
Intro
This is the second post of the tutorial. The first one describes our goal and example test cases, before continuing any further please have a look at the previous post.
Note. I submitted all templates from the tutorial to Community Gallery but they are still waiting for approval, until then you can download templates from GitHub and import them directly in your GTM container. Here’s the links to the repositories: Firestore Web Tag, Firestore Server Client, Firestore Server Tag. Also if you want to follow this guide please download Web Container Workspace and Server-Side Container Workspace with all setup described in this tutorial.
The plan
Our setup consists of two parts. The first is a GTM Web Container with Firestore Web Tag Template and tag based on this template. The Firestore Web Tag template allows you to create a list of the rules on how to change the user property. For example, you can create a tag which will be fired on the purchase trigger and have these rules: increase transactions by one, increase revenue on purchase amount, set last purchase date to current time. The template converts rules to GET requests to a Server-Side container, actually it uses sendPixel API and waits for the server response. Server updates the user state in Firestore and returns user properties in cookies. As soon as the Web Tag gets the server response it makes dataLayer push, at this moment you can access updated user properties using GTM 1st party cookie variables. Please read the previous post for more details about Web Container setup.
The second part of our setup is a GTM Server Side Container with two templates: Firestore Server Client and Firestore Server Tag. The Firestore Server Client template receives requests from Web Containers, validates it and generates an event. Firestore Server Tag gets rules from this event, uses Firestore.runTransaction GTM API to read and update user state. After that it sets cookies and makes a new event on the server side with updated user state. This way you can fire conversions on both server side and web side.
In this post I will describe how to set up Server Side GTM, but before that I’ll tell you a few words about Firestore to understand the basics, please read the official documentation for more details.
What is Firestore?
Cloud Firestore is a cloud-hosted, NoSQL database. It stores everything in documents, and the documents are organized into collections.
Each document has a unique key, you can get and update the document by its key. In this tutorial the key will be a user key (user_token or in some scenarios user_id). Please note that the key has a few constraints:
- Must be valid UTF-8 characters
- Must be no longer than 1,500 bytes
- Cannot contain a forward slash (/)
- Cannot solely consist of a single period (.) or double periods (..)
Any document contains a set of key-value pairs. In our case we will store integers, floating-point numbers or text values but Firestore supports nested objects, arrays and other data types.
One more cool thing is Firestore is schemaless, documents inside one collection can have different fields. For us it means if we want to add some properties only for subsets of users it causes no problem, each user will have a separate document and we can store any fields we need to.
How much does Firestore cost?
It depends, there’s no simple answer. You will pay as you go, based on the amount of reads and writes, amount of stored data and amount of network bandwidth that you use. But it can be free, Firestore offers a free quota: 1GB of data and 20,000 writes per day. If you just want to test Firestore you could start from storing only the user purchases number. If you have less than 20,000 purchases per day it should be free, if you have more you are lucky and probably have a budget to pay a few dollars for the test.
Also please review Google pricing examples they estimate that an app with 50,000 installs (5,000 Daily Active Users, each user makes 20 writes and 80 reads) will cost about $12.14/month.
Anyway it is a good idea to set up Billing Alerts to avoid billing surprises.
Firestore setup
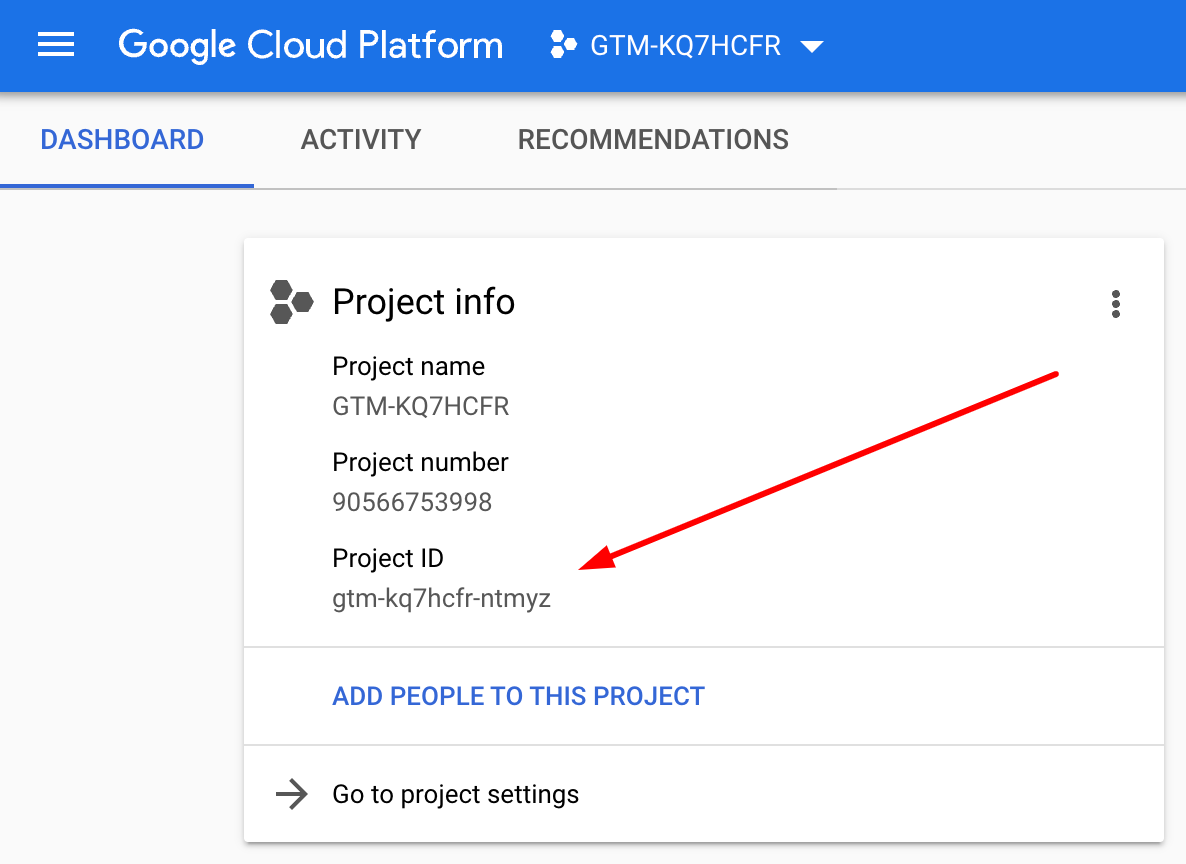
Go to the GCP dashboard for your Server-Side GTM. Please copy somewhere your Project ID as we will need it later.
Next step we have to enable Firestore API
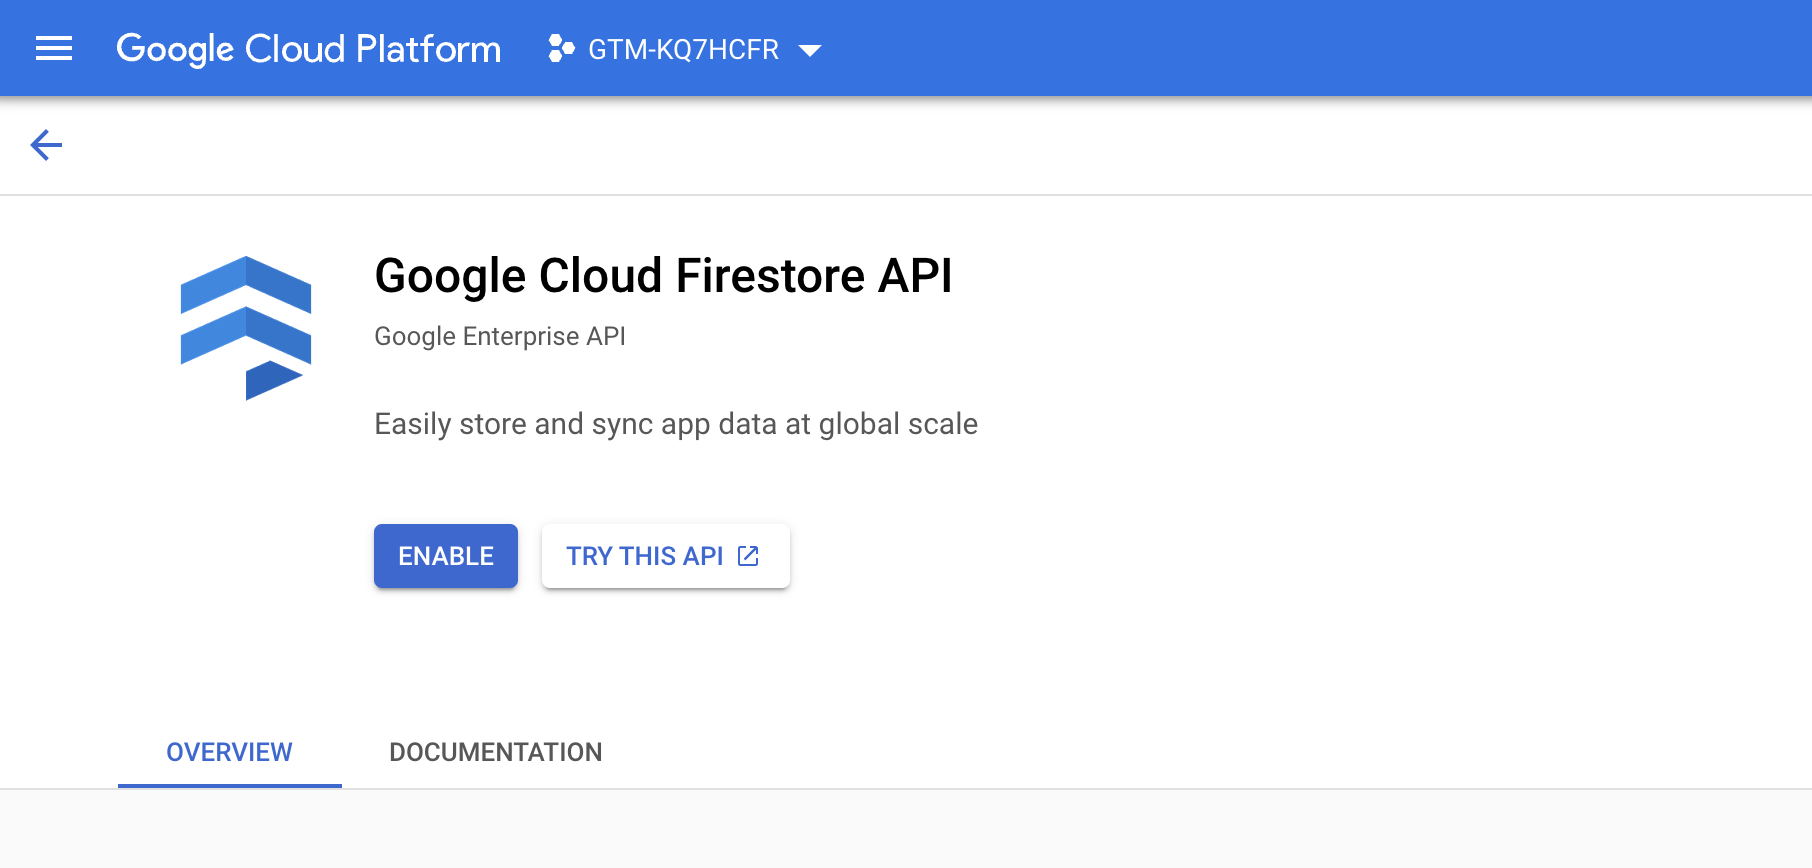
On this page please click the Enable button and wait for a few seconds while it is enabled.
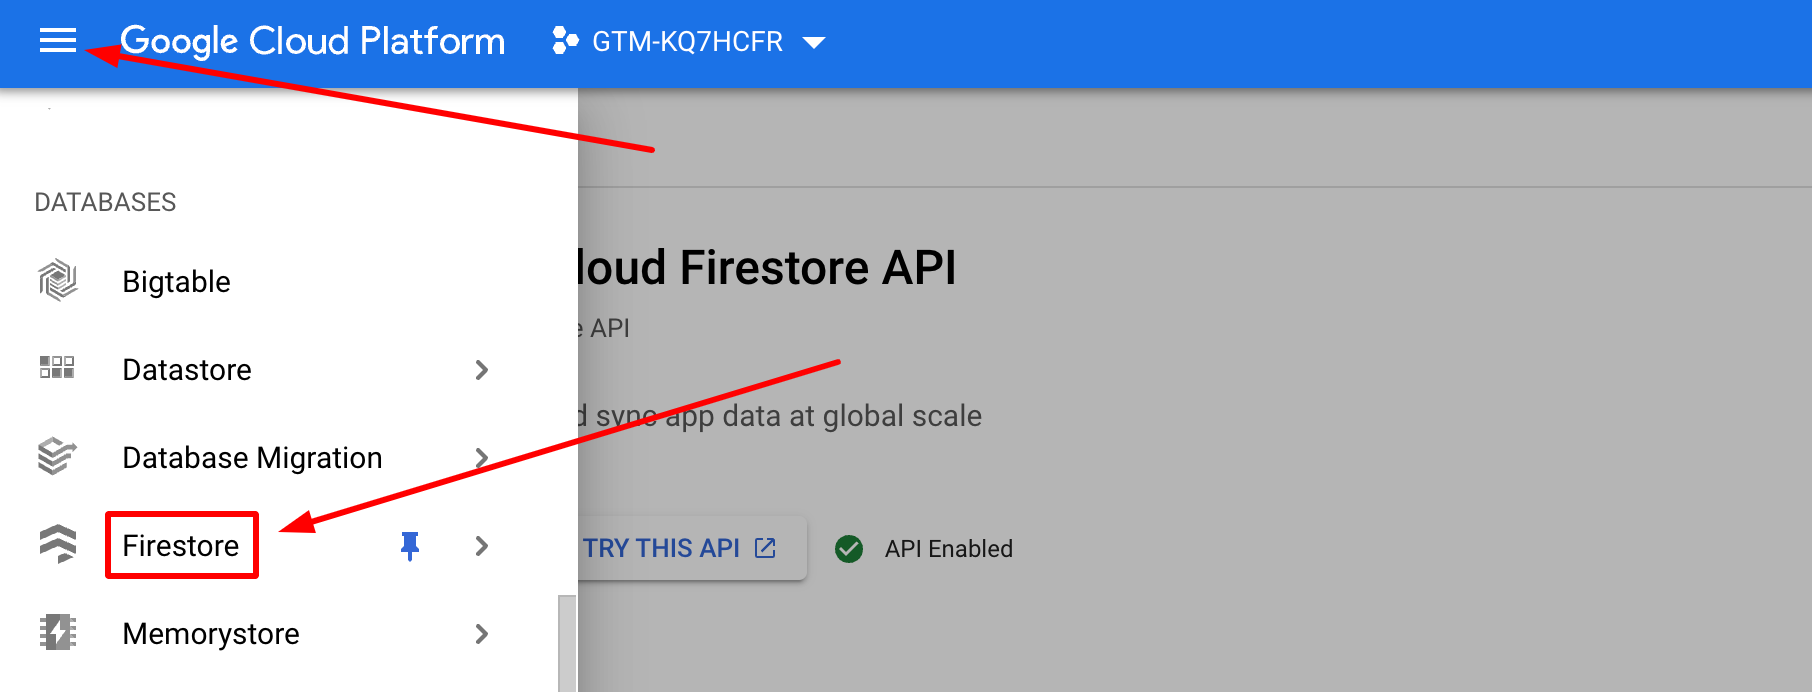
Then go to the Firestore page, click on the top left menu and scroll to the Databases section.
On the Firestore page you can see this warning. If there’s no such a warning please skip this step.
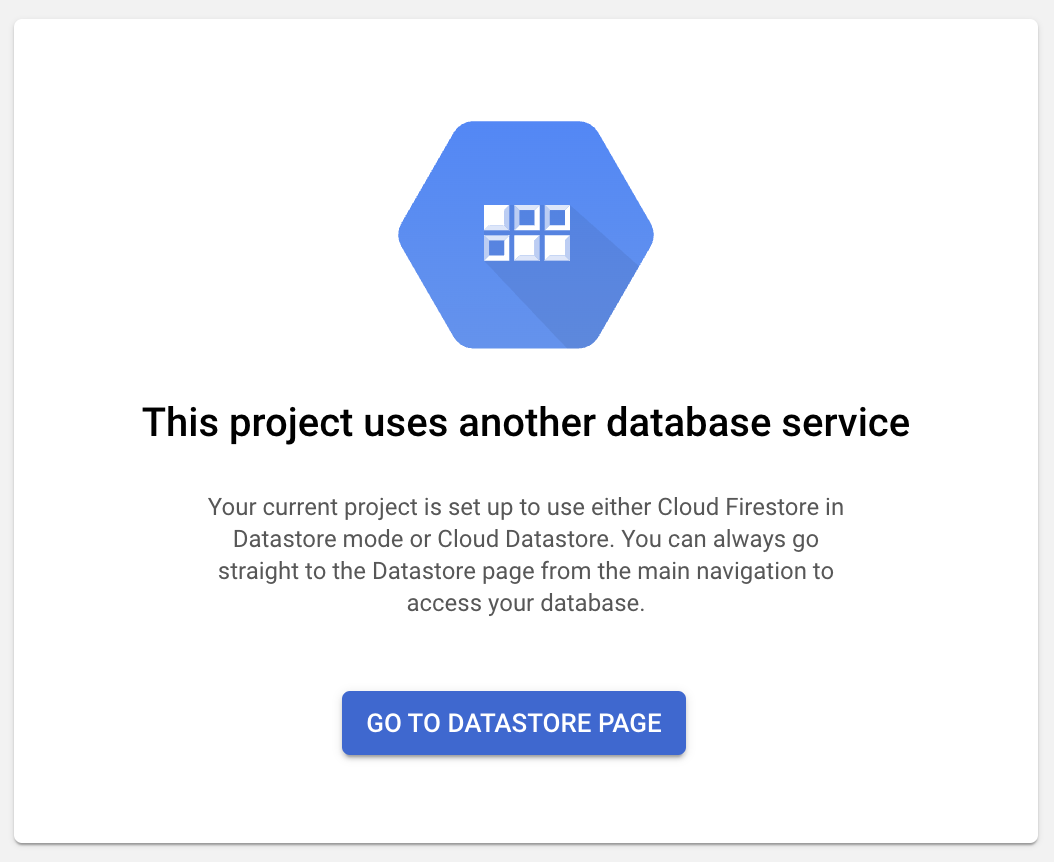
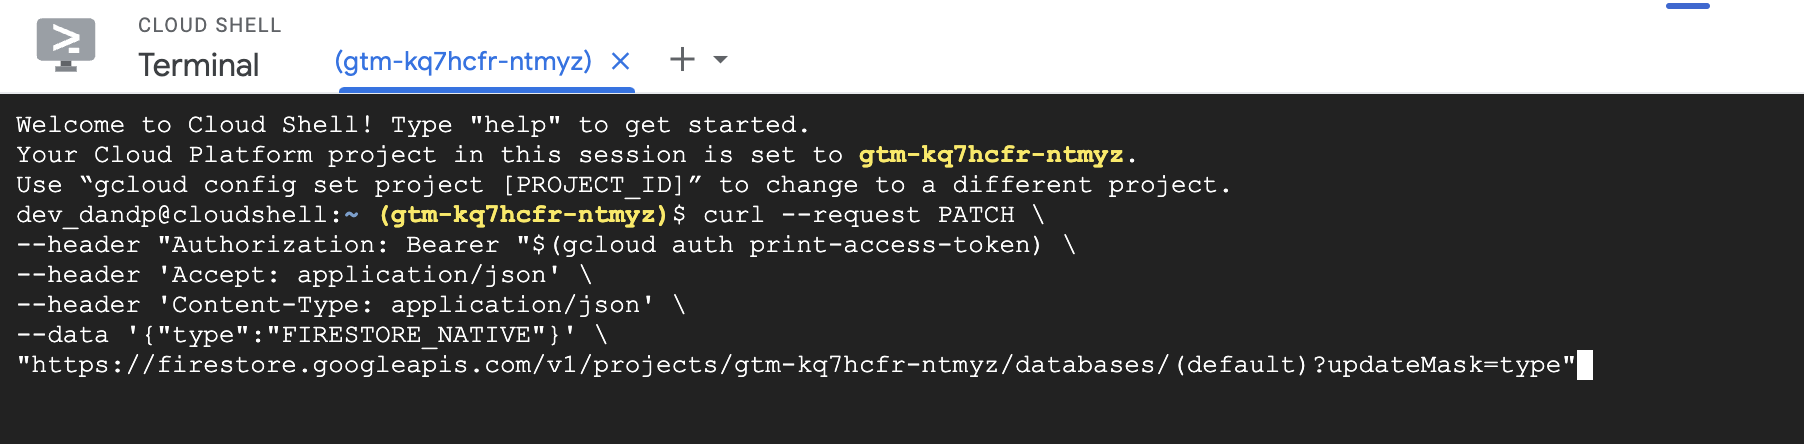
GTM Firestore API works only with Firestore in Native mode. Here’s a Google post about how to switch to Natime mode, you have to open the cloud shell
Allow the access and run this command:
curl --request PATCH \
--header "Authorization: Bearer "$(gcloud auth print-access-token) \
--header 'Accept: application/json' \
--header 'Content-Type: application/json' \
--data '{"type":"FIRESTORE_NATIVE"}' \
"https://firestore.googleapis.com/v1/projects/PROJECT_ID/databases/(default)?updateMask=type"
But please change PROJECT_ID to your id from the first step.
After that black magic step on the Firestore page, you should see an empty list of documents and collections
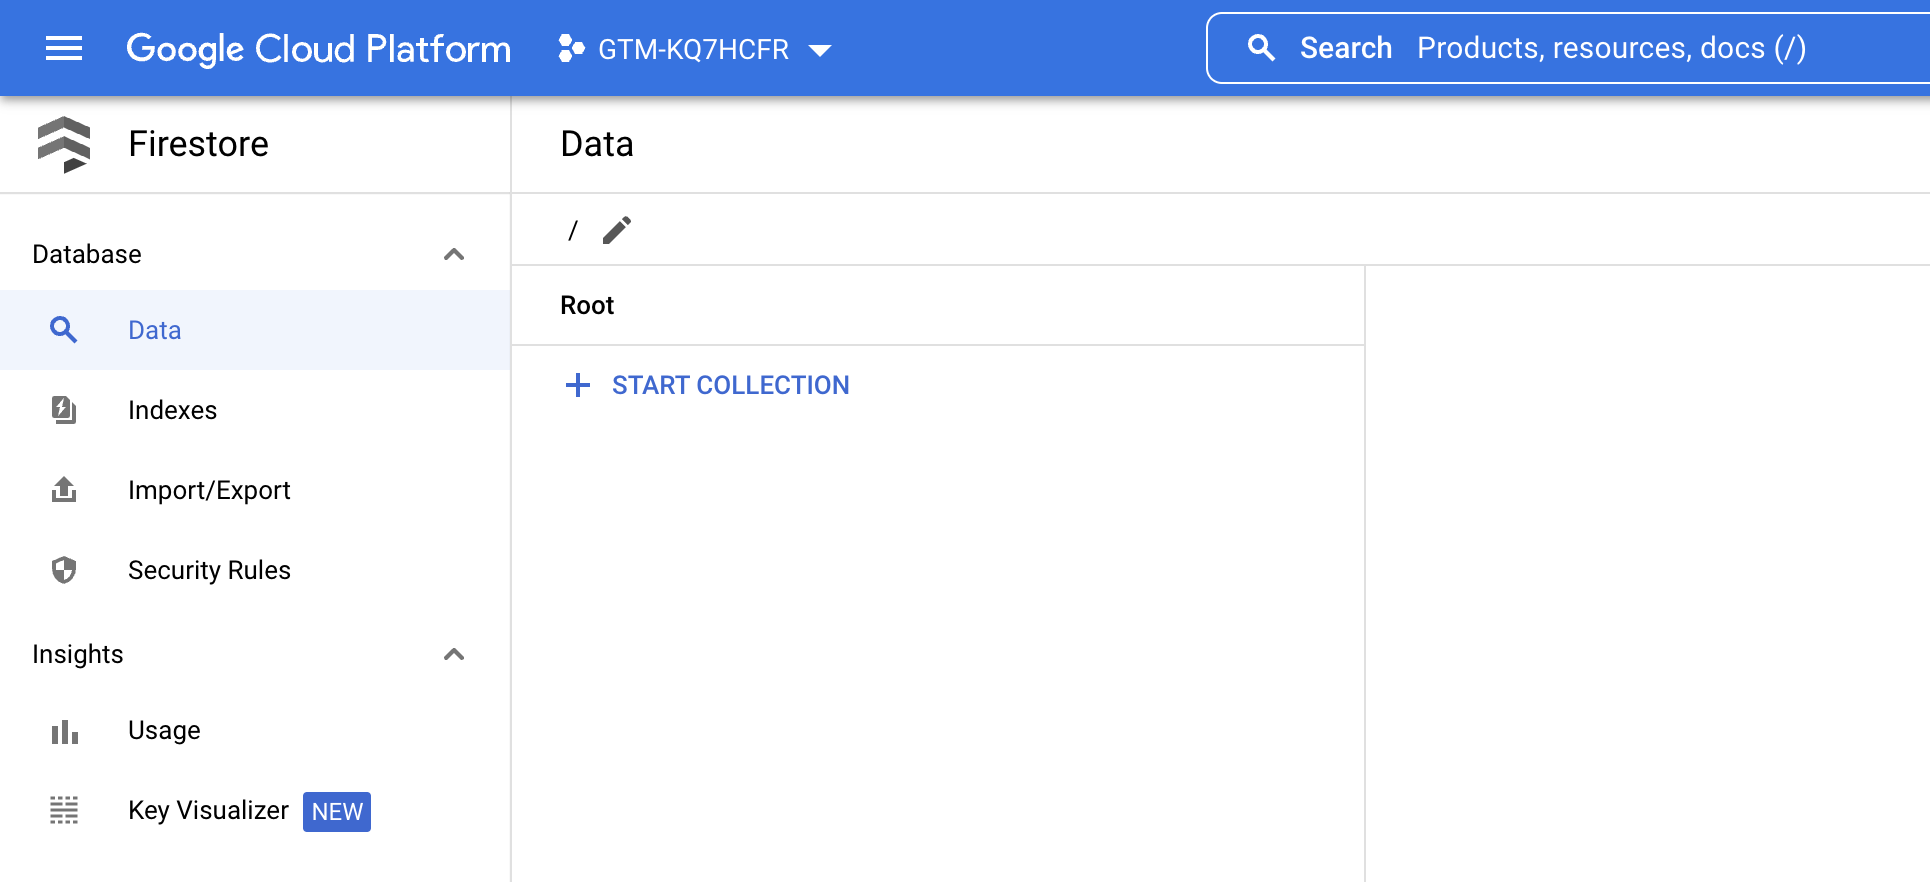
Ok, don’t close this page, we will go back to it later to check user data.
Server-Side GTM Setup
I assume that you’ve already deployed
Server-Side GTMand setup domain configuration. But if you don’t know what SS-GTM is and just arrived at our wonderful planet please read Simo’s post: SERVER-SIDE TAGGING IN GOOGLE TAG MANAGER.
Now we will return to the GTM interface and set up a Server Side Container. Remember that it will be much faster if you download and import Server-Side Container Workspace with all tags from this tutorial.
Server-Side Client Template
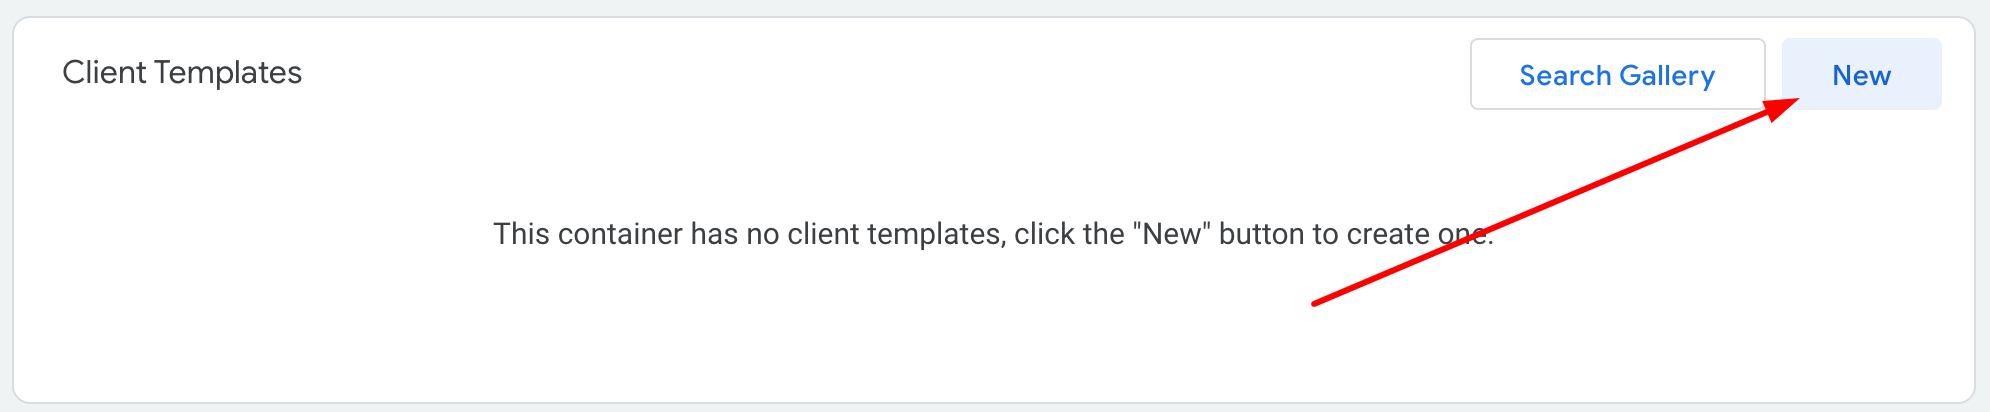
Unfortunately the Community Gallery hasn’t supported Clients yet. So you have to download the Firestore Server Client template.tpl file from the GitHub repo. Go to the Templates page and in Clients Template section click the New button.
Open the top right menu and click on Import:
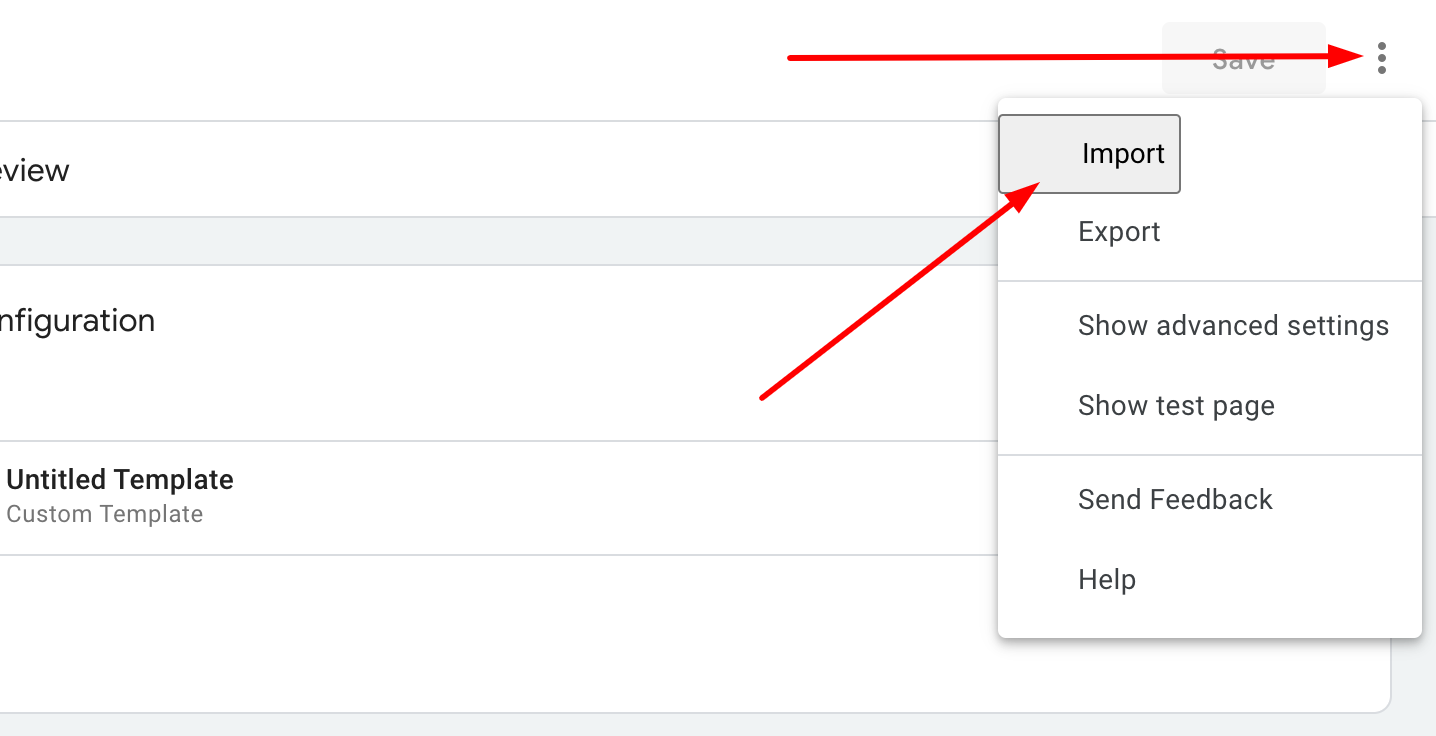
Select template.tpl file, and click save. Now you could close the Template Editor window and go to the Clients page. Click on the New button and select Firestore Server-Side client

Client setup is very simple, just name your client, for example Firestore. You can leave the other fields on default. But if you want you can restrict requests by list of allowed referrers - add all needed domains in the corresponding field.
You can also change the name of the event generated by the Client in case you already use an event with the name firestore.
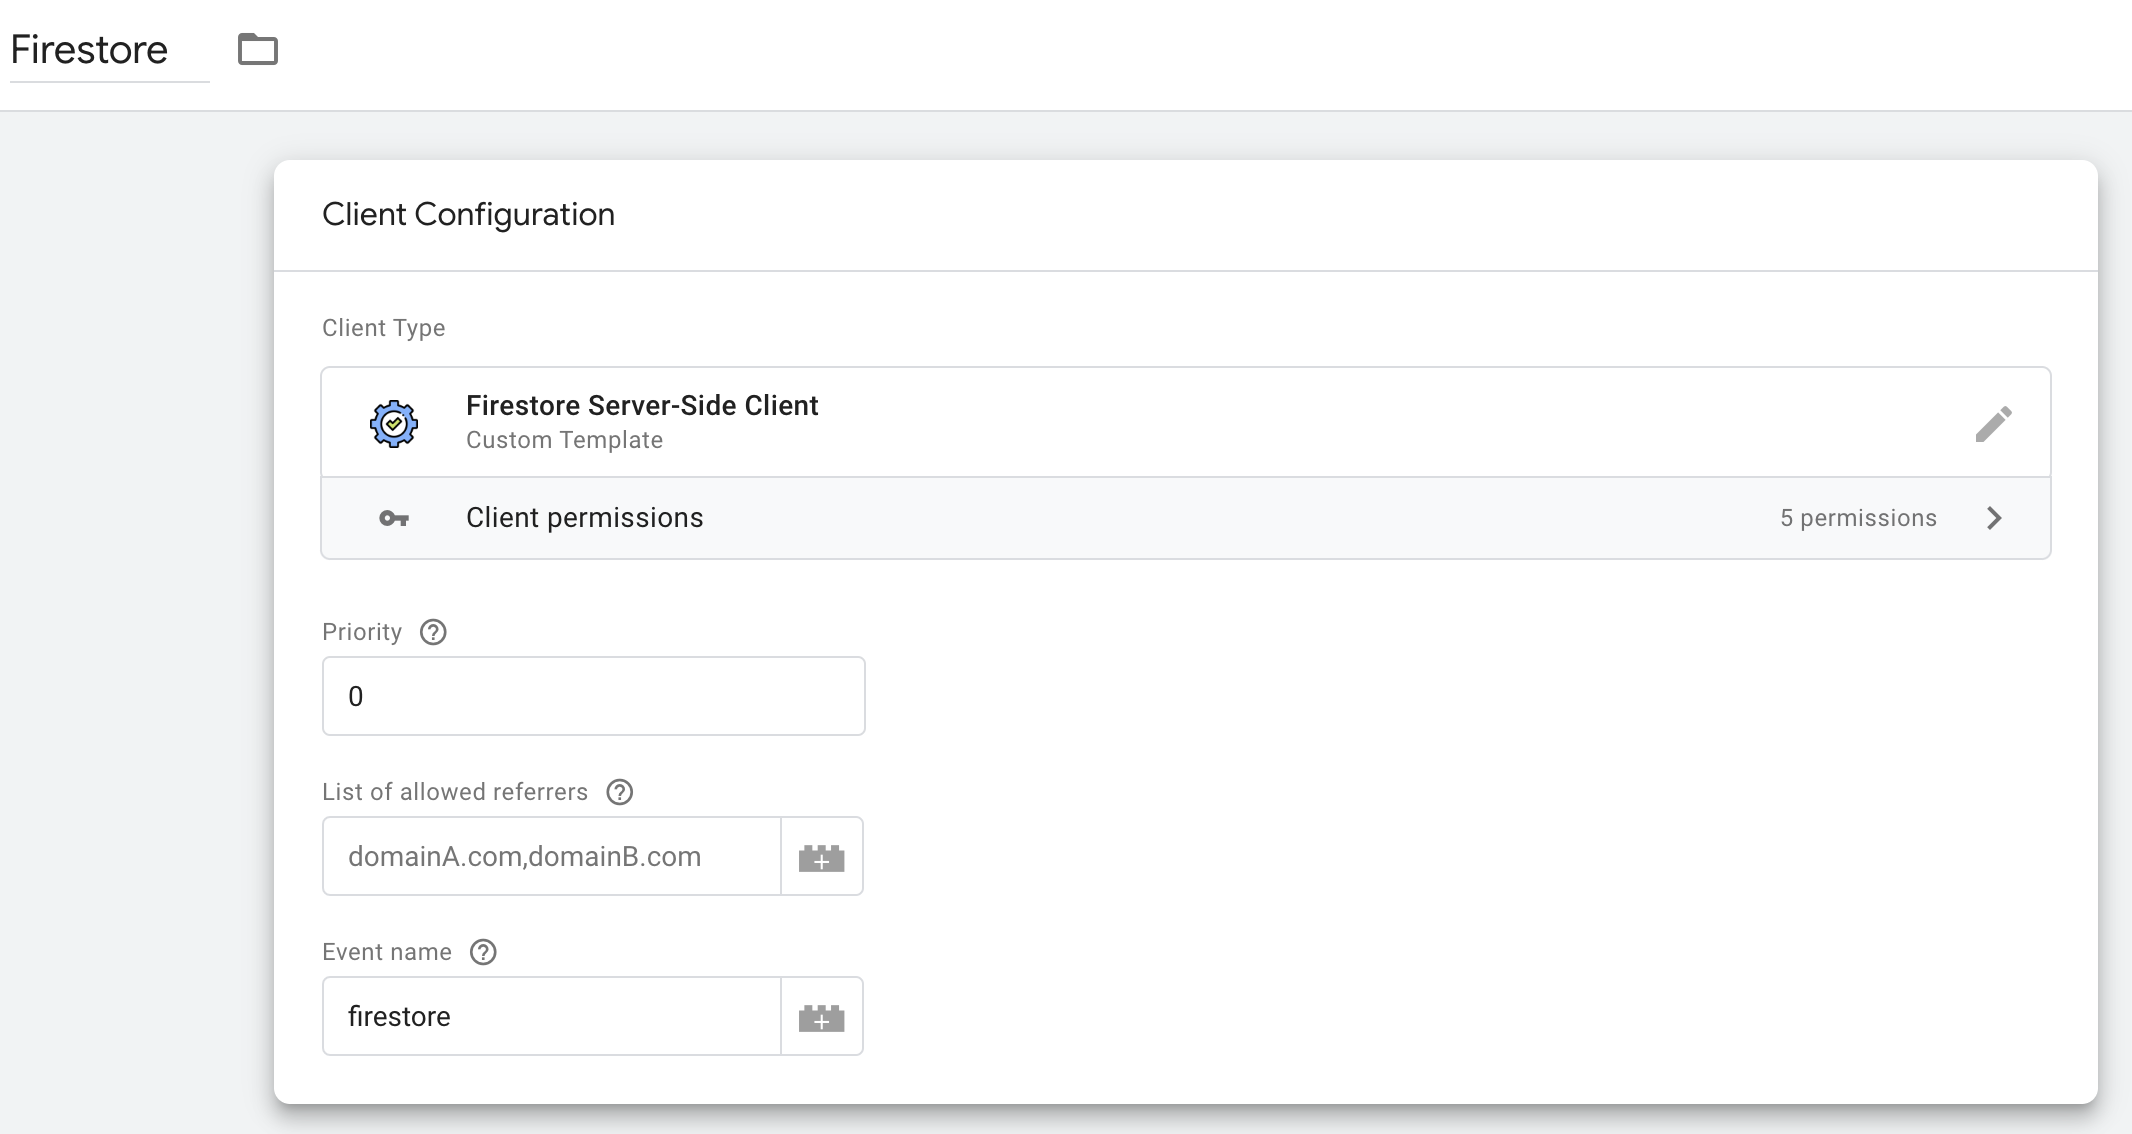
That’s all for the Client
Server-Side Tag Template
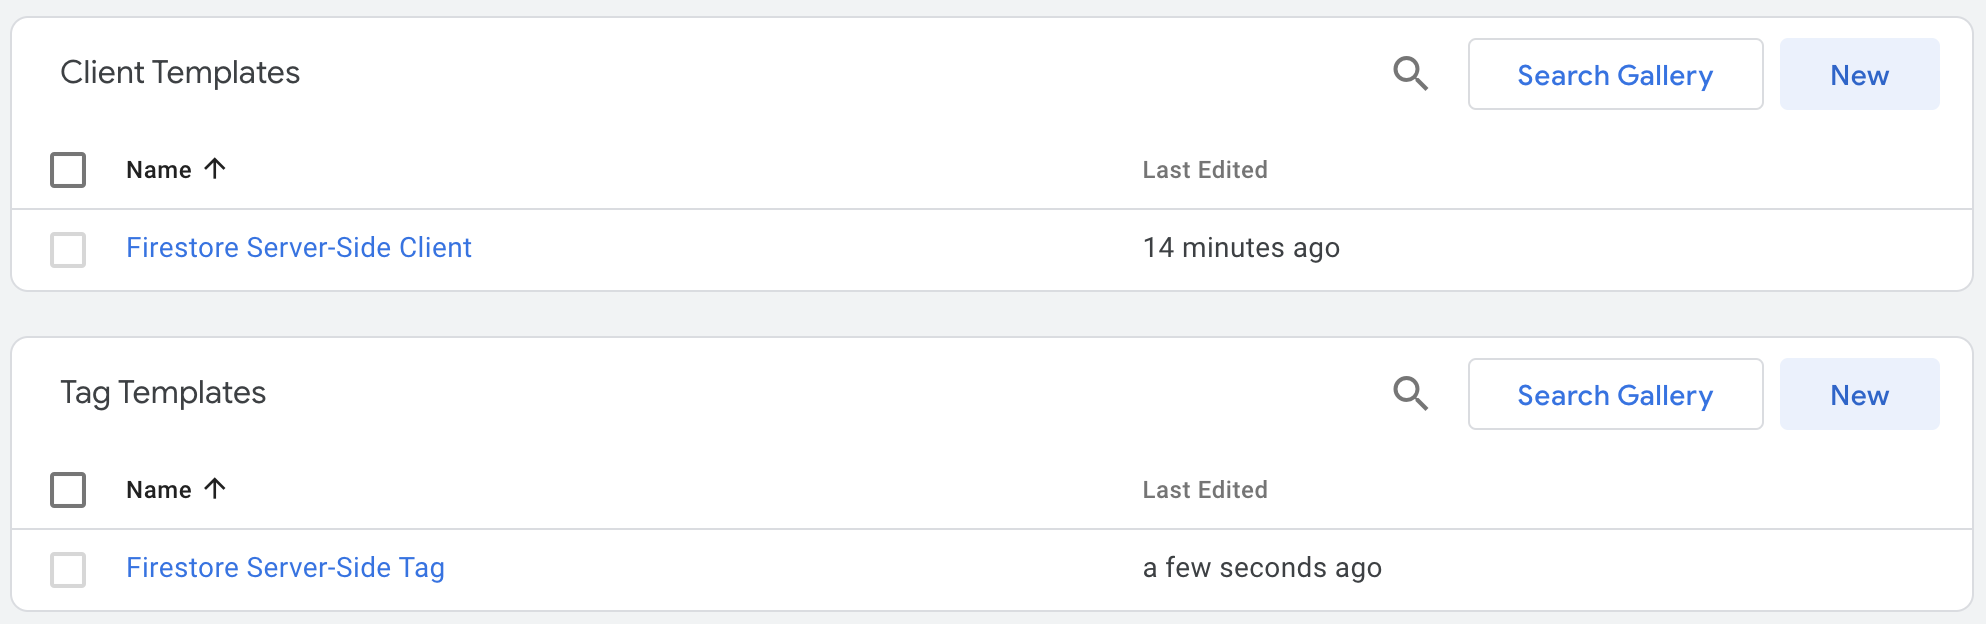
At first, we will add the Firestore Server-Side Tag Template either from the Community Gallery (not accepted yet) or from the repository. Follow the same steps you did for Client but this time inside the Tag Templates sections. As a result you will have two templates:
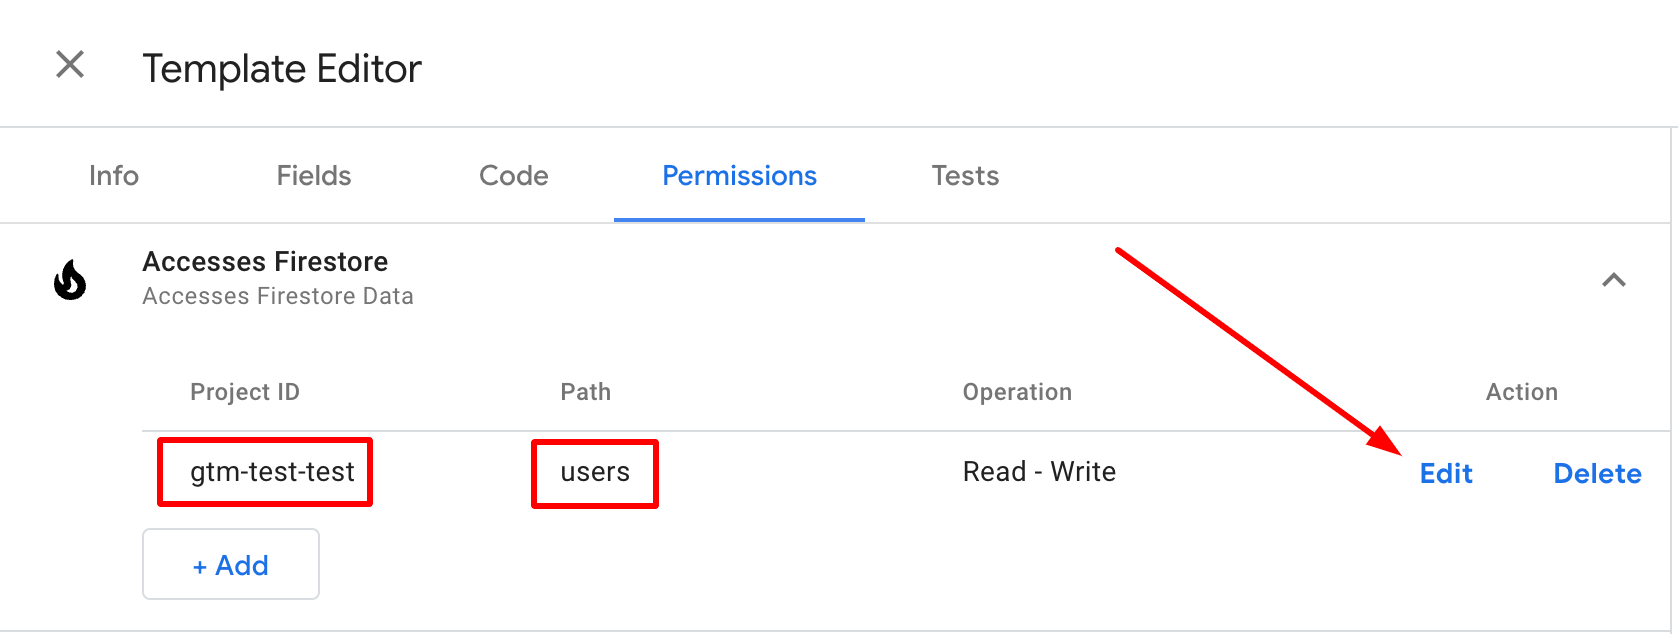
But you have to open the Template and go to the Permissions tab, open Accesses Firestore section and set your GCP Project ID, and change path, if you decide to change the default one.
Ok now let’s create a trigger for incoming Firestore events
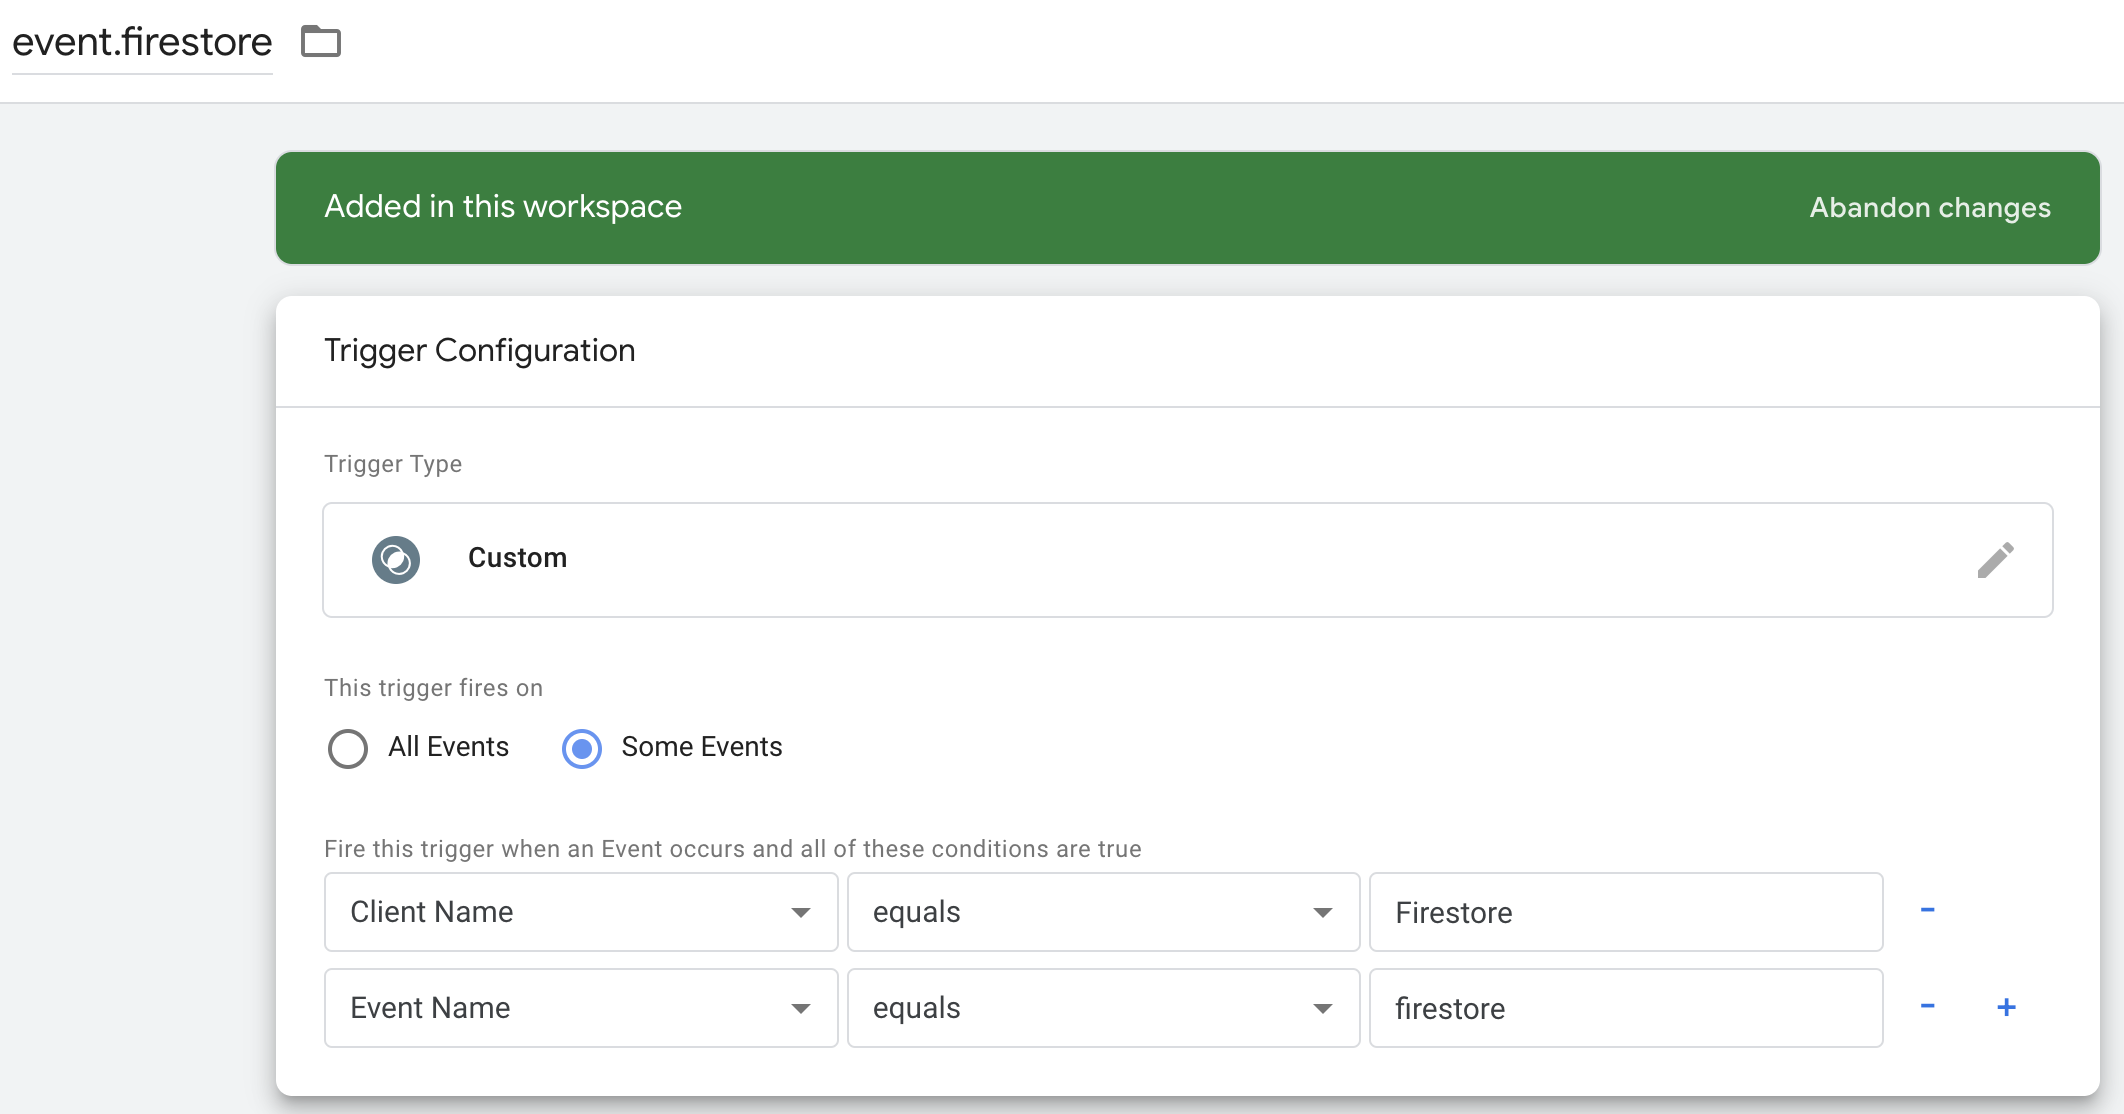
Please take note that for Event name we use equals condition, not contains, this is important as the tag can generate a new event firestore_updated with an updated state. If you set contains you will meet the beauty of an infinite loop, but Google engineers predicted such human behavior and the infinite loop will consist of five iterations only.
And now the tag itself:
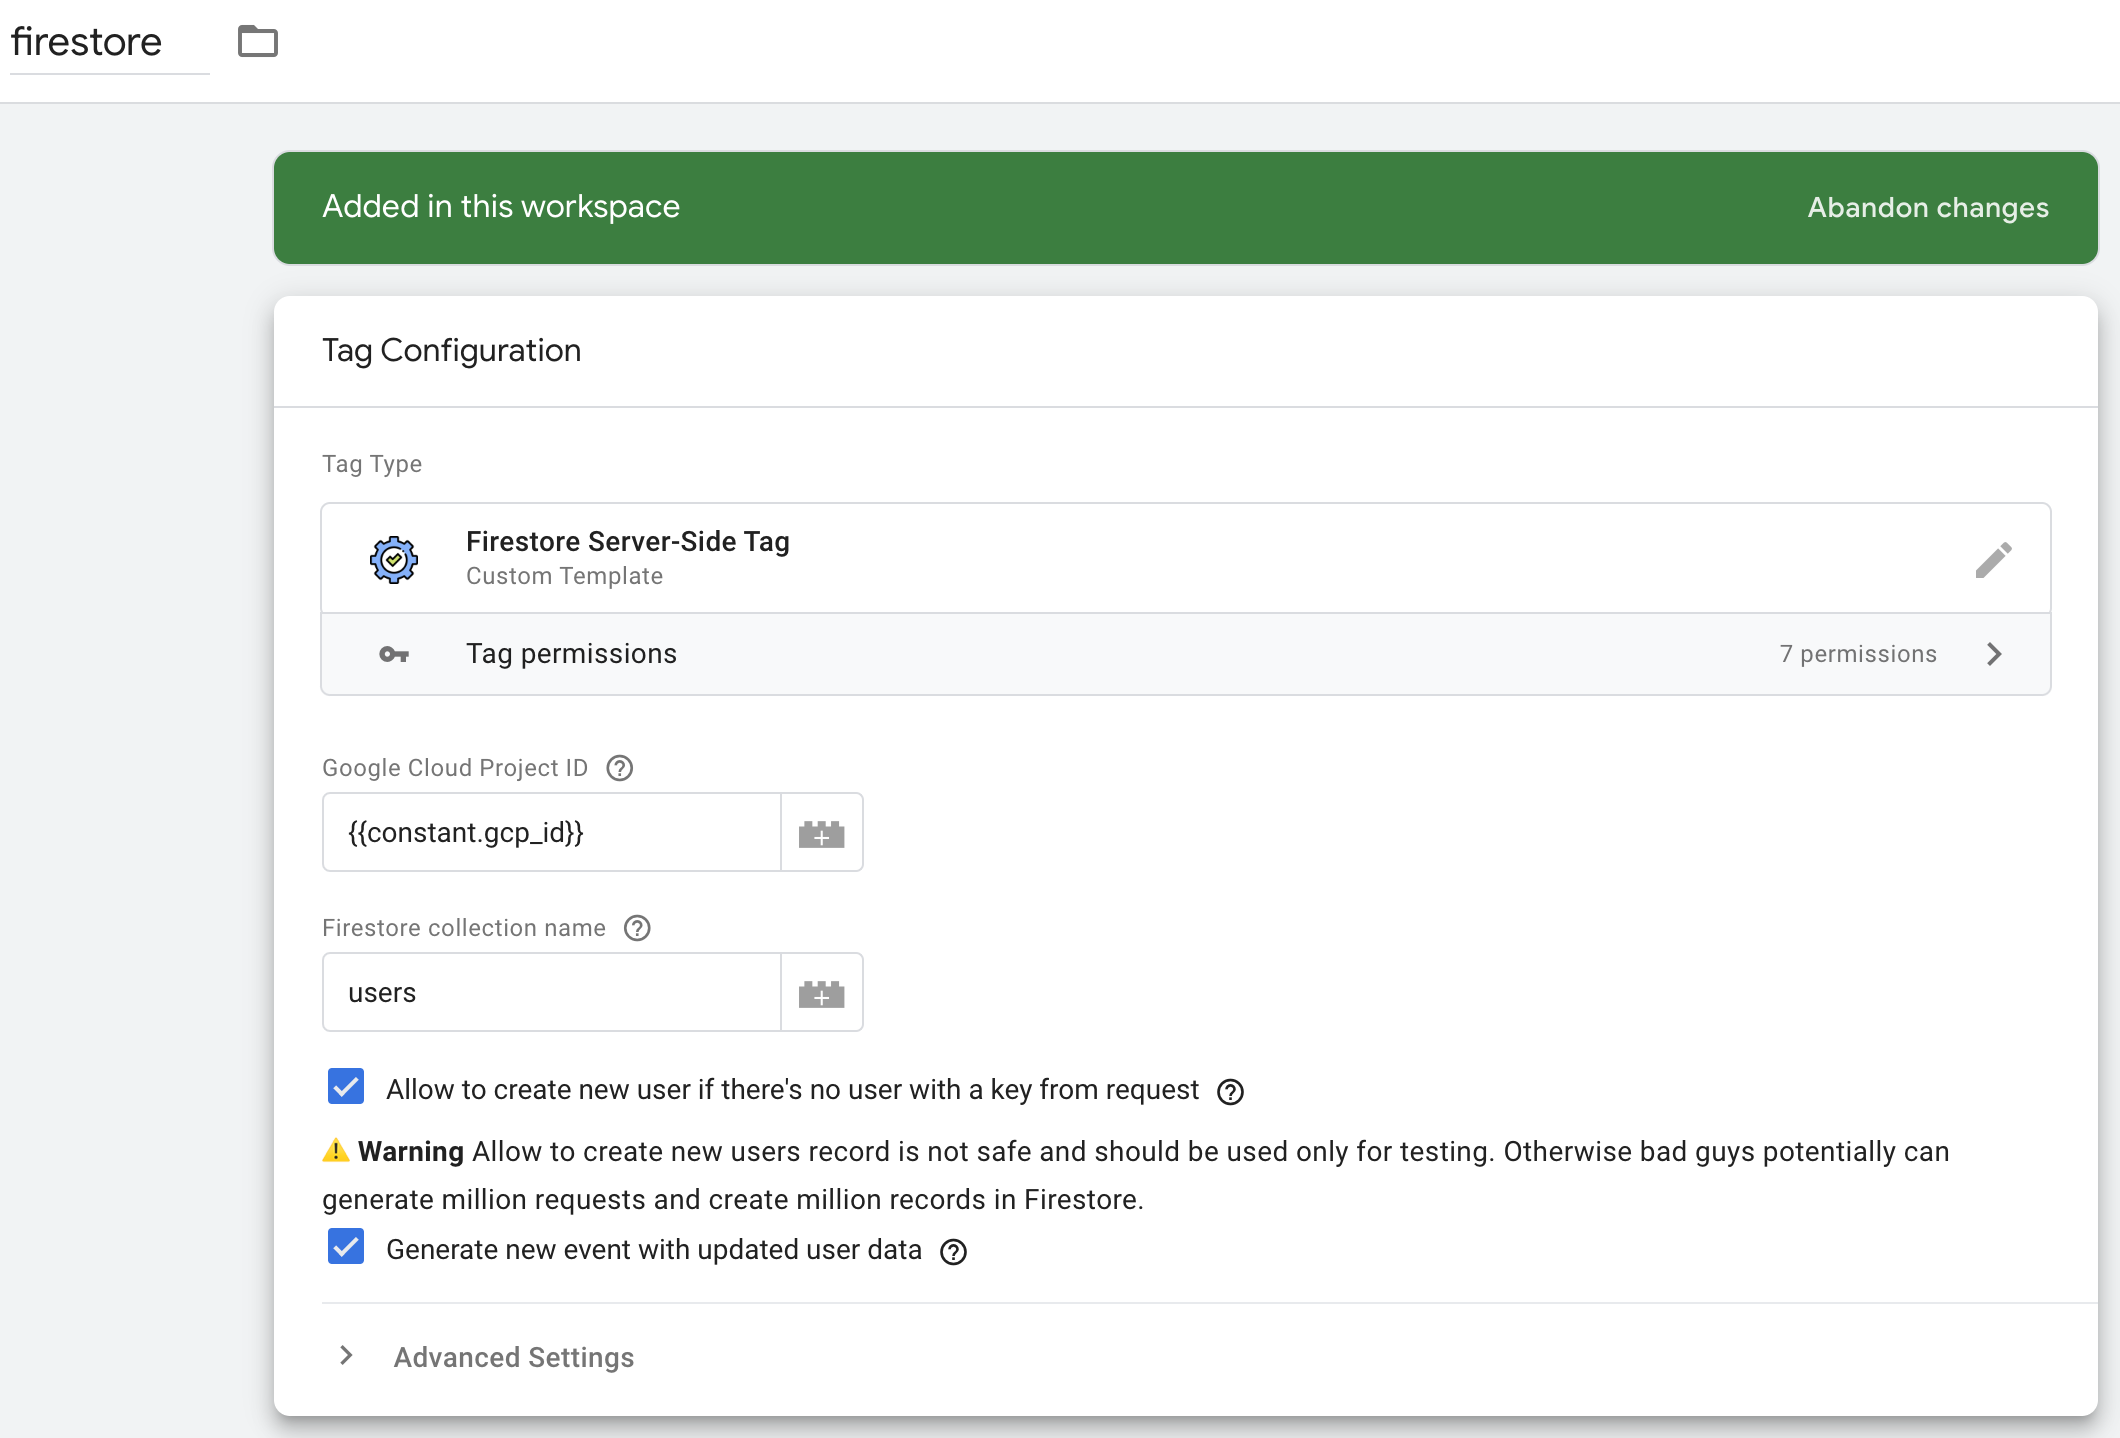
What do we have here: GCP project id - in this field we should set the id of your project (not mine). We saved this ID at the first step when setting up Firestore. Next collection name field, do you remember that all Firestore documents will be saved in collections? In this field we will set the name of the collection for our user’s documents. By default it will be users.
The next check box is «Allow to create new users if there’s no user with a key from the request». I think it’s time to discuss in more detail what the user key should be.
User Key
In the simplest case a user key can be a user_id. Especially if user_id are not incremental numbers like 101, 102, 103, etc but randomly generated numbers. Otherwise it’s a potential security risk as the bad guys could generate requests for thousands of your users ids and mess up all their data in Firestore. Maybe it is not so dangerous as you never would store any PII data in Firestore, but still it could be a problem for marketing and additional bills for Firestore writes operation.
The better way is to use user token as a user key. Your IT team can implement the next steps:
- On the back end, on user registration generate
user token, save it in their DataBase as one of the user’s property and also create a document in Firestore with a key equals touser token; - On the front end, on
loginevent make a dataLayer push with auser_token; - Optionally, on the back end generate
user_tokensfor all users and pre-populate in Firestore user documents with all parameters marketing needs.
A few comments
Step 1. This shouldn’t take too long, Firestore has an SDK for many programming languages and well written documentation As an example you may use this Python code:
| |
Step 2. The dataLayer push can be like this:
| |
Step3. This script can be helpful not only for the first data upload but in the feature if you need to upload some back end generated metrics or predictions.
As a conclusion, if you aren’t afraid of bad guys and have good karma, use user_id as a user key. If you don’t want to rely on karma, ask IT to generate user tokens. In our tutorial we use constant 1234 just to check in the debug mode that everything works correctly.
Back to Firestore Server-Side Tag, the «Allow to create new users if there’s no user with a key from the request» checkbox does what it says. By default if the tag does not find a user with the key it returns an error response and sets non cookies, but if you don’t have an IT team which can generate new Firestore documents for each new user, you can tick this checkbox, then the template will create a new Firestore document for a new user key, set the state and return cookies back to the front end. As I told you it’s not safe, but ok for testing.
The last tag’s checkbox – «Generate new event», you can uncheck it if you fire pixels only on a Web Container.
Please don’t forget to add the trigger we created earlier.
That’s all for setup. Finally, let’s do some tests.
Test Cases
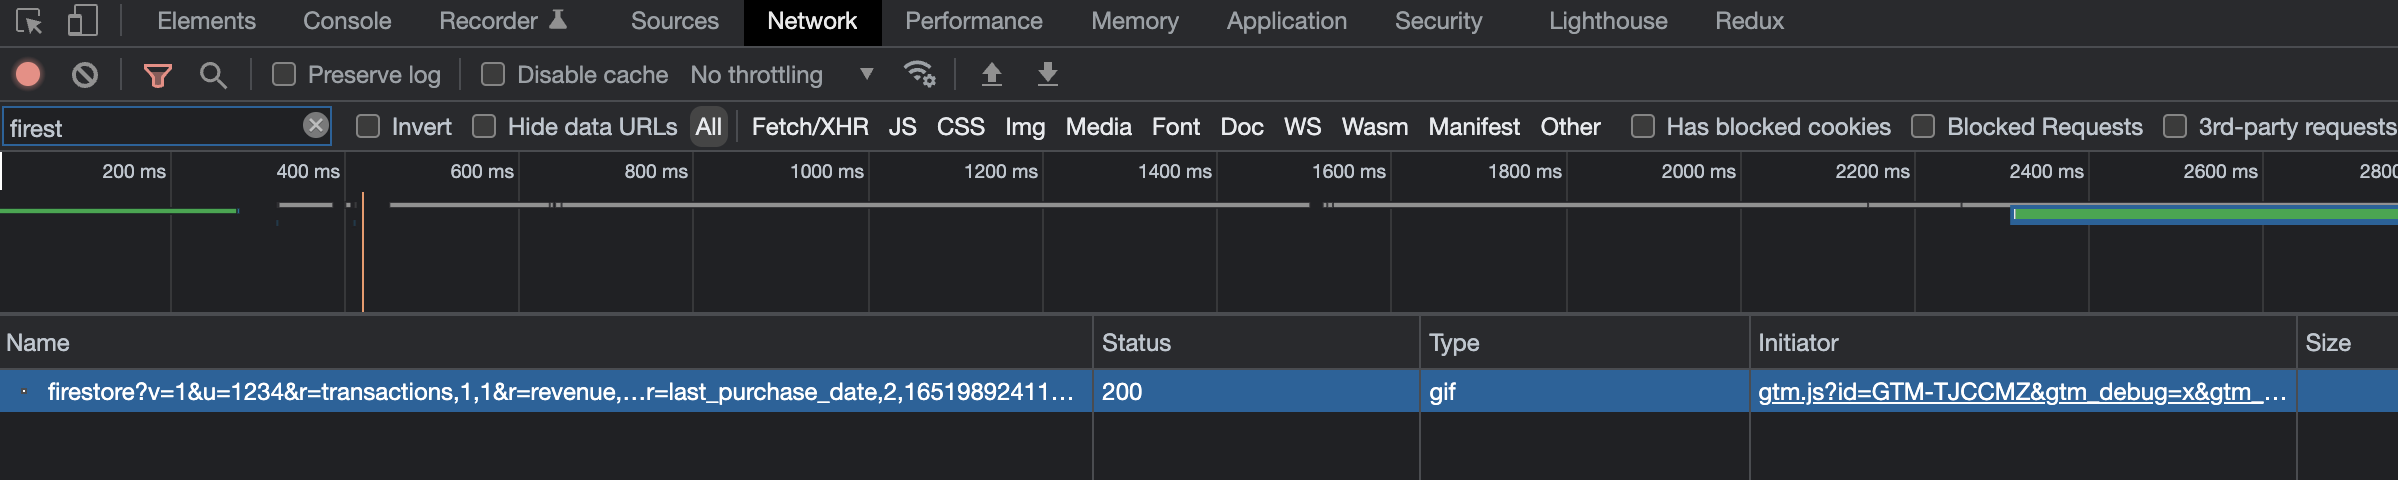
At first click the Preview button in the Server-Side container, after that click Preview on the Web container. If you remember our setup, Firestore Web Tag fires on page view.
Check Network tap and you should see the GET request:
Check the firestore.purchase tag in the Debugger on the front end:
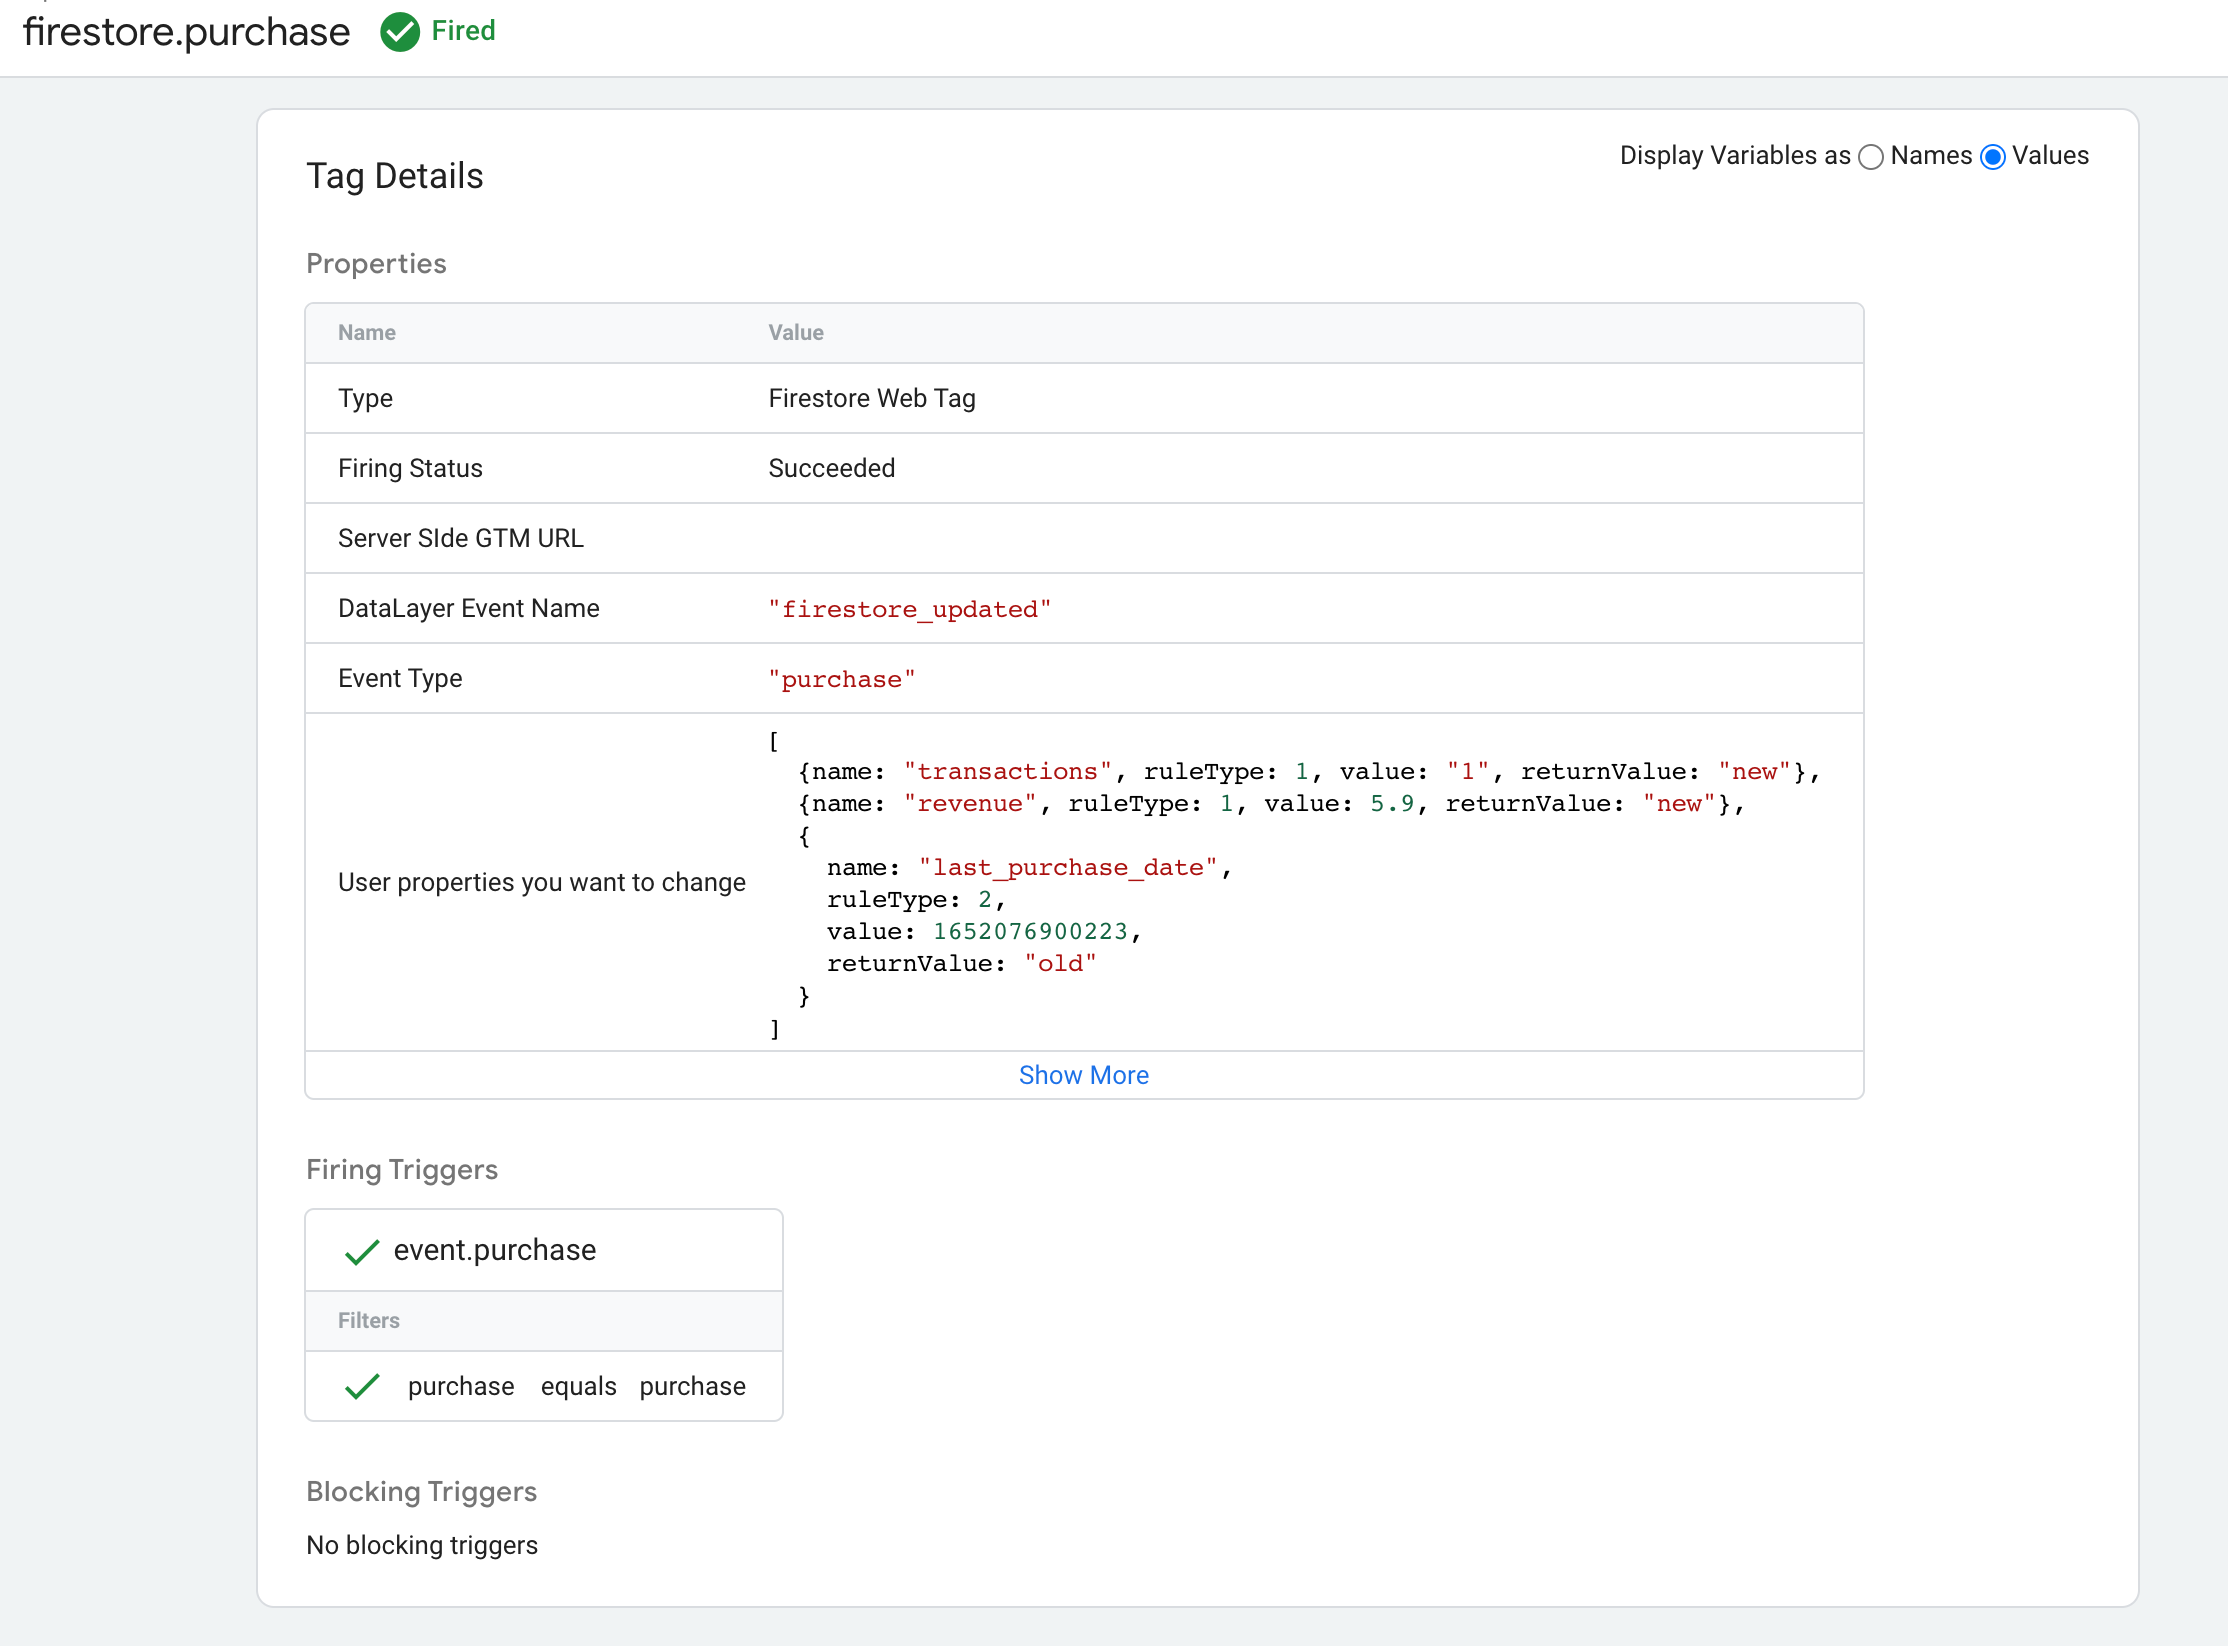
And on firestore_update event check the cookies variables

Everything looks good, now switch to Server-Side container and check the Debugger:
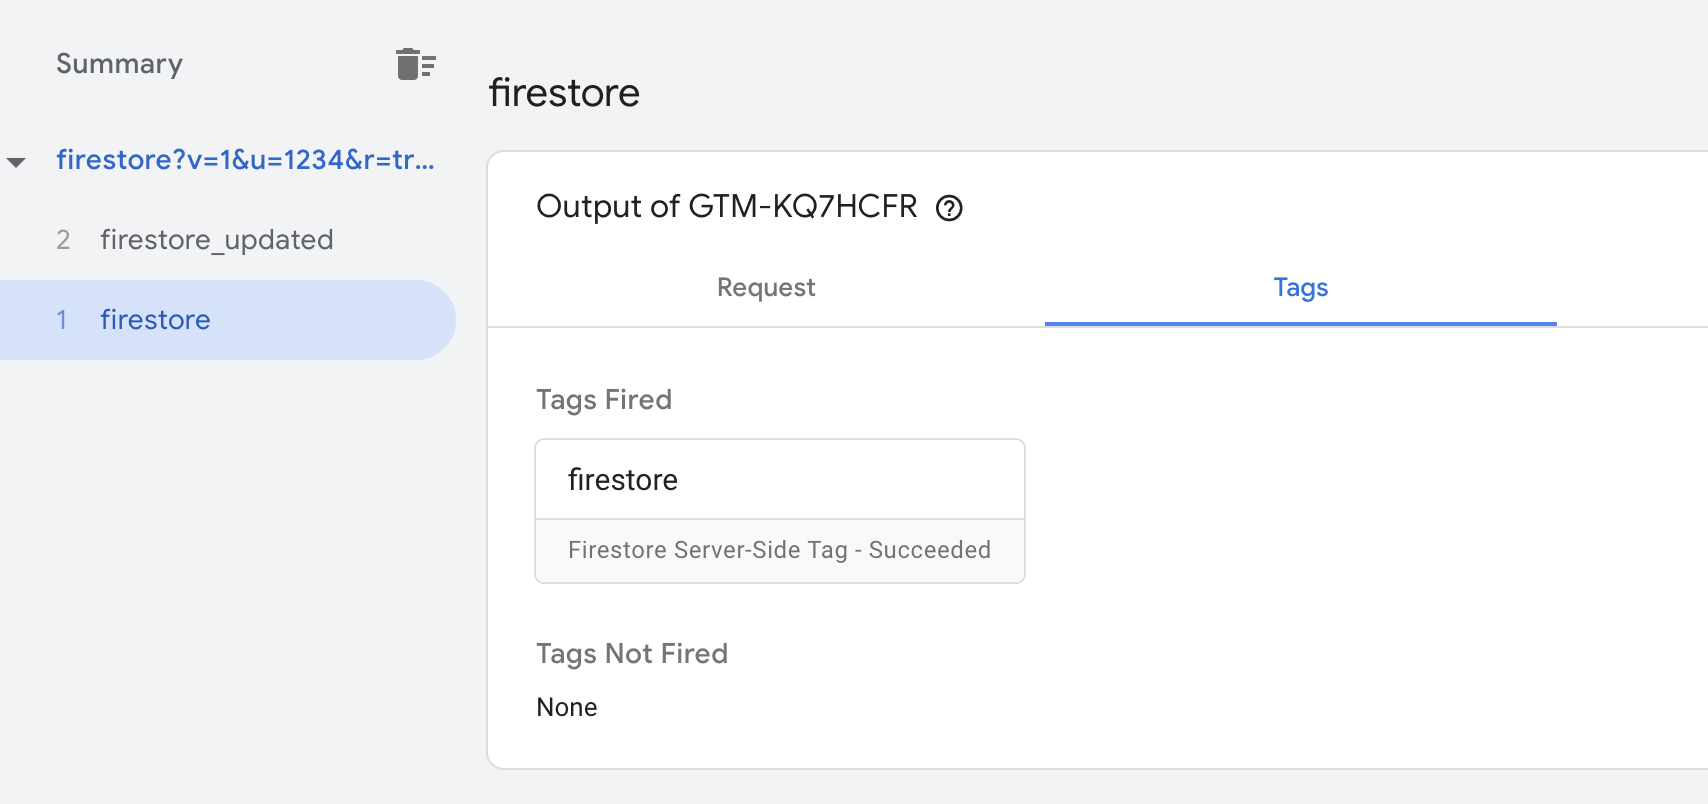
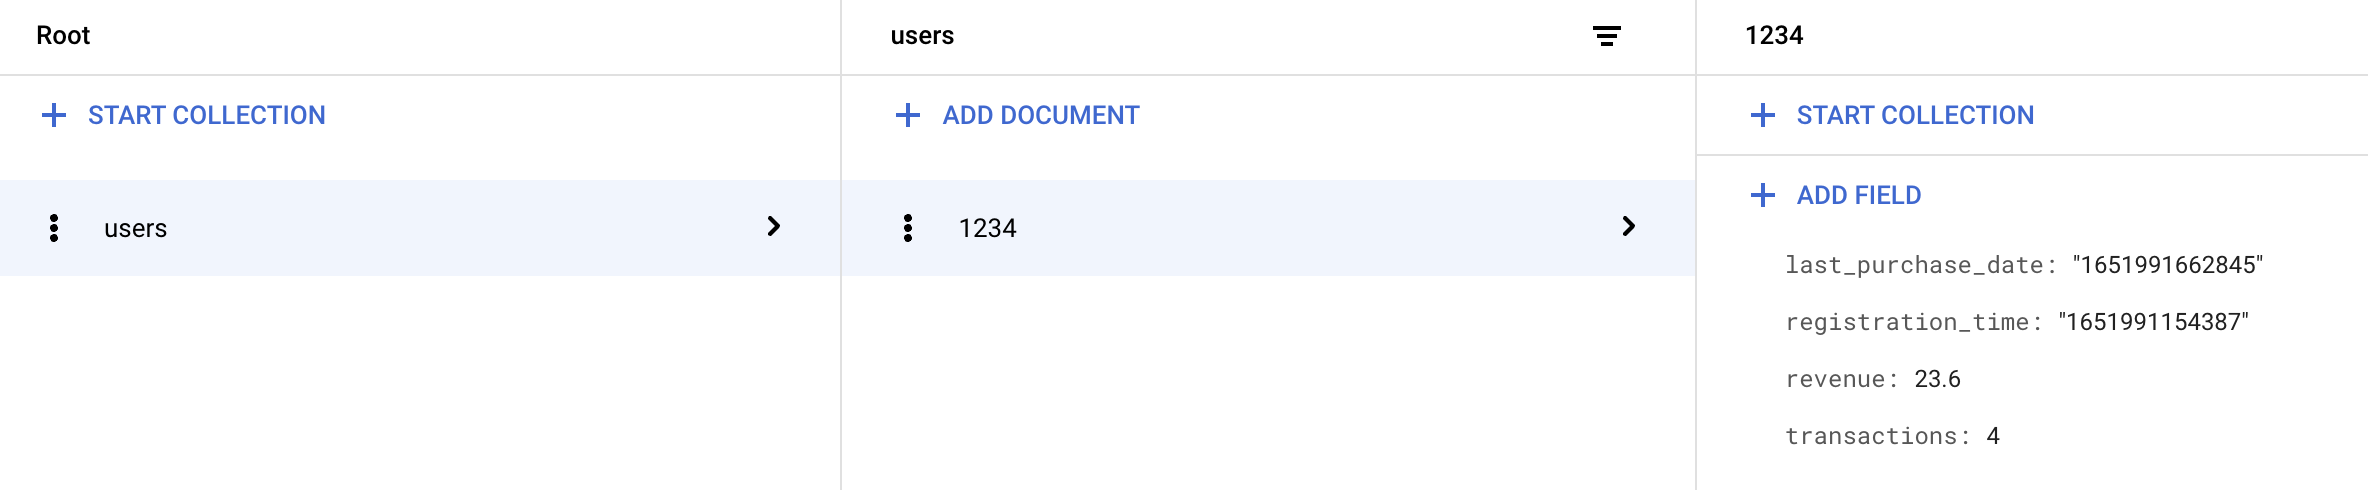
The firestore tags fired successfully. And in the Firestore we have, a user collection and a document for a user with a key 1234

That’s great, in Web container we had triggers for two cases:
- a user makes 3 purchases or spends more than 100 dollars
- a user makes a purchase but the previous purchase was made more than a month ago
For the second case we change 30 days to 30 seconds, please wait 30 seconds and reload the test page on the front end. Then check the front end Debugger:
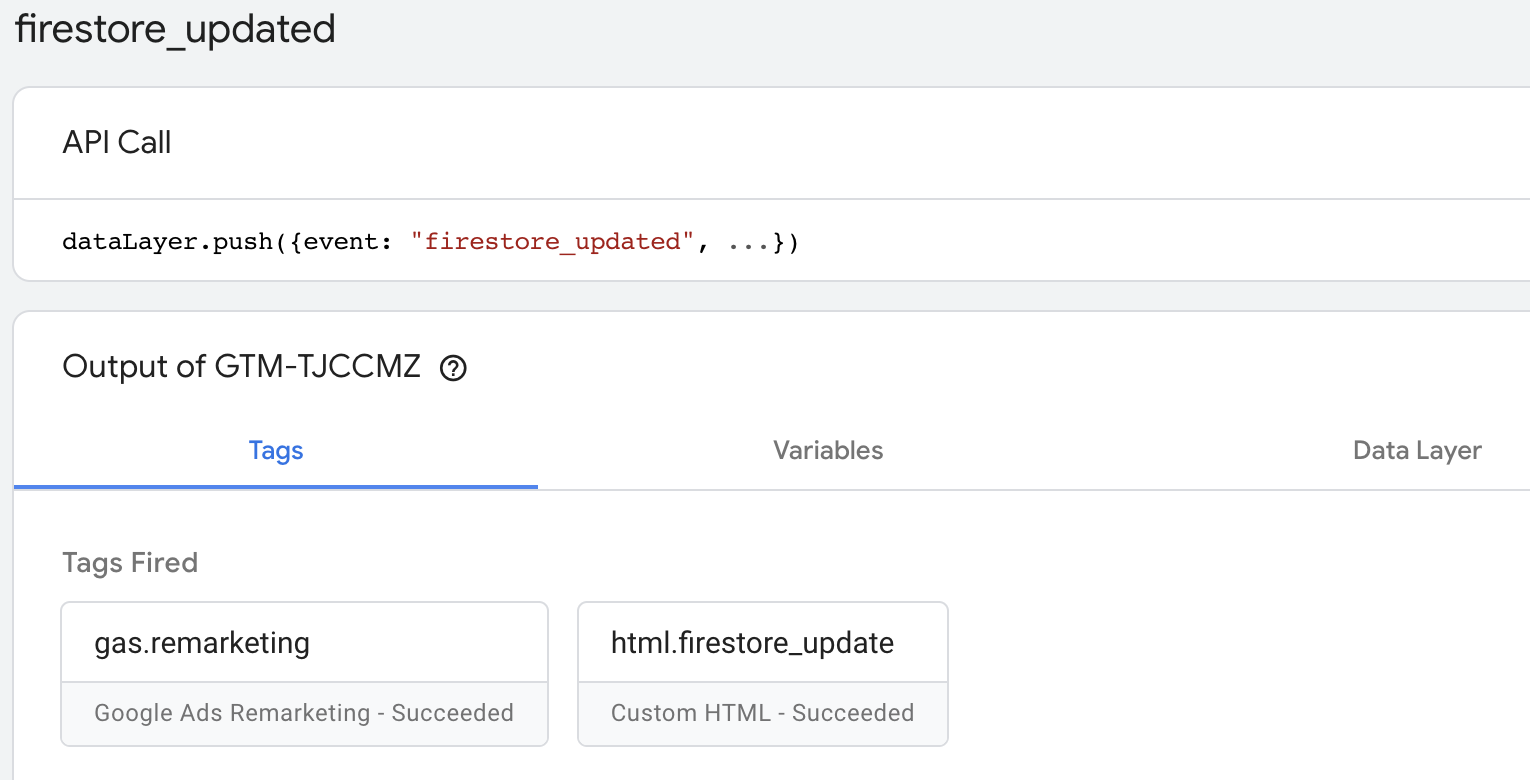
We can see the gas.remarketing tag was firing on firestore_updated, it means that the user has more than 1 purchase and the previous purchase was more than 30 seconds before.
Reload the test page two more times and have a look in the Debugger again:
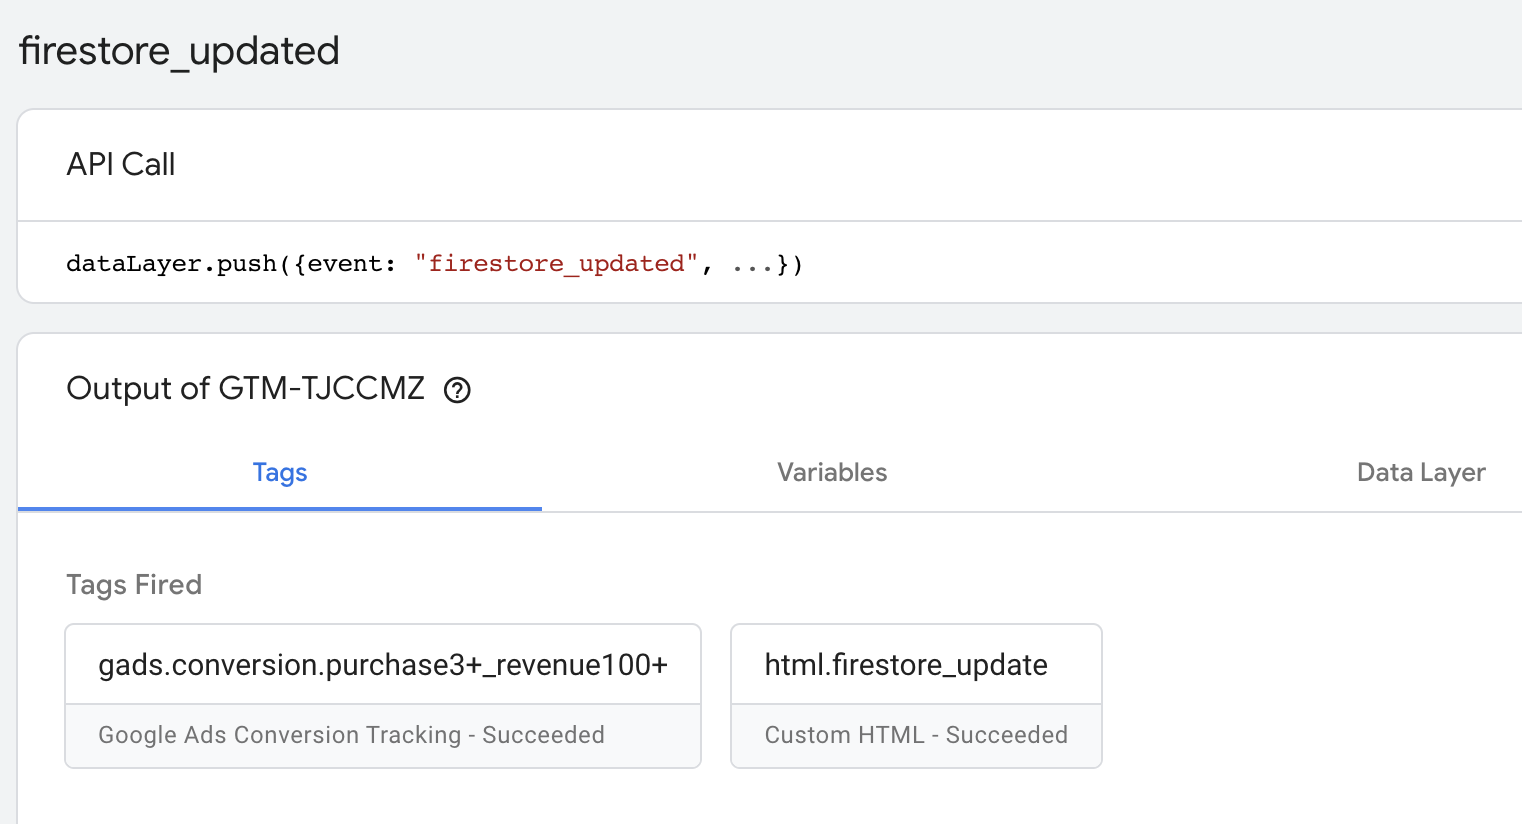
As you see Google Ads conversion tag was fired as the user has more than 3 purchases and we can check it in Firestore too:
That’s all for this long tutorial, I really hope you enjoyed the ride and will give these Templates a try, as they will help your marketing team to test something new and profitable.
If you have any questions or ideas please message me on LinkedIn, any feedback is very welcomed.