
How to prepare GA4 data for your reporting? Especially if you have dozens of metrics and they depend on each other. How to update reports as soon as daily data is exported? How to reuse SQL code and magic constants? Store everything in a repository and have separate branches for all data engineers? And finally how to get notifications if something goes wrong?
There are a lot of variants to answer these questions, but let’s try to use DataForm. DataForm is integrated into BigQuery, it’s a rather easy to learn, JavaScript-based and somehow documented solution.
I decided to write a series of posts related to Dataform if you find them interesting or if you want new topics you can message me on LinkedIn. I’ll be glad to hear that not only my mom is reading this and is interested in Dataform.
The plan
- Dataform setup and gentle intro - we are here
- Prepare GA4 events and keep them clean
- Schedule daily updates without Airflow using Cloud Functions
- Setup Dataform notifications (slack, email) and sleep well
- Terraform to rule them all - deploy Dataform in one click (practically)
Dataform setup
Let’s set up Dataform together step by step with screenshots and comments. We will init Dataform, connect it to GitHub and init the project.
Before we begin, I assumed you were already familiar with GCP, had created the project, and had configured GA4 data export to BigQuery. However, for the purposes of this article, I will use the GA4 sample dataset. So if you want to play with Dataform, you don’t need your own dataset, you can clone my GitHub repository or follow all of the steps in this guide.
Let’s enable DataForm. We need these easy 1 to 10 steps.
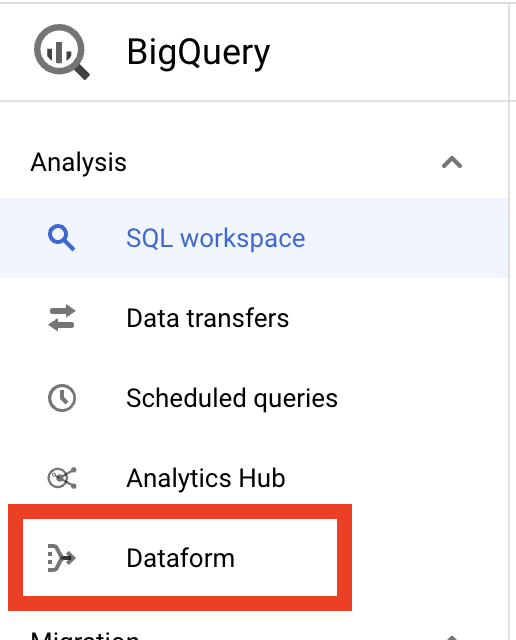
Go to GCP in the left menu select BigQuery. In BigQuery’s left menu select Dataform.
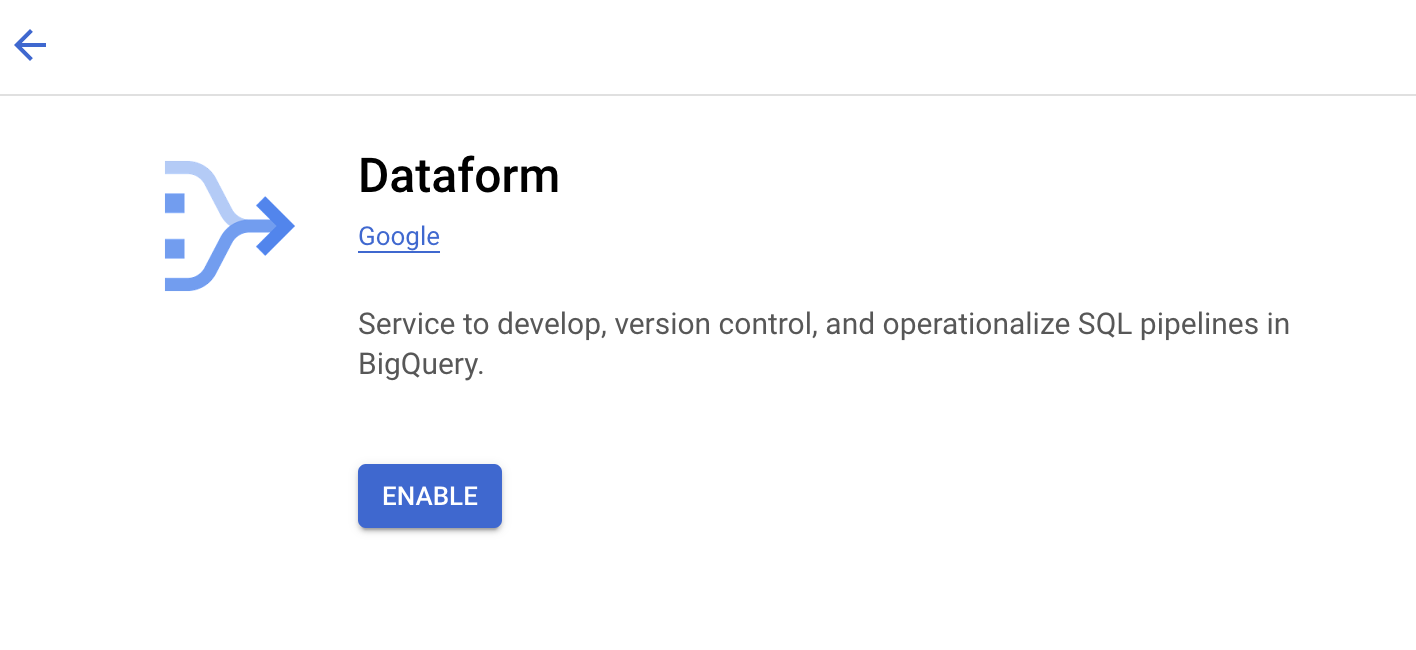
It redirects you to the Dataform API page. Enable the API.
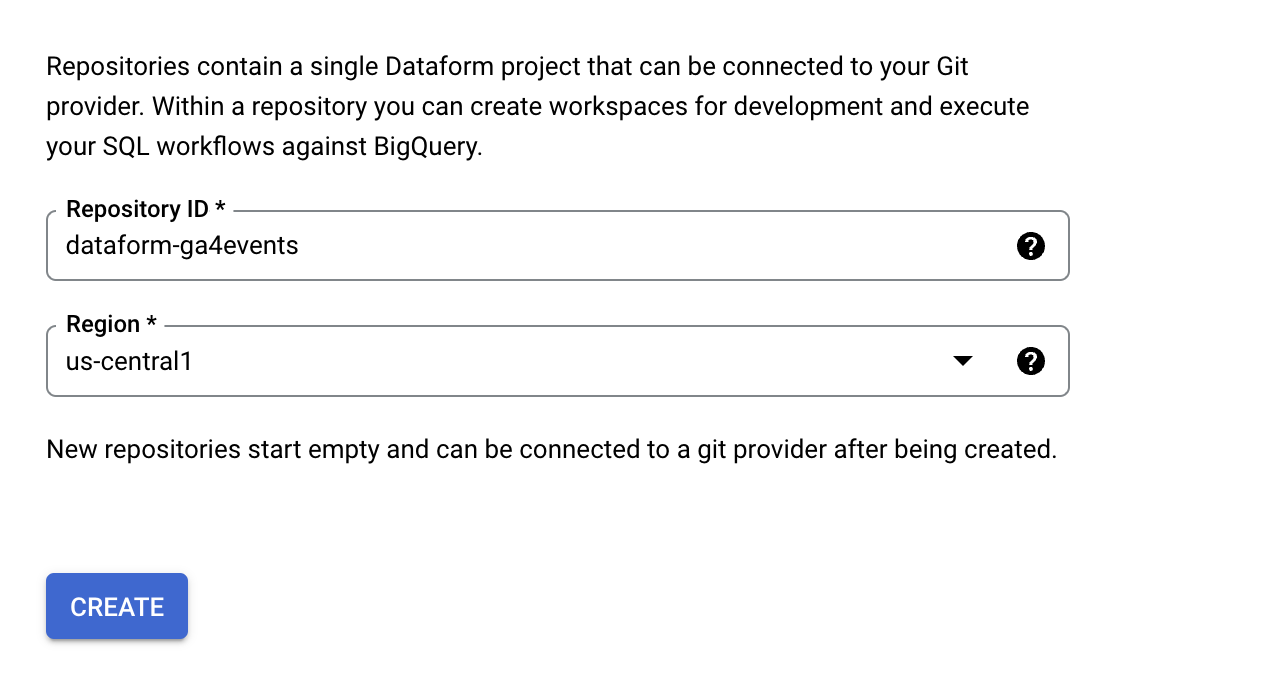
It redirects you back to the Dataform page. Click Create repository button, at the next step set the repository name and location. Note: As the GA4 sample dataset is located in the USA, you have to select us-region1 if you are going to follow this tutorial. Thanks, Eliès Gaillard for this comment
After the repository is created, you will see a message with the service account email for example: service-XXXXXXX@gcp-sa-dataform.iam.gserviceaccount.com. Copy this name and go to
IAM & admin / IAMpage. Enable checkbox Include Google-provided role grants and click pencil (edit) button in front of the Dataform service account (email from the previuos step).
We need to add these three roles for BigQuery access:
BigQuery Data Editor,BigQuery Data Viewer,BigQuery Job User.Add one more role that we will need later when connecting Dataform to GitHub. Click Add another role button, and select
Secret Manager Secret Accessor. Don’t forget to save changes.

Let’s setup integration with GitHub, steps for GitLab are practically the same. Open your GitHub account and create a new repository.
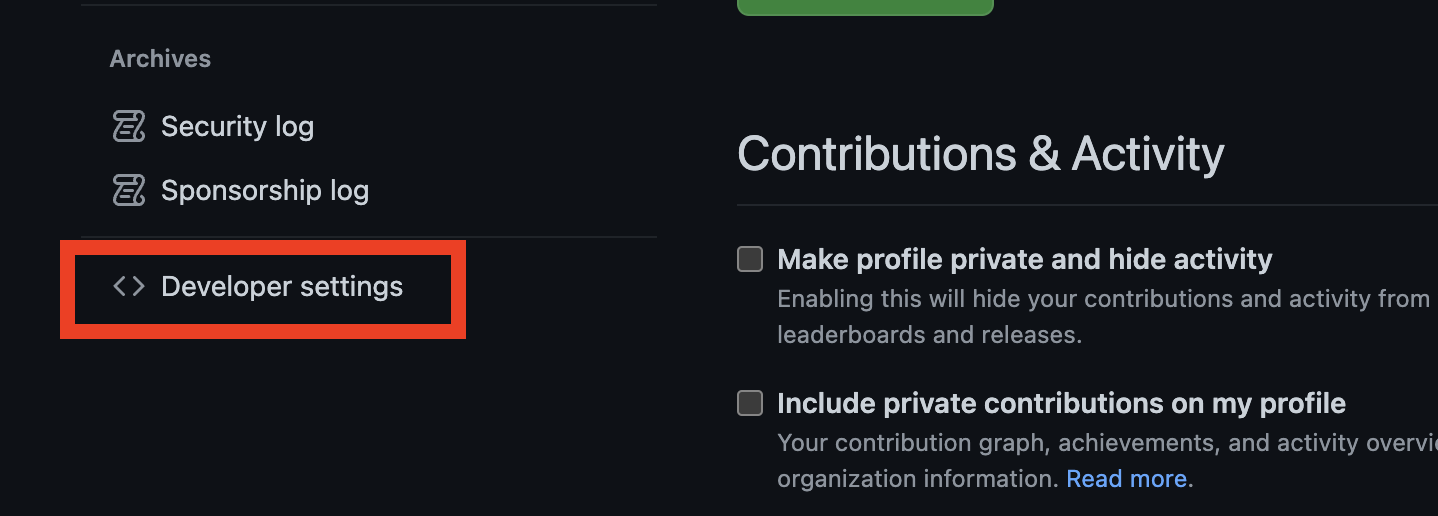
In the upper-right corner click your profile photo, then click Settings. In the left menu click Developer Settings.
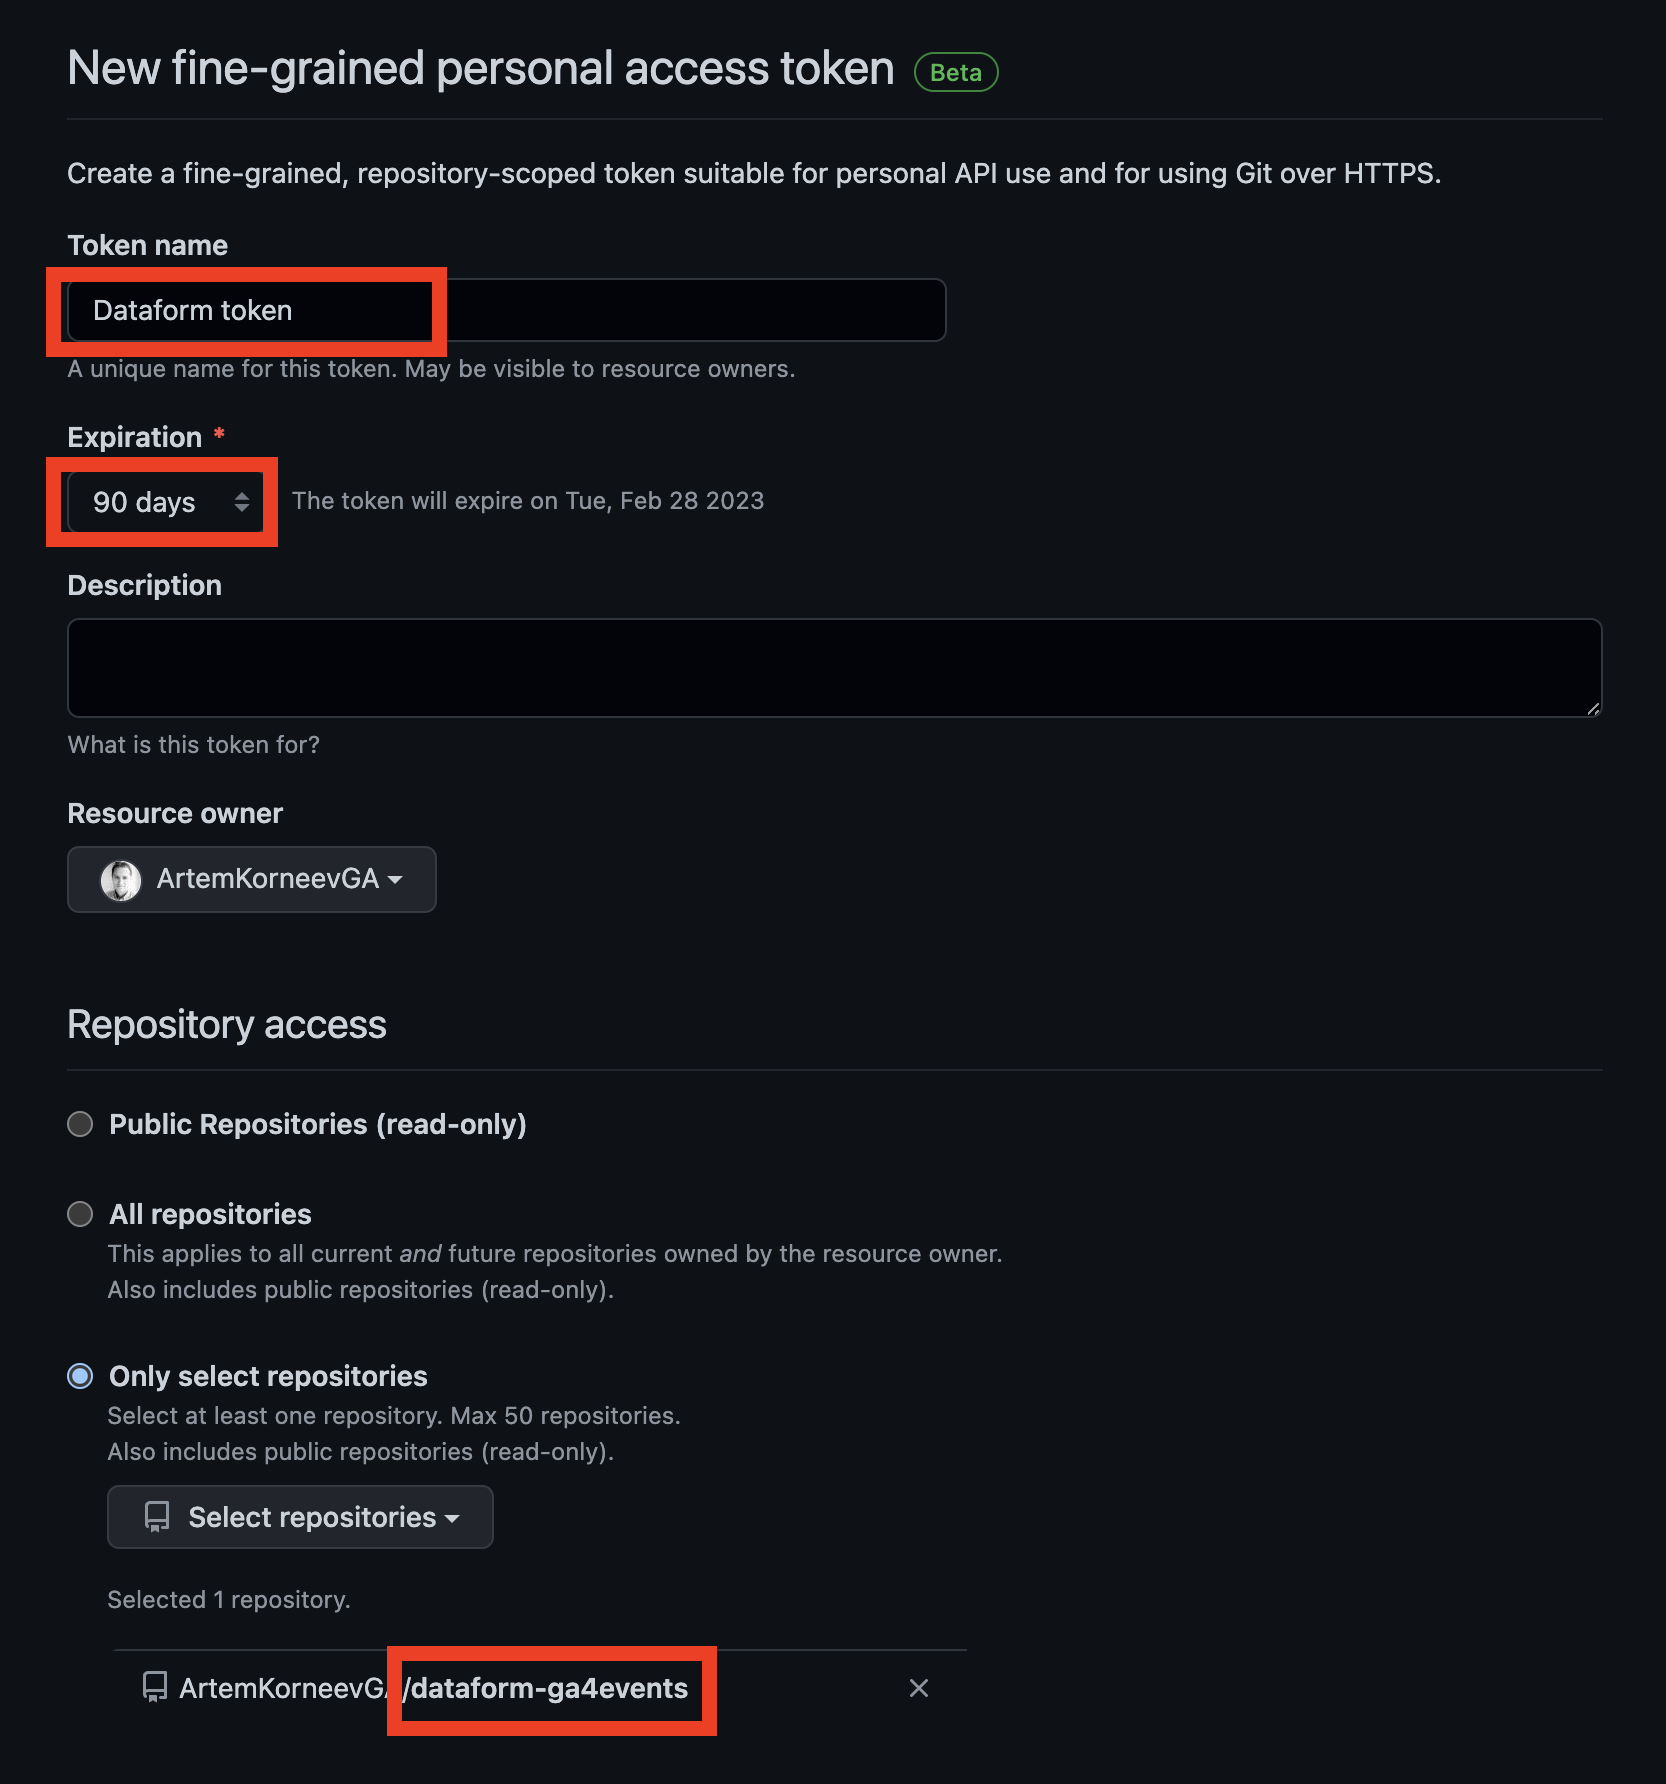
In the left sidebar, under Personal access tokens, click Fine-grained tokens. Set Token name, expiration date, and select the repository you just created. And grant these permissions:
- Administration - Read and write
- Commit statuses - Read-only
- Contents - Read and write
- Deployments - Read-only
- Metadata - Read-only Click generate token.
In GCP open the
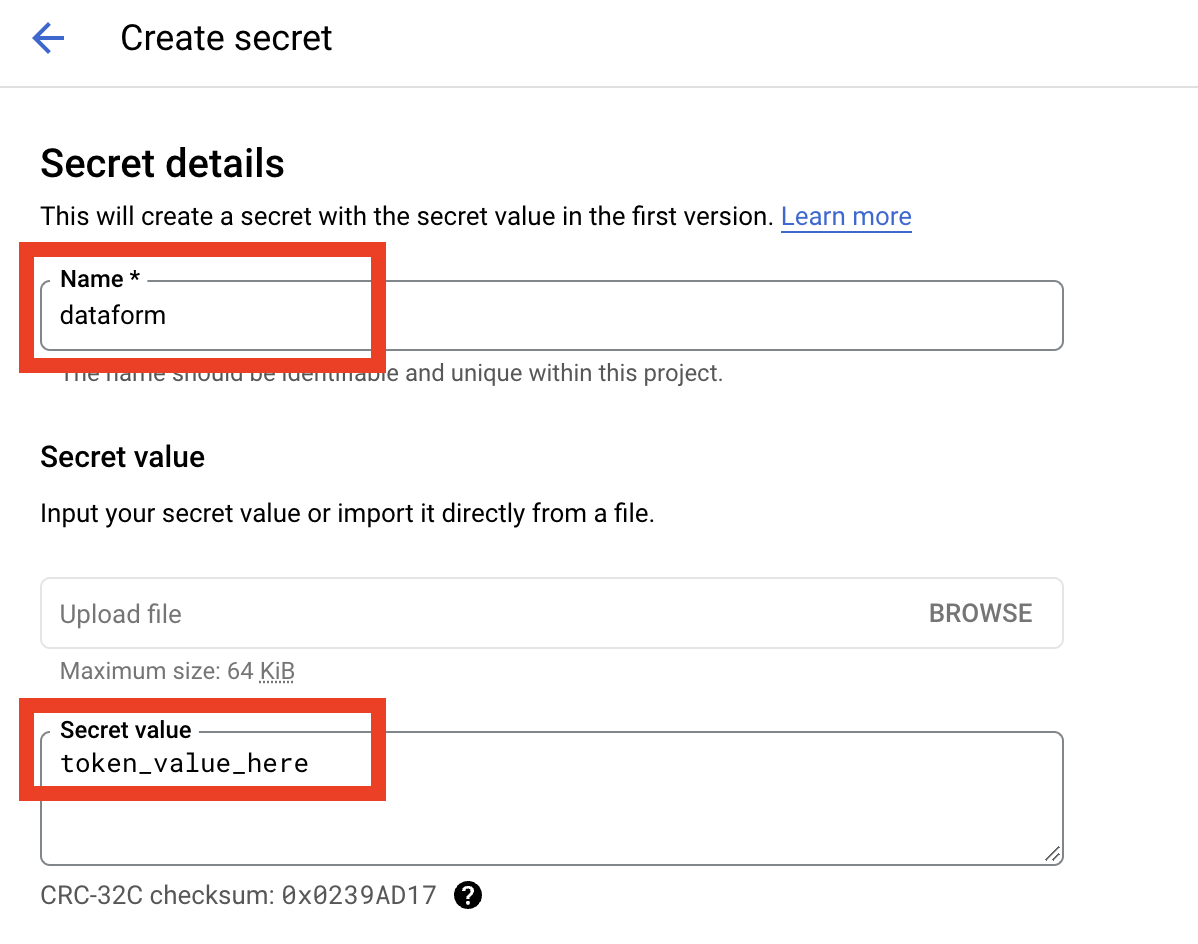
Security / Secret Managerpage. If you do it the first time you will be redirected to the API page and you will need to enable the Secret Manager API. After that click Create Secret. Set name todataform, paste GitHub developer token value to Secret Value field and click Create Secret button.Go back to the Dataform page, and click on the repository name, in the top menu click on Connect With Git button.

And we need a repository url, default branch name and secret. Click the Code button on the GitHub repository page (from the step 5) and copy the url (it should end with .git).
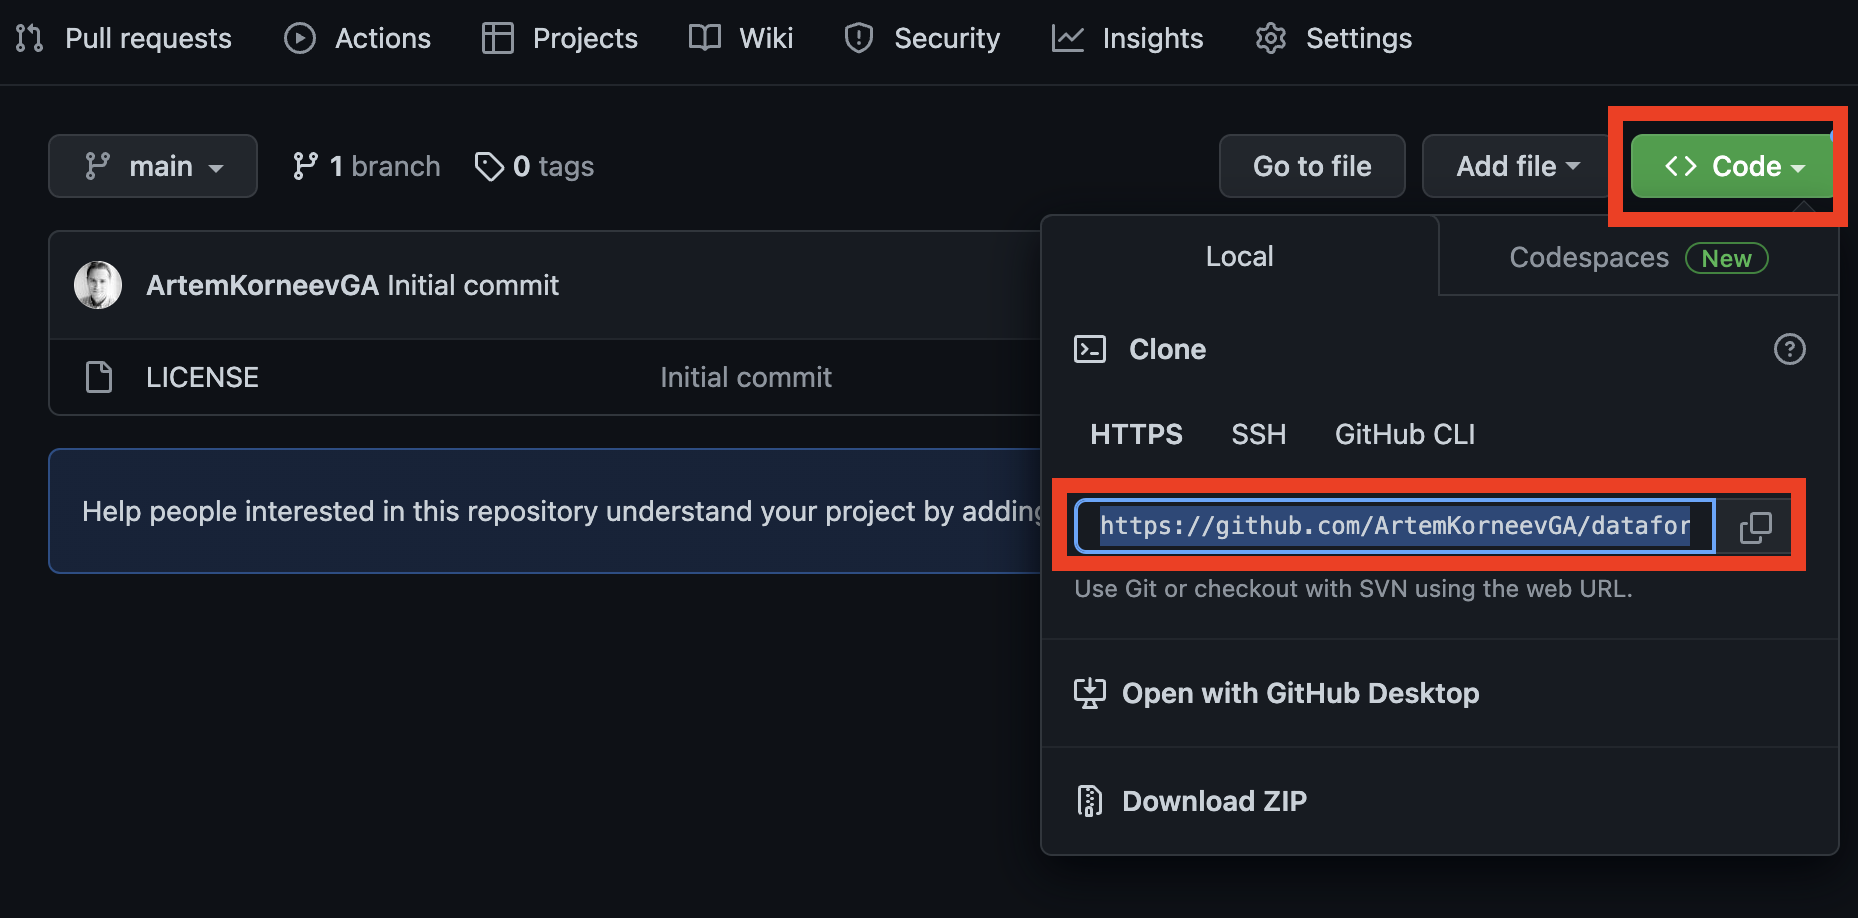
Default branch name set to main, and select dataform in dropdown for the Secret field. Click Create a Link button. And you should get message Successfully linked to remote Git repository.
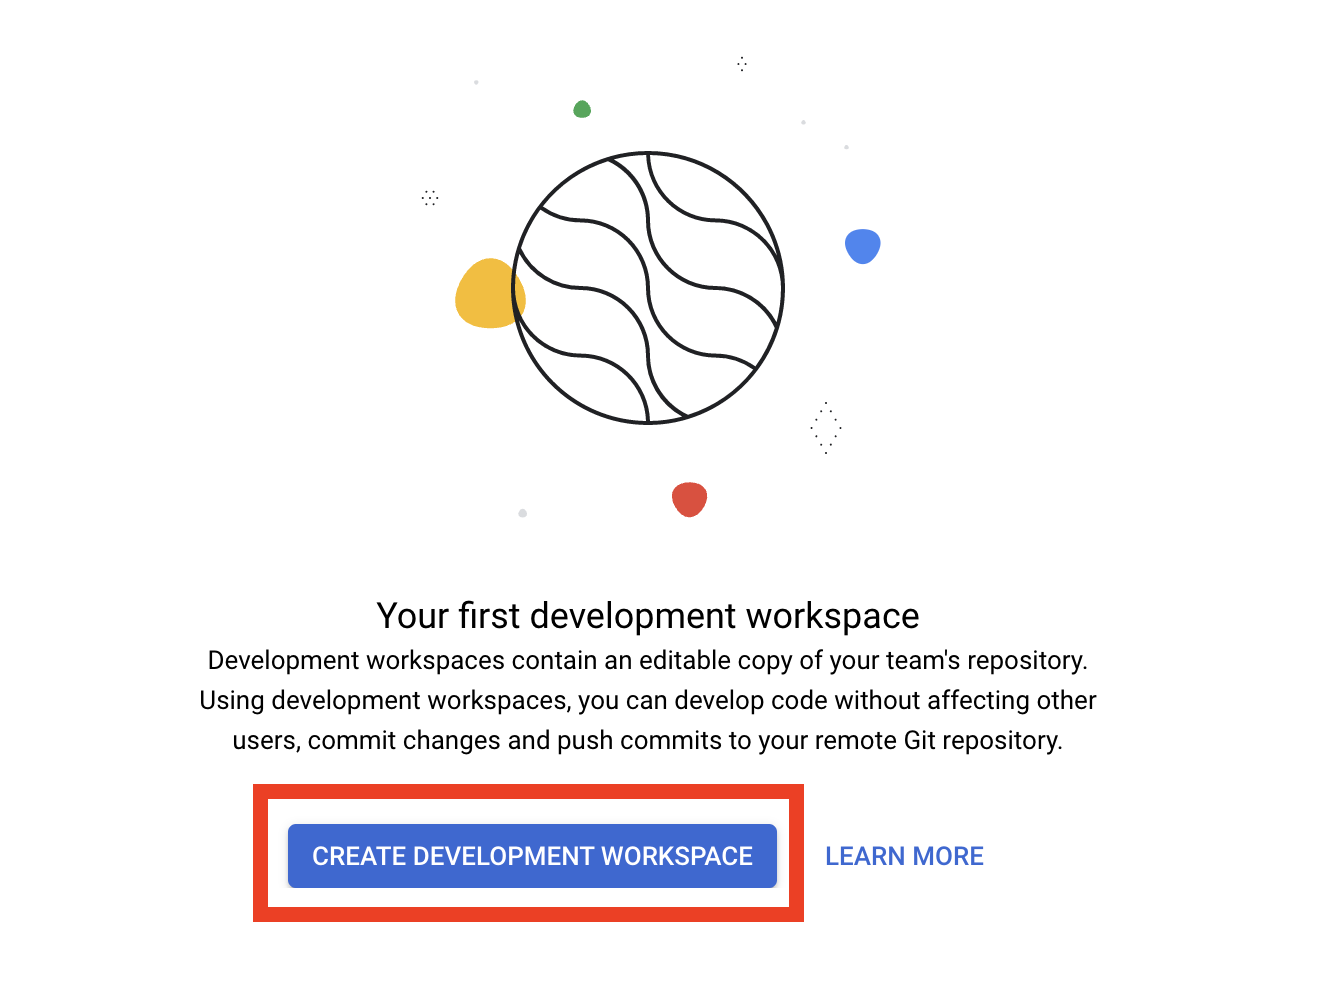
And now the last step is to click the Create Development Workspace button. For Workspace id you can set your name. Other data engineers in your team may create their own workspaces.
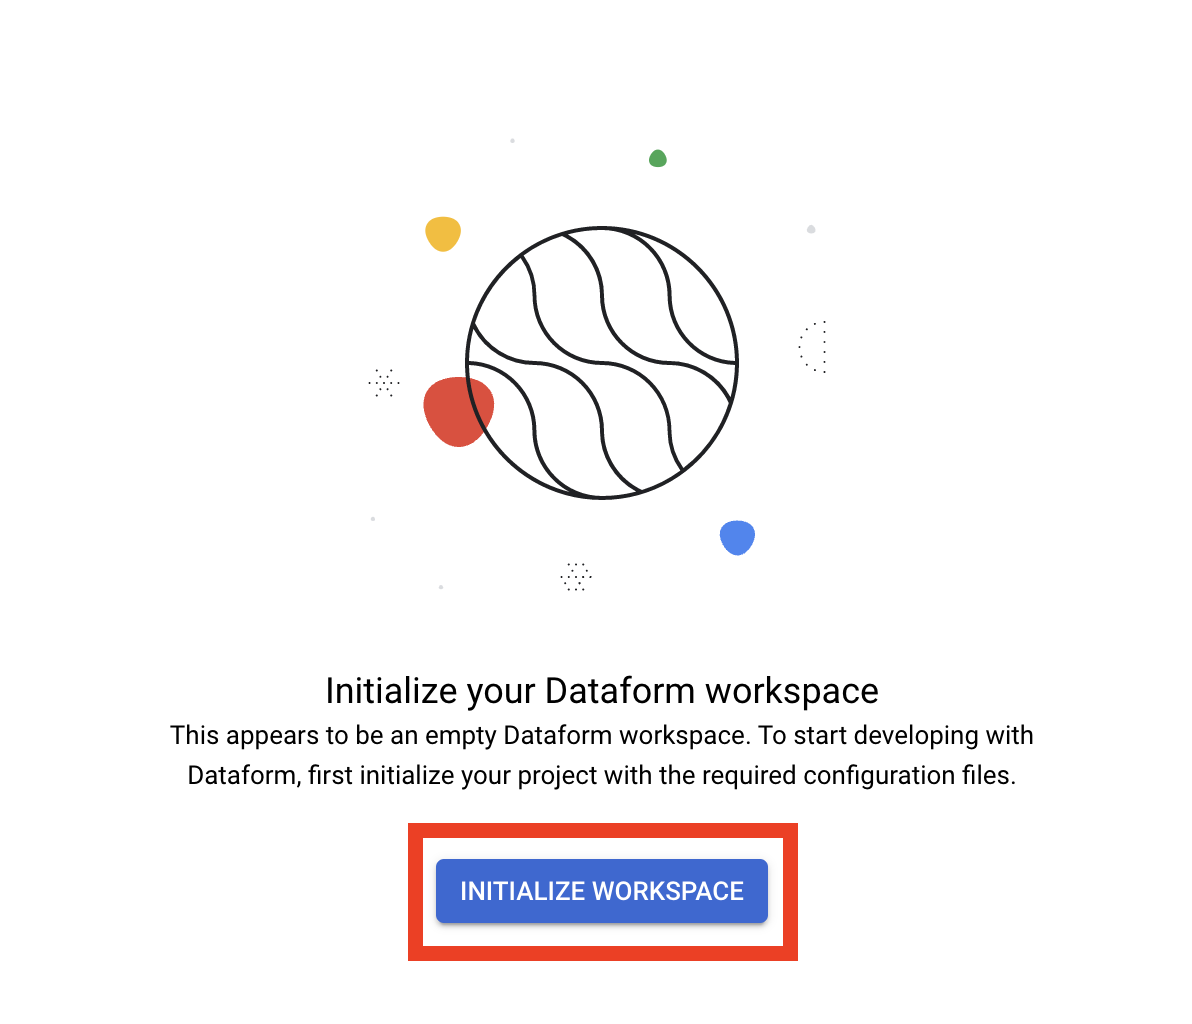
Ok and the final step is go inside your workspace and click the Initialize workspace button.
The initialization process is complete.
Dataform GIT basics
Let’s practice with git routines. At first commit the init state. Click the Commit button on the left top corner.
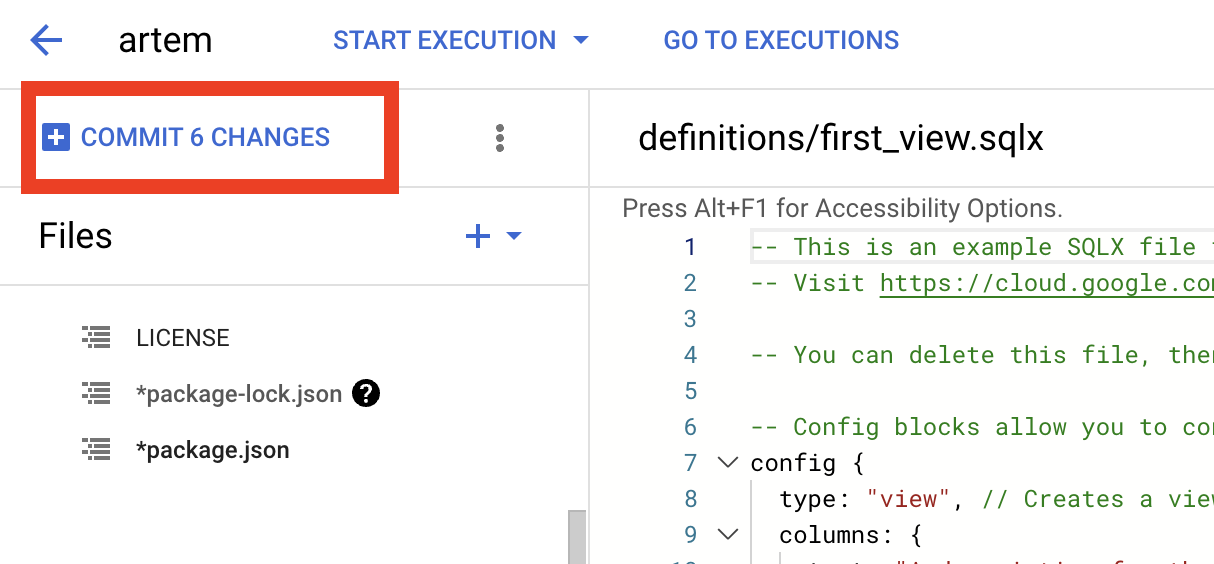
In the opened window enter the commit name for example Init and click Commit again. And now you need to click Push to remote branch to actually push your changes to GitHub. If you look in your repository, you’ll notice a new branch (artem in my case) that contains all of the initial changes.
But at the moment, you have changes only in your branch. Usually, in production you will schedule and use code from the main branch. This way, data engineers can have their isolated environments (aka workspaces, aka branches), and the production ready code lives in main. A short recap: remote branch it’s your branch, default branch - main or production branch.
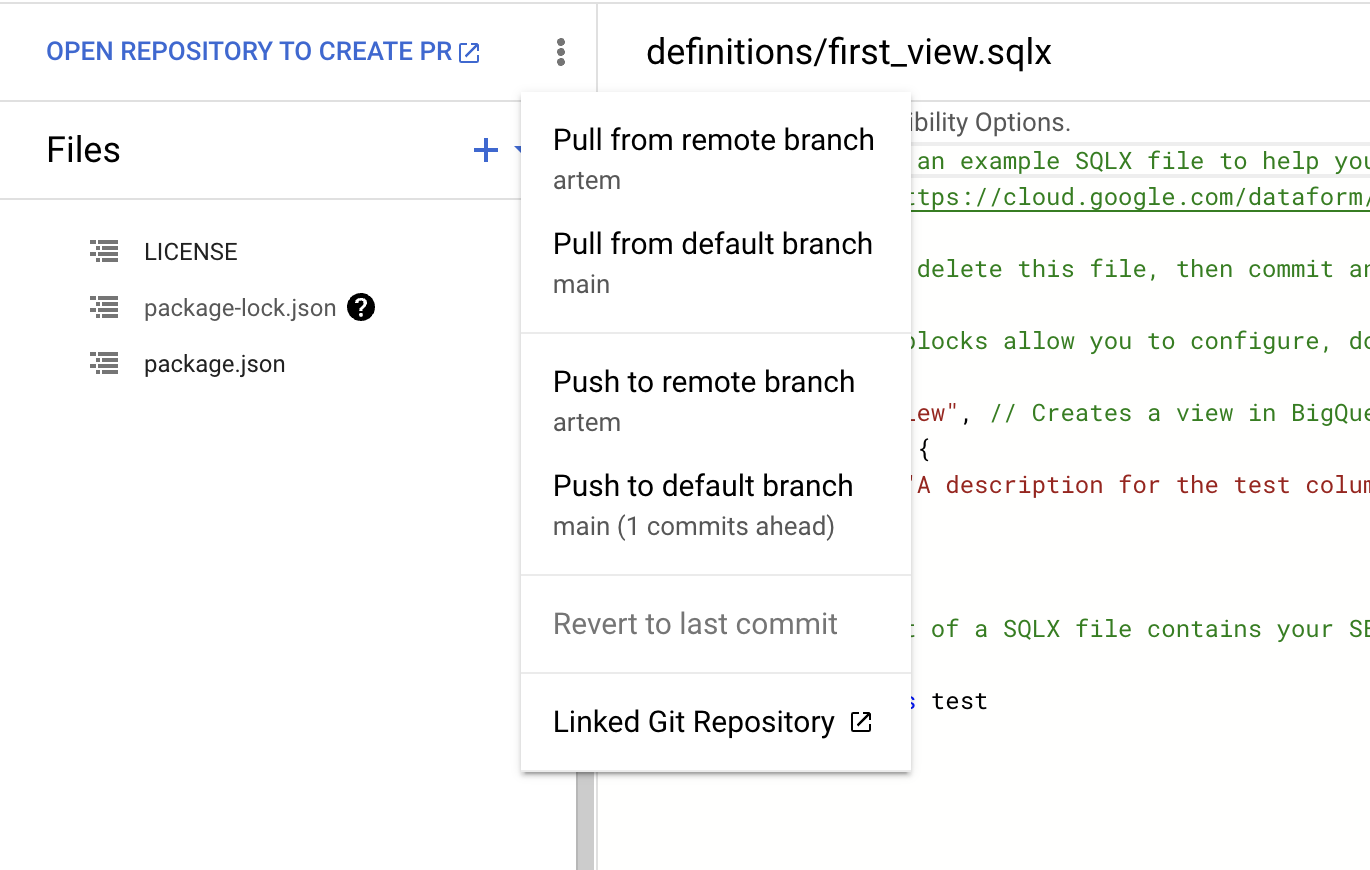
You can push all changes to main branch straight from Fataform by selecting Push to default branch from the three-dot menu.
But if you are working in a team it’s better to create a Pull Request (PR) this way you can collaborate and review changes before they go to the production branch. Click Open repository to create a PR. You will be redirected to the repository page, click Branches .

Then click New pull request in your branch.

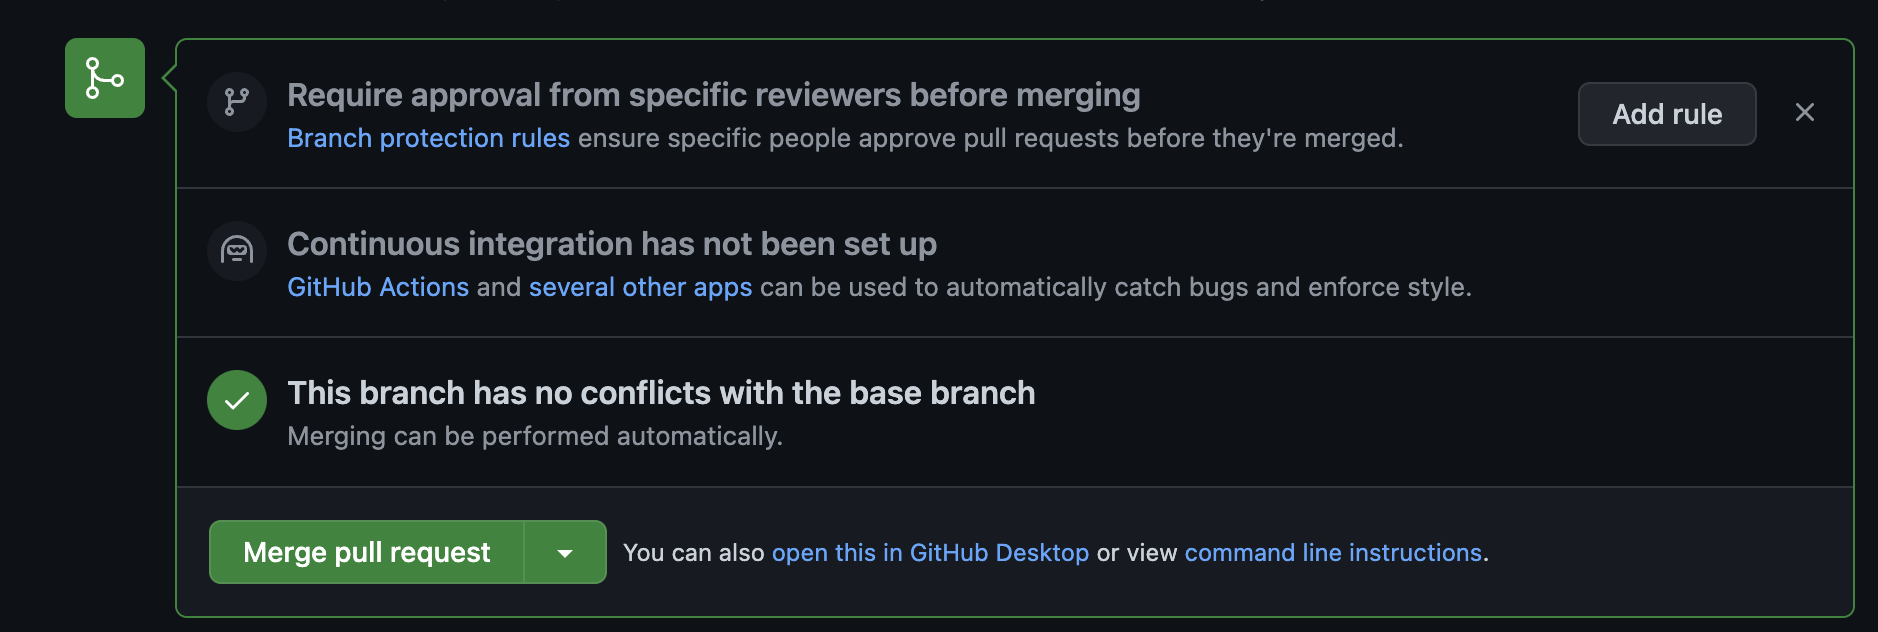
Set PR name, add comment if needed and click Create pull request. In a new window if all checks are green click the Merge pull request button. And then click Confirm merge once more.
Now you can go back to Dataform and click Pull From Default Branch to keep your working branch up to date.
It’s amazing and one of the great benefits of Dataform. Actually it means you have a built-in process to communicate and approve all changes of all your data pipelines. And also you have a history and you can easily find the author of any table, metric, whatever and ask him what the comment «never tries to refactor this» means.
Dataform GA4 Events sample
Note: I also recommend you try my dataform-ga4-sessions package. It helps you build Dataform actions for GA4 sessions and events. All standard features are already included: source/medium extractions, channel grouping, last non direct click attribution. Give it a try; it’s free and open source.
Ok and now It’s time to do something cool as a small reward for all these clicks we’ve made up until now.
I’m a great fan of learning by doing concepts, so we will try to make a simple Dataform workflow to get GA4 page_views for just one day. In the next posts we’ll make it a bit complicated with scheduling, assertions and so on.
But at first a little bit of Dataform basics.
Short SQLX intro
The heart of Dataform is .SQLX files (aka model). They are SQL + JavaScript with embedded Dataform helpers + configuration block. In the configuration block you can define the type of entity and its properties. The base types are:
- table
- incremental table
- views
- assertion
- custom SQL operations.
I’ll describe types in more detail later when we start to use them.
If you want to export events from GA4 BQ dataset you need to create a SQLX file, declare it as a table type and add SQL with SELECT query. When you execute this SQLX Dataform will compile SQLX to Standard SQL, create a new table and insert values based on this SQL.
The very important thing is that you shouldn’t use full table names (I mean Table ID something like project.analytics_XXX.events_XXX) inside your SQL, it’s better to reference tables using a special ref helper. This way Dataform can build a dependency tree and run SQLX in the right order. For example, you have a report that references base metrics tables, and these metrics are built using data from event tables. Dataform runs SQL related to events first, then metrics, and finally reports. Bless the ref! No more lists of dozens of scheduling rules, additional pub/sub events, or even DAGs practically unnecessary.
I hope this explanation gives you a broad understanding of what we are going to do. Let’s SQLX it.
Declare data source
We need to declare source tables, after that we can reference them in our SQLX files. Let’s create declarations.js with the following content:
| |
Everything should be clear here: we call the Dataform build-in function declare and pass the project, dataset and table into it. Usually we don’t need to specify a database as we use datasets from the same project.
Note: Declaration can also be done through an SQLX file, for more details please read the declarations documentation.
But let’s take a little step back, Dataform documentation recommends using this folder structure for sqlx files:
definitions
- sources
- staging
- reporting
sources - for all external datasets and to define transformations (normalization, etc.) for these source datasets. All other sqlx should be built on top of these models.
staging - all intermediate datasets are needed for reporting and later steps
reporting - datasets for reports and BI tools
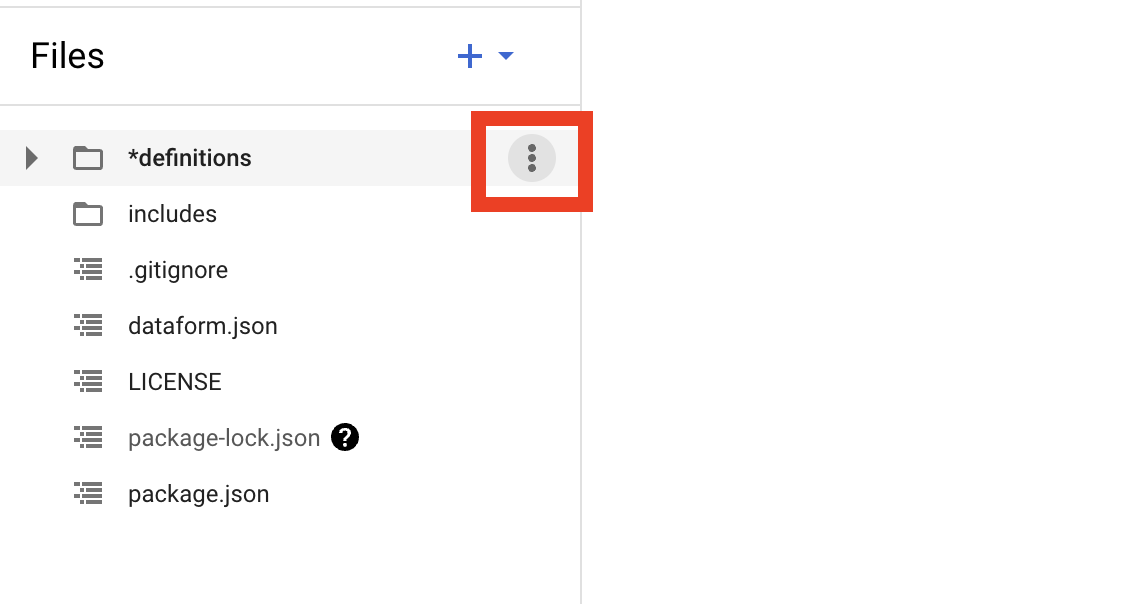
To add any files or folders just hover over the existing folder and click on the three dots in the right corner, then select the action you need from the menu.
So we save declarations.js in definitions / sources / ga4 folder:
- definitions
- sources
- ga4
- declarations.js
- ga4
- staging
- reporting
- sources
And now we can reference this table in any model using its name like this:
ref('events_20210131')
But before creating our first SQLX, let’s add a bit more JavaScript. In includes folder add constants.js file with this code:
| |
We define three constants and export them. And now we can use them in our declarations.js file like this:
| |
What’s happened here - any file in the includes folder will be automatically imported and we can reference any exported variables, functions etc. from these files. But if you create a folder inside the includes folder, you’ll need to import files from it manually.
Add the first SQLX
In definitions / sources / ga4 let’s create page_views.sqlx files with this content:
| |
In the config block we set a few properties. The type property to table. Table type means Dataform will create table in BigQuery based on SQL code you provide, and will recreate the table on each run. Please read the documentation for more details on table type.
Note: By default Dataform will create table with a name of your SQLX file. So in our example table name will be page_views
Schema sets to dataform_sources. This property defines the destination schema. I prefer to have three separate schemas for source, staging and reporting tables. But if you delete schema definition Dataform will use defaultSchema (dataform by default). defaultSchema is set in the global config file - dataform.json.
And after the config block we have a Standard SQL query. I suppose you are already familiar with the GA4 BigQuery dataset but if not as a starting point you can review the GA4 export schema documentation, and these Google samples and of course you can try Simo Ahava’s Google BigQuery and Google Analytics 4. Or, as a variant, if you don’t have time to learn how to work with GA4 BigQuery data, you can use a tool like the GA4 BigQuery SQL Builder.
In the query I’ve got events with event_name equal to page_view and unnested a few parameters: page_location, page_referrer, ga_session_id from event_params. This is a simple query just to demonstrate how to use Dataform; I will show a more complicated variant in the next post.
But please notice instead of using a table id we use reference to the table:
| |
After you will create a page_views.sqlx file and paste the code Dataform will compile it to SQL and you can see the result in the Compiled Queries Tab in the right panel.

You can check that the final query has a full table name: bigquery-public-data.ga4_obfuscated_sample_ecommerce.events_20210131
It’s very handy. First of all you will know if you have compilation errors or not, and second you can copy sql and test it in BigQuery just to be sure everything works as expected. I always do so before I commit any changes.
And one last step let’s add a JavaScript helper to work with event_params. Create the helpers.js file in the include folder with the following code:
| |
The function getEventParam returns a subquery that UNNESTs event_params. As an argument you can pass an event parameter name, its type (string by default) and column name (event parameter name by default).
And now we can use it in page_views.sqlx
| |
Now the code looks more DRY but you can check it has the same compiled query result.
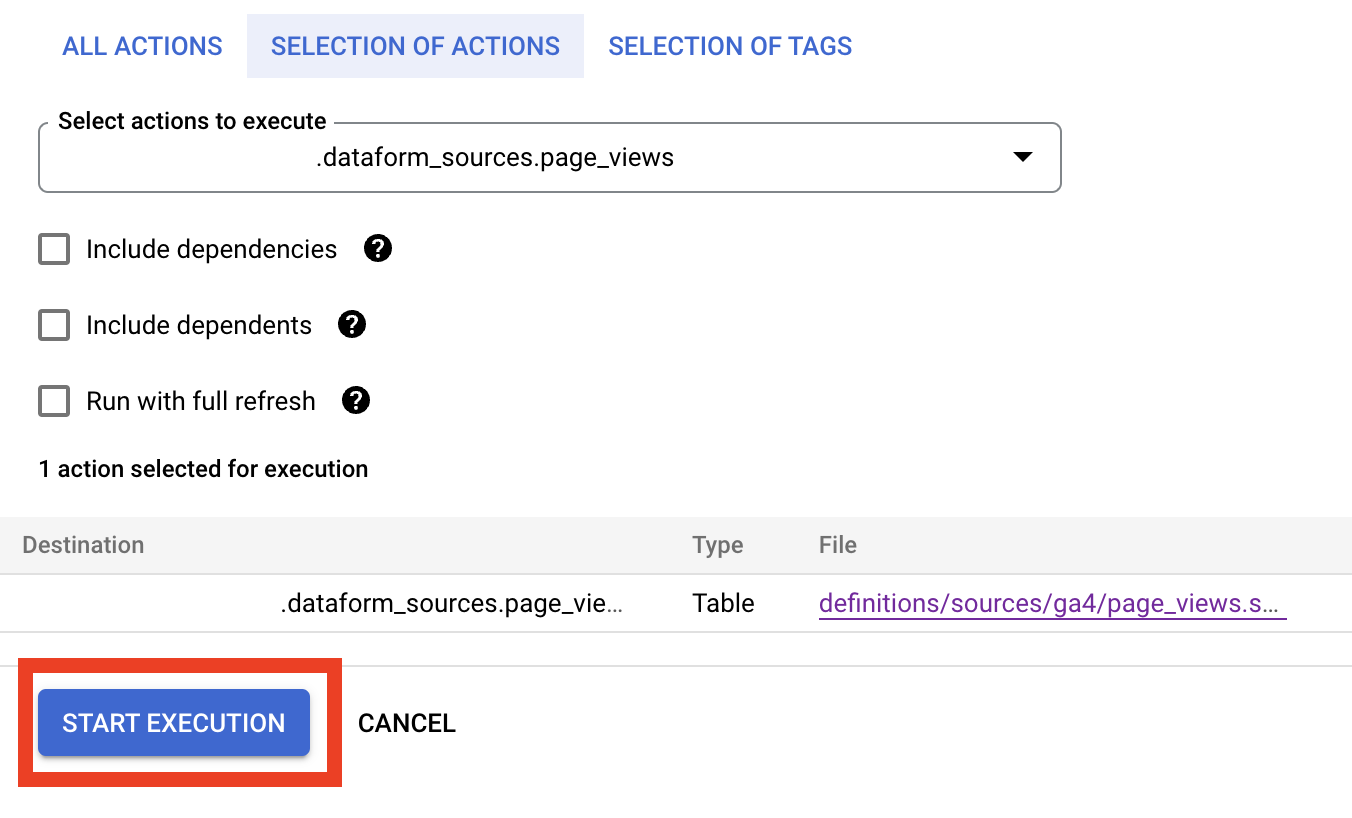
Ok everything looks like ready, so now we can actually run our first SQLX. Click on Start Execution in drop down select Actions and click on page_views.

It opens a left panel with a list of actions we are going to execute. Here we just click Start execution.
It will create a small message Successfully created workflow execution with Details button. And If you click (with Command/Ctrl to open in a new window) on this button you will see execution details. In our case it should be green, but if not you can click View Details to get logs.
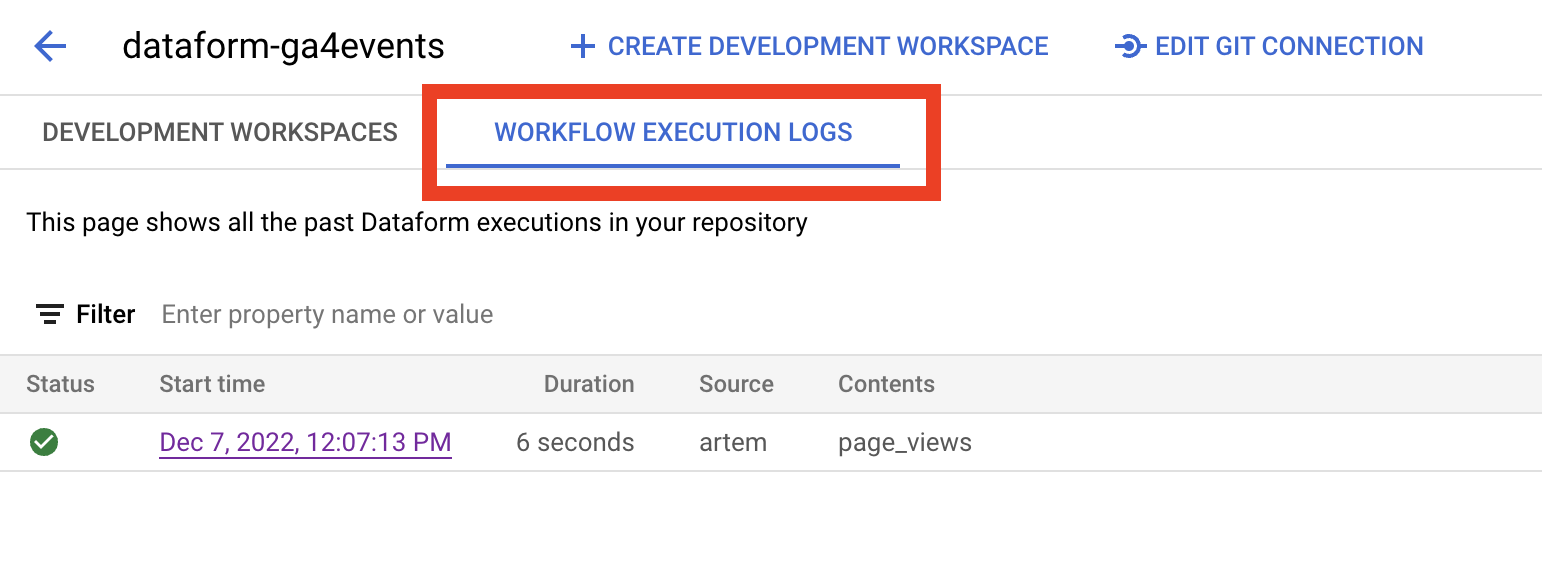
You can always find the history of all your executions if you go to Dataform / your repository name page and switch to Workflow execution logs tab.
And now in BigQuery datasets we have dataform_sources with page_views table. The name of the result table by default will be set to the name of SQLX file (but if needed you can change it in config block).
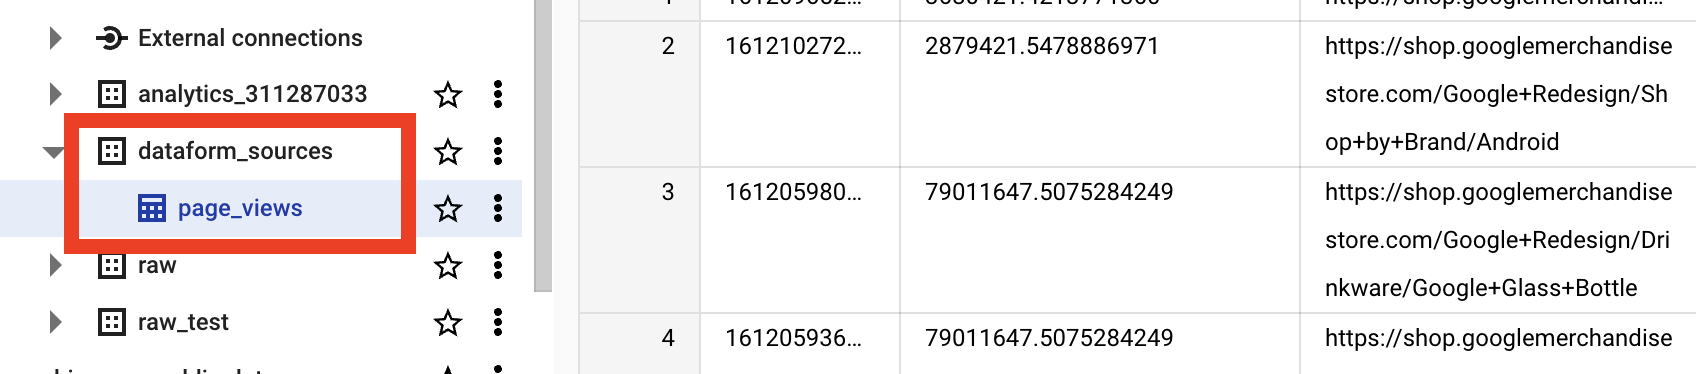
Success! Now we know everything about Google, at least what was hot in the Google Store in 2021, not bad anyway. Don’t forget to commit and push all changes to your branch and to main branch.
I think that’s all for the first intro post. We set up Dataform, created the first simple SQLX based on Google GA4 sample data set and successfully executed our first workflow.
In the next I’m going to show a more complicated example on how to get dozens of GA4 events using one config file. How to add data checks and how to keep events that pass checks separate from those that do not. More SQLX, more JavaScript, more fun.
Stay tuned, and please send all your comments and questions on LinkedIn.
P.S. Thanks to all guys who messaged me on LinkedIn and said that not only my mom read this post! And special thanks to Raisa Sokolova and Eliès Gaillard who reviewed the article.