
The goal
I’ll show you how to create practically any conversions or audiences based on user state using Google Firestore. Maybe it sounds too long and boring - but definitely profitable.
This tutorial consists of two posts. The first one will be easy and smooth, we will create a few cool conversions in Web GTM, and I hope it will inspire your imagination to make something spectacular that your marketing or clients desperately need. The second post is a little more painful, as we will set up Server GTM and Google Firestore, it’s a bit scary especially if you haven’t played with Google Cloud before. But you know, it’s not rocket science, we have to go through it only once and after that you can go back to the Web Container and create as many new conversions as the GTM container allows.
Note. I submitted all templates from the tutorial to Community Gallery but they are still waiting for approval, until then you can download templates from GitHub and import them directly in your GTM container. Here’s the links to the repositories: Firestore Web Tag, Firestore Server Client, Firestore Server Tag. Also if you want to follow this guide please download Web Container Workspace and Server-Side Container Workspace with all setup described in this tutorial.
Conversions
To illustrate how to use Firestore and Server-Side GTM together we will create a few conversions:
- a user makes 3 purchases or spends more than 100 dollars
- a user makes a purchase but the previous purchase was made more than a month ago
Why Firestore?
Before going to Tags, a few more boring paragraphs.
Later on in this post I will mention user state or user properties but I don’t mean, you know, user object, or formal user model your development team stores in their databases. I speak about something more temporal, about marketing experiments. That’s great if your marketing team is always on fire trying something new - new partners, new segments, new conversions. But they need to get some additional information about the user, and I don’t mean PII, I mean something simple: how many times a user did this, achieved this, liked that and so on and so forth. You never know for sure which of these features will work and for how long. Still, the numbers should be precise and consistent or you could make the wrong decision based on wrong data.
How can we store User State?
The easiest way is through localStorage or cookies, in the olden days we didn’t really like cookies as users could operate a few browsers, devices or even erase cookies. Now thanks to Apple it’s not an option, Safari erases cookies and localStorage itself.
Another variant is to ask your dev team to make an API to store marketing data. That’s a great option but you have to consider it like a separate IT project and it’s not only about developing such an API, it’s about monitoring, scaling, managing access and so on. After that you have to build something on top of your API to add tags and firing rules. And please, don’t reinvent the wheel. For example you can call your inner API from Server-Side GTM, like I showed you in a previous post.
Marketing can also use existing solutions, this tutorial describes such a solution. We can use Google Cloud: Google Tag Manager to set up the tags and firing rules and Firestore when it comes to storing user state. I suppose you already know what GTM is, so you can add and deploy new triggers and tags rapidly. Firestore is production ready, realtime, Google managed, and so on, spaceship for your data. Recently, Google added an API to integrate SS-GTM with Firestore. Great. Now you can write your own solutions or use my Templates. By the way, they are open source, you can review or change them if you need to (I’m open for pull requests too).
That’s all for the long “short intro” let’s go to business.
The plan
Also I suppose you are an experienced GTM user and I won’t explain to you how to add tags and triggers. Please download and import the test Web Container with all tags from this tutorial. I will explain all setup steps and show you screenshots but will skip simple instructions like: pls go to trigger page and click new button to create new trigger.
We need to follow these simple steps:
- Add Firestore Web Tag Template;
- Create a trigger for a purchase event. And create a variable for the purchase amount;
- Create a Tag based on the Firestore Web Tag template and fire it on the purchase trigger from step 2. This tag will send data to Server-Side GTM. As soon as the data will be saved, Tag makes a dataLayer push
firestore_updated. This push means that SS-GTM changes user properties, saves them in Firestore and sets updated values in cookies; - Create triggers on
firestore_updatedand create GTM variables to get user properties from cookies; - Create Google Ads conversion and Google Ads Remarketing tags with a triggers from step 4;
- Cool, now that we are ready to setup Server GTM and Firestore, let’s jump to the second post;
- Test everything and create new valuable and profitable conversions and audiences.
Looking at the plan you may say:
«Wait a minute I noticed a cookie word. Don’t you say the cookie isn’t a reliable solution?»
Yes you are right, but we will use session cookies not for keeping the user state but only for getting the user state back from the server. Unfortunately (or may I say by purpose) there’s no sendHttpRequest API for Web Tag Templates. I have to use sendPixel API to send user data to Firestore. And Server returns the user state in cookies. But as I say it’s a session cookie so your browser will erase these cookies as soon as you close the tab. No worries, I’ll explain technical details in more depth in the next post.
Implementation
Step 1 Firestore Web Tag Template
Download the Firestore Web Tag template.tpl file from the GitHub repo. Go to the Templates page and in Tags Template section click the New button. Open the top right menu and click on Import.
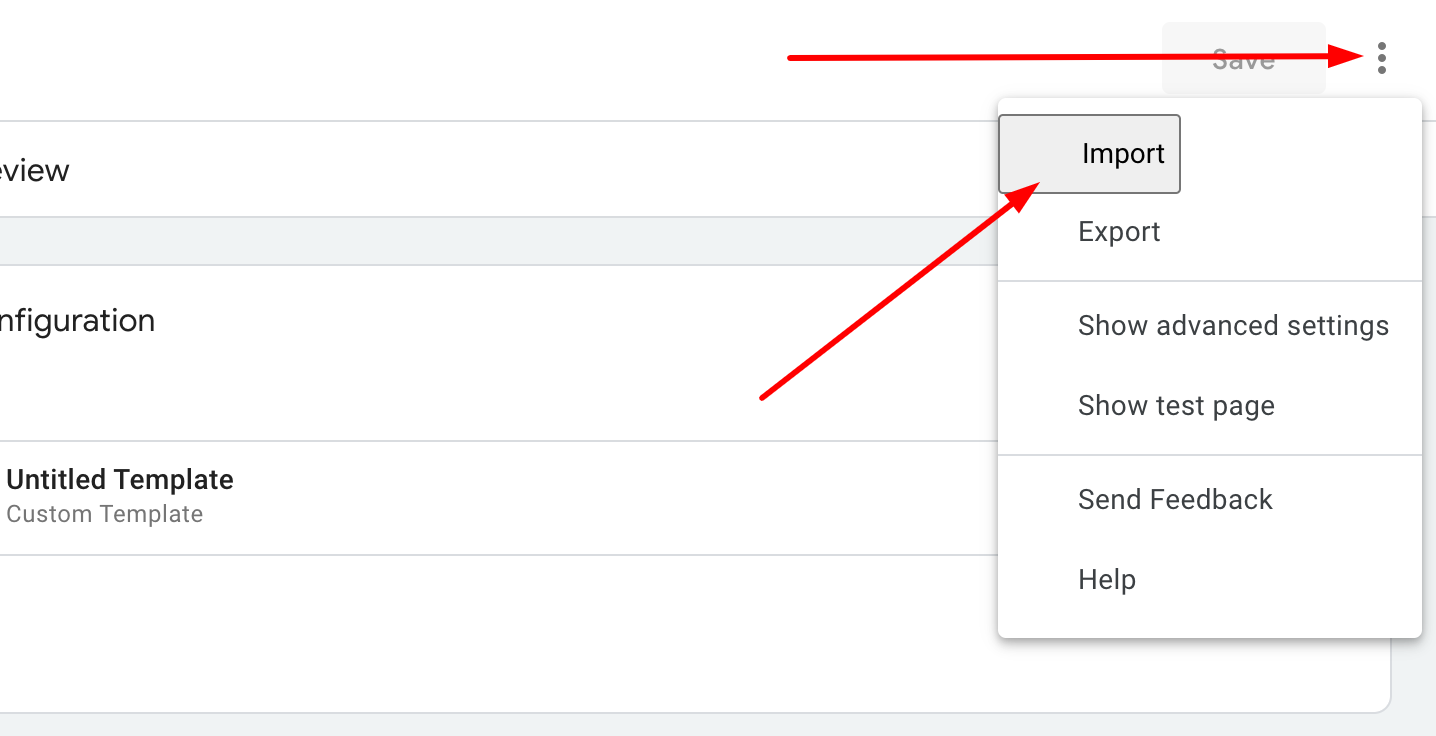
Select template.tpl file, and click save.
Step 2 Purchase trigger and some helper variables
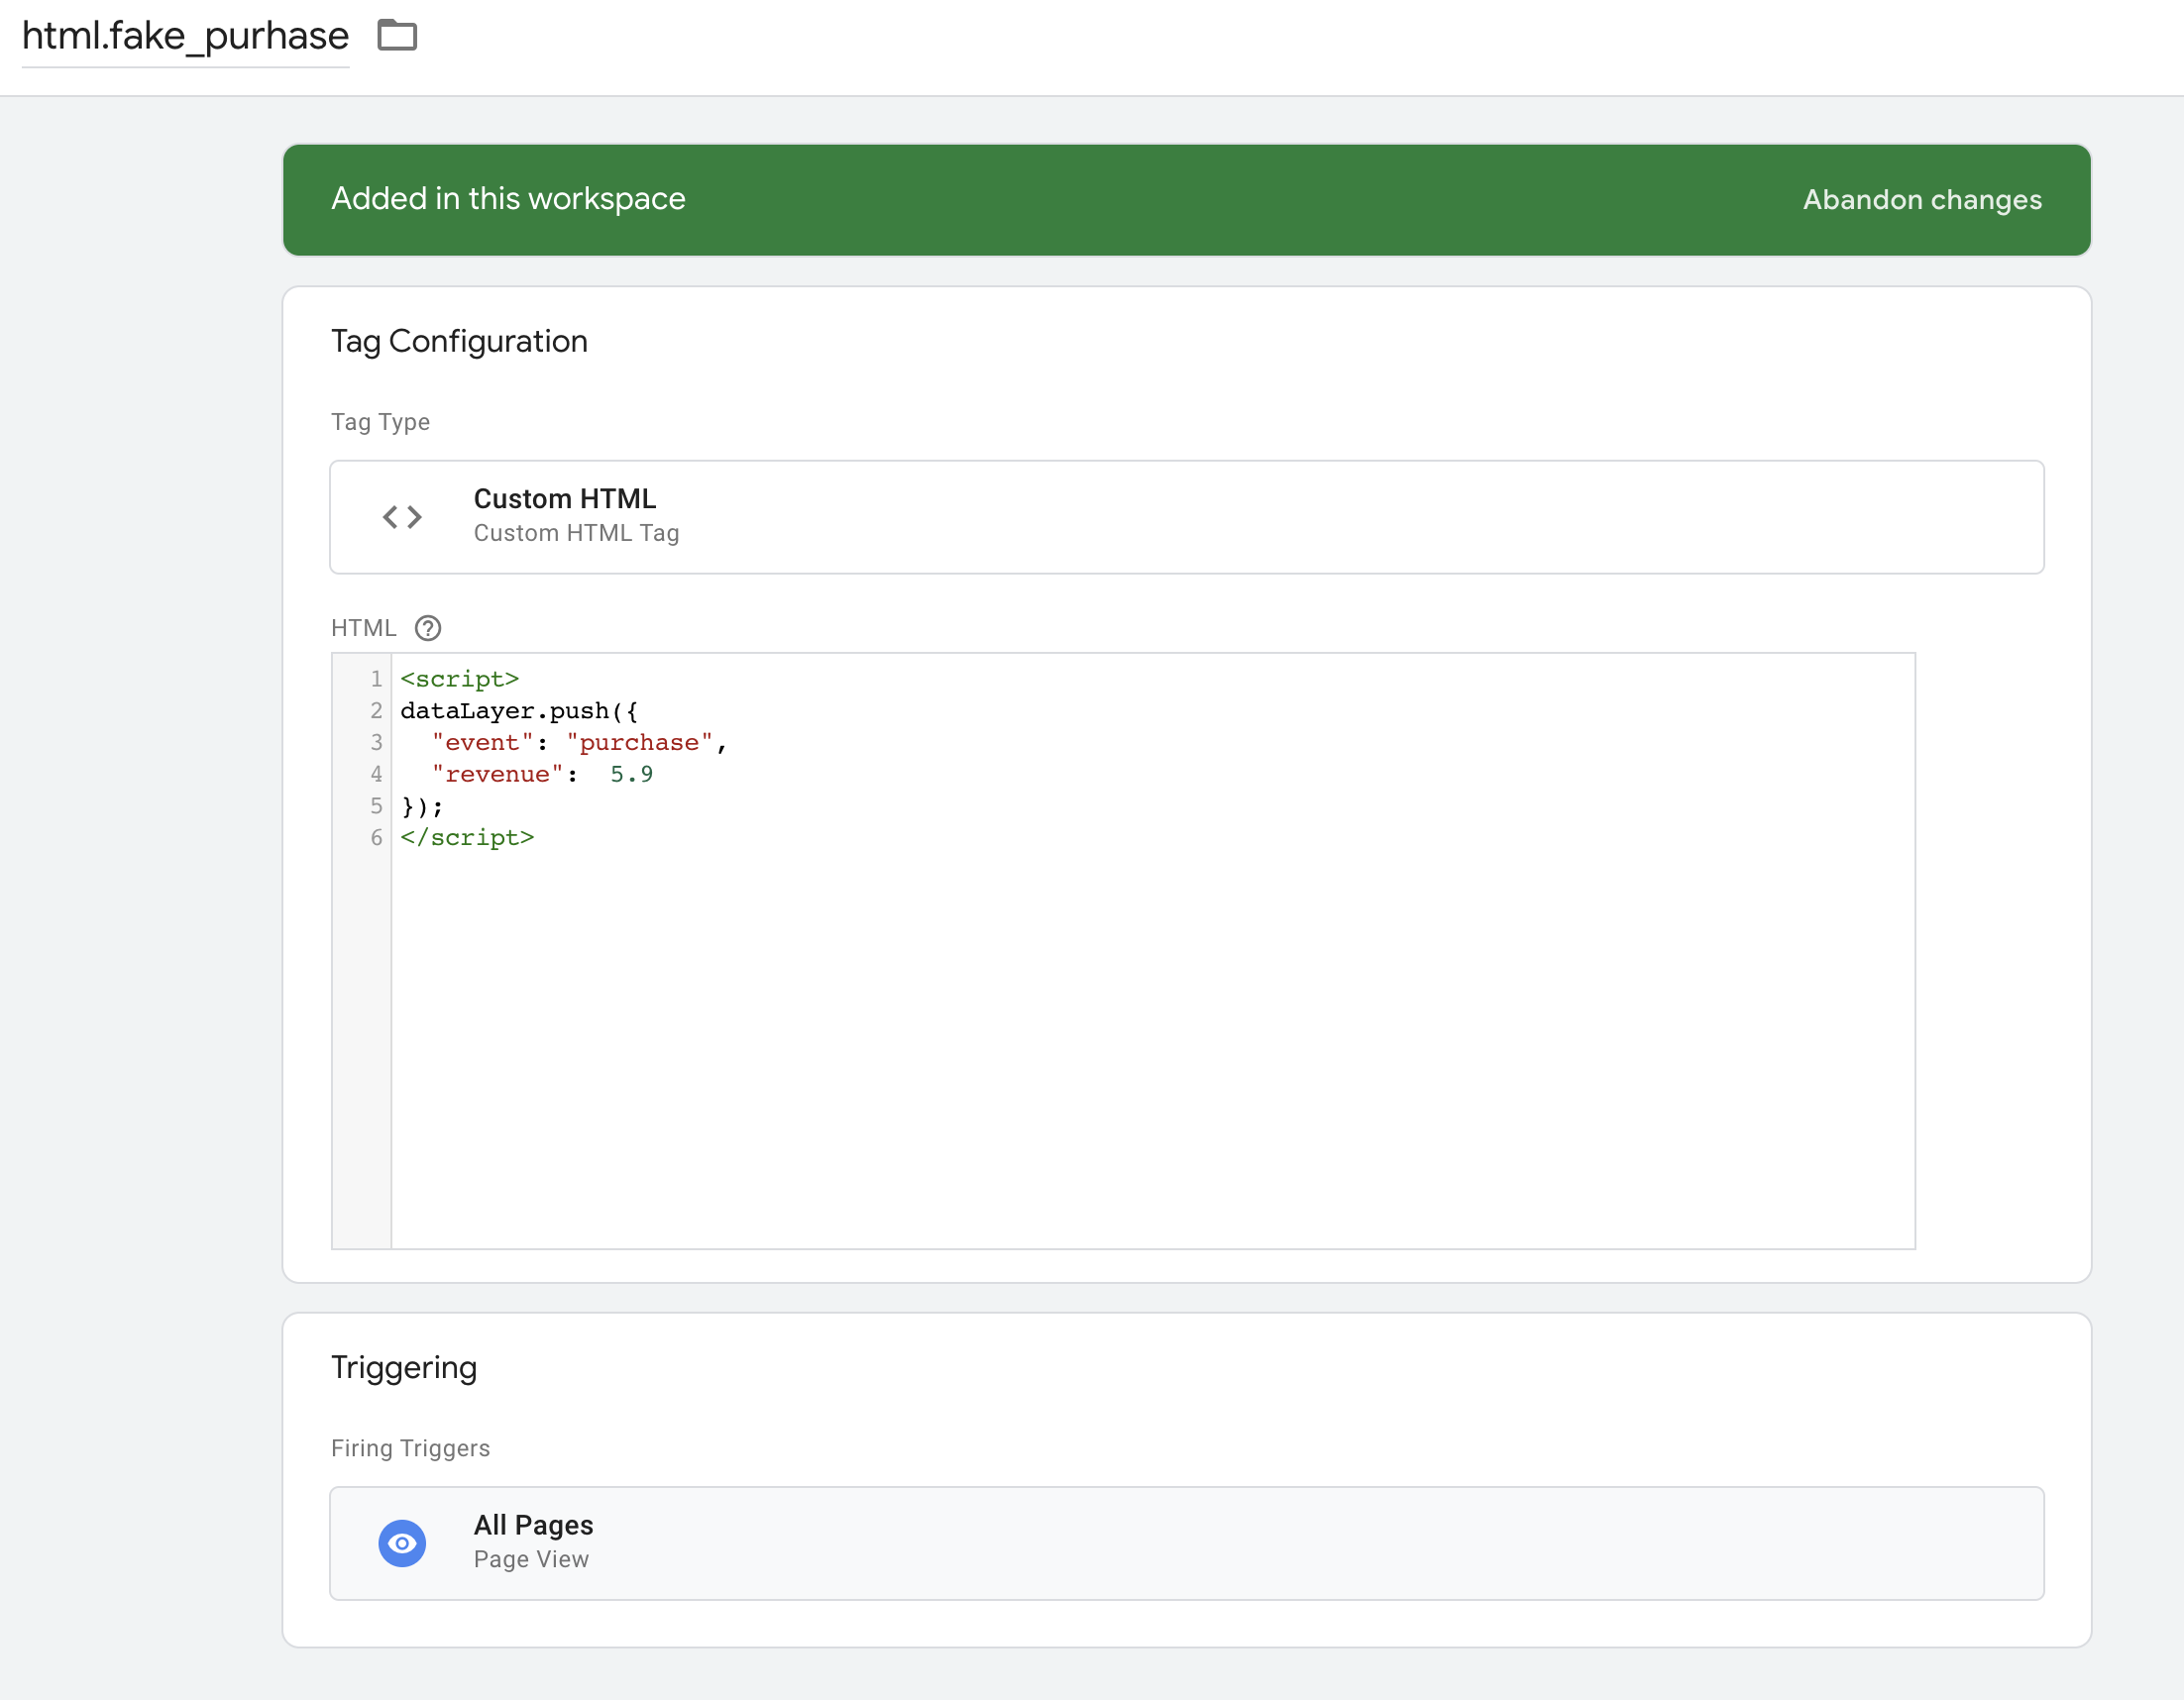
For testing let’s make html.fake_purhase tag which will generate a dataLayer push with a fake purchase on page load.
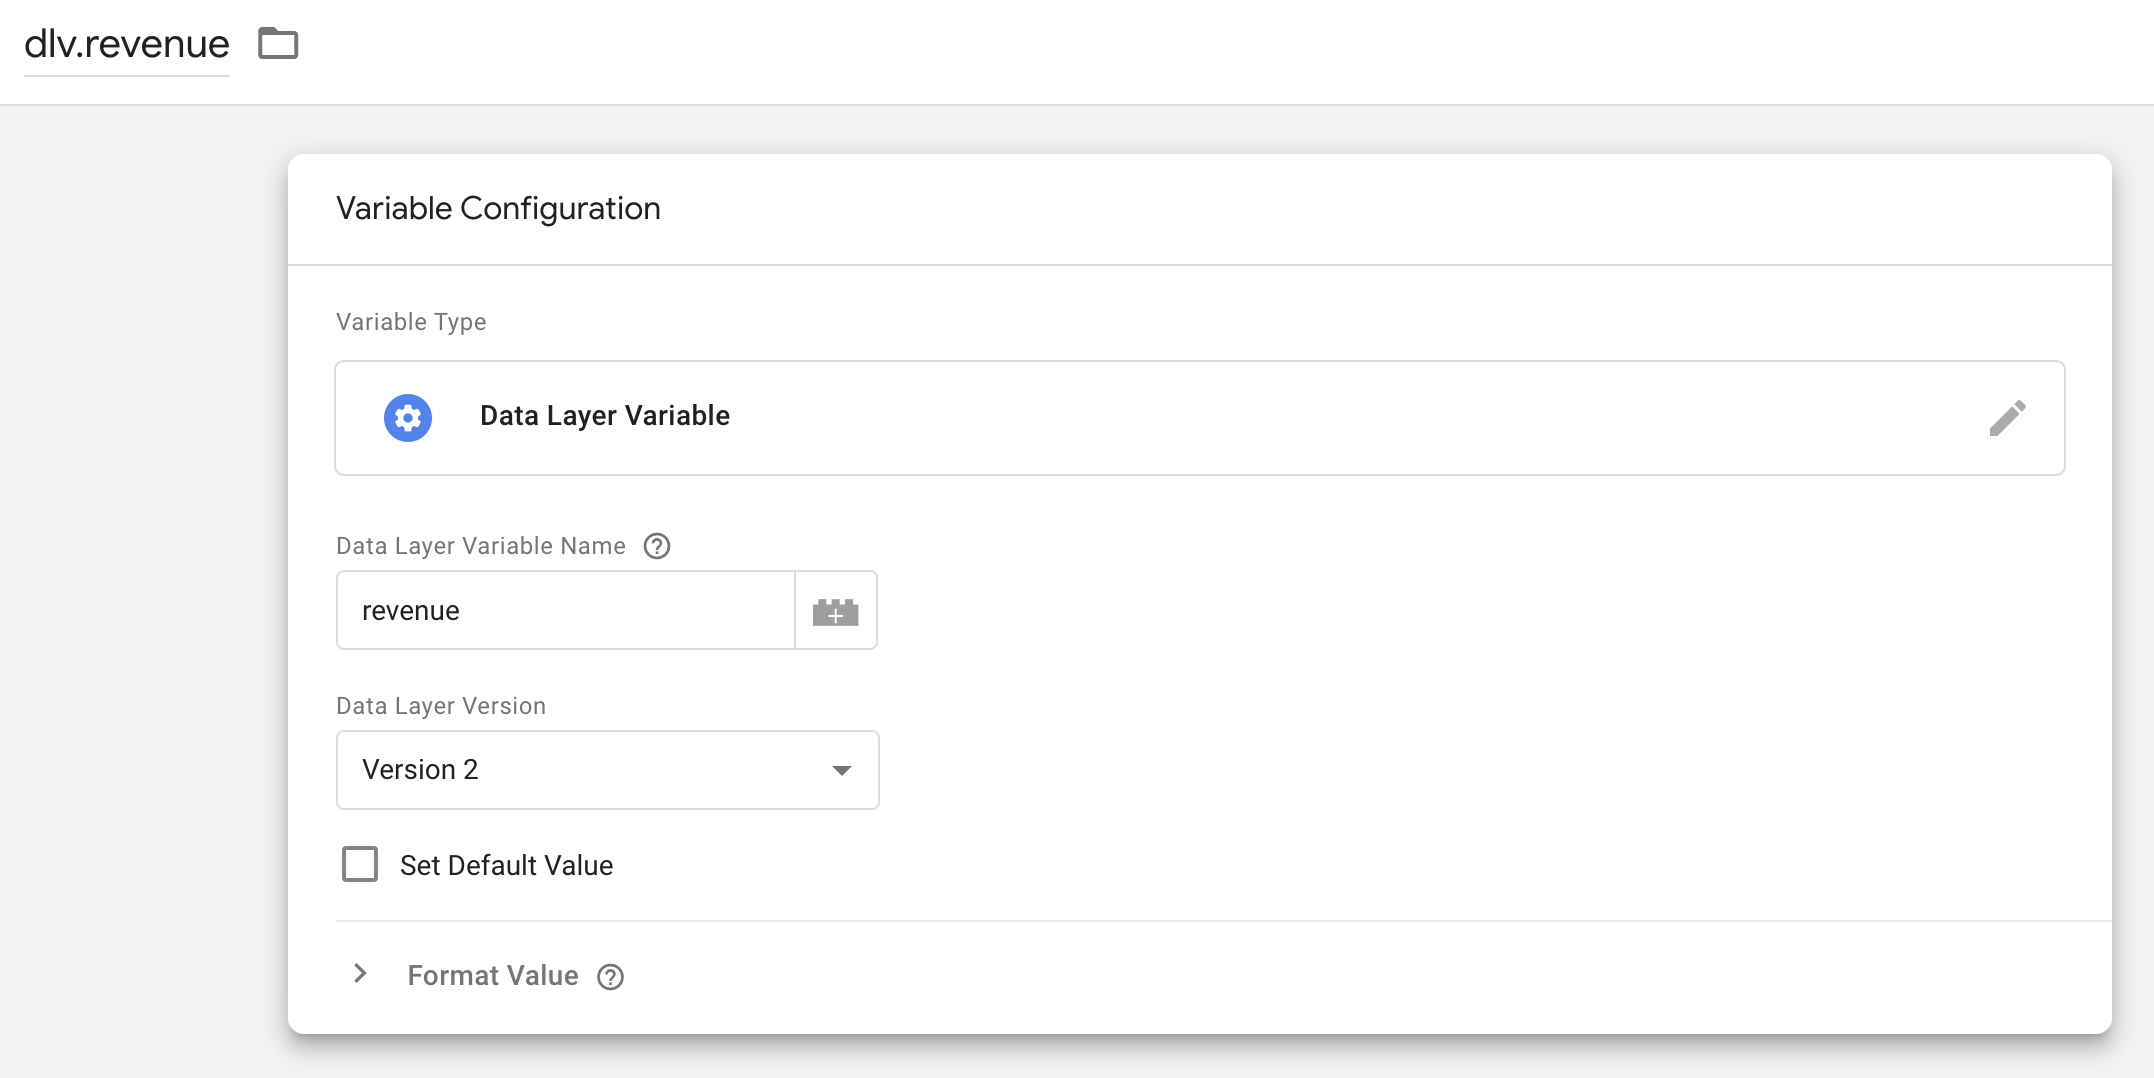
Add dataLayer variables to get revenue from purchase event
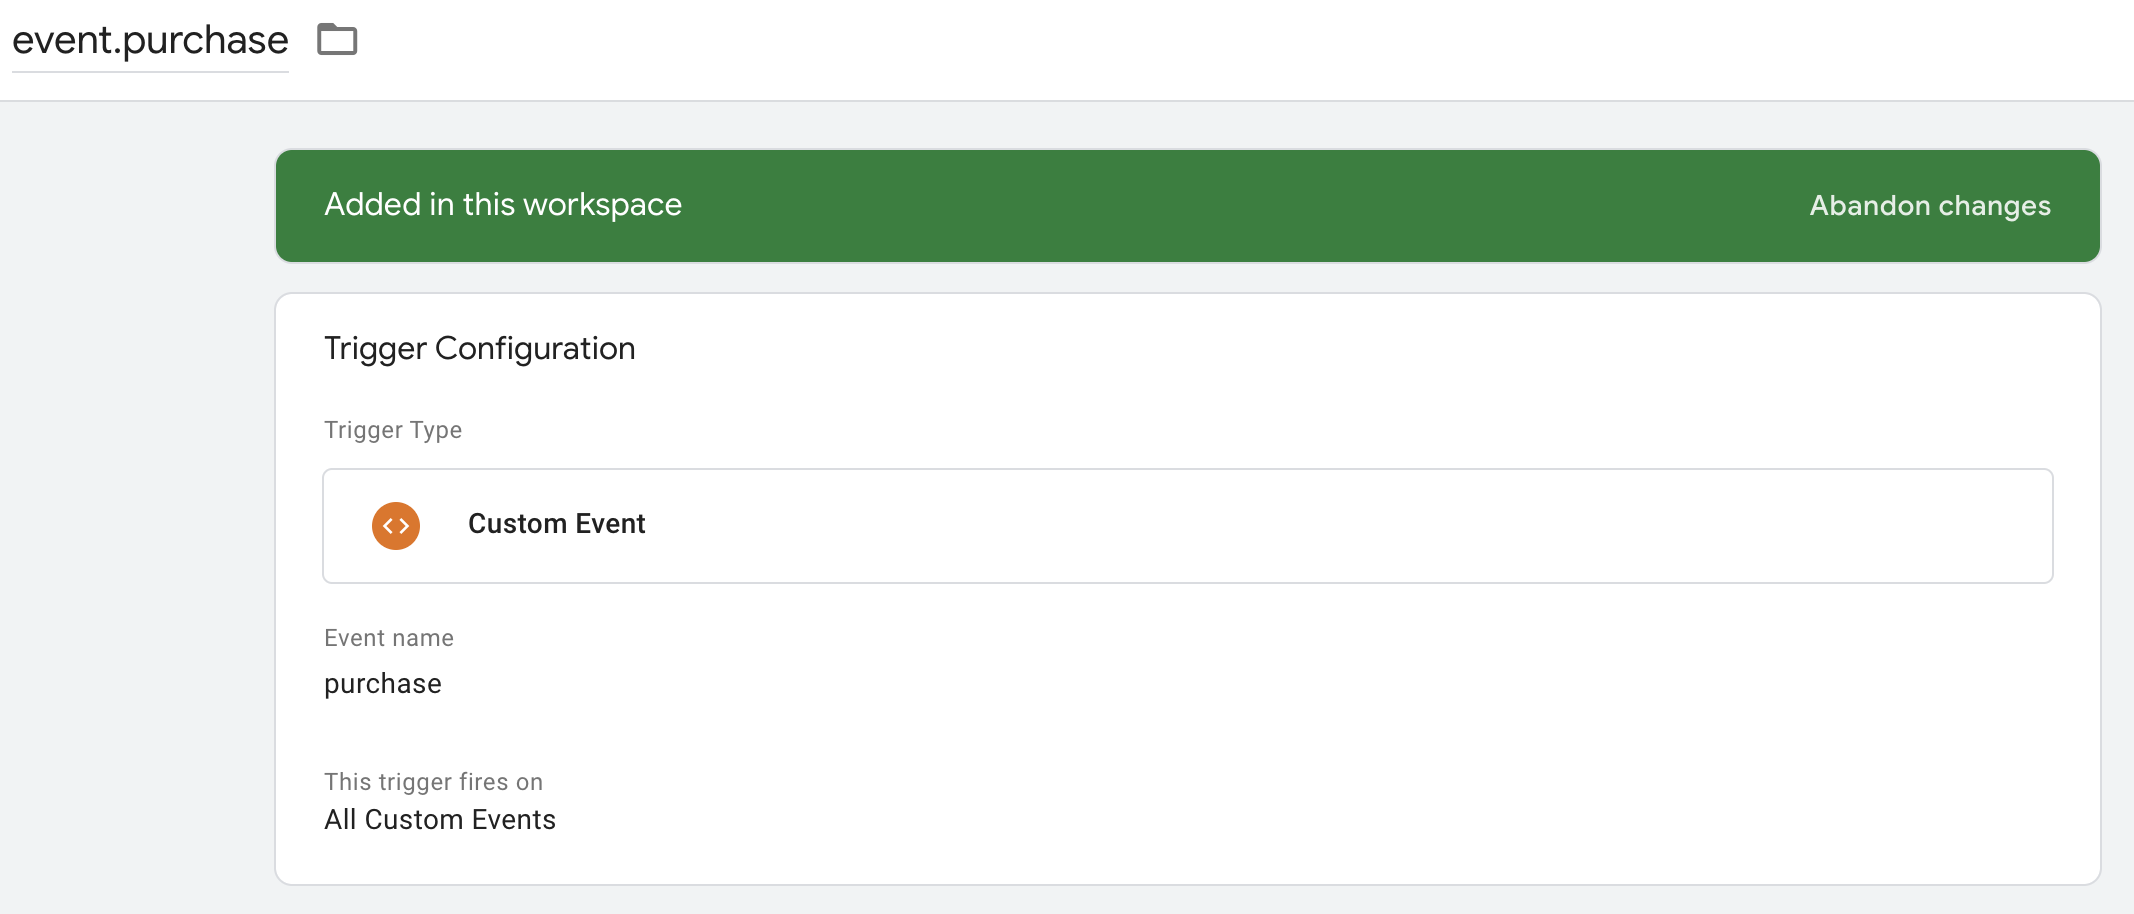
And trigger firing on purchase event
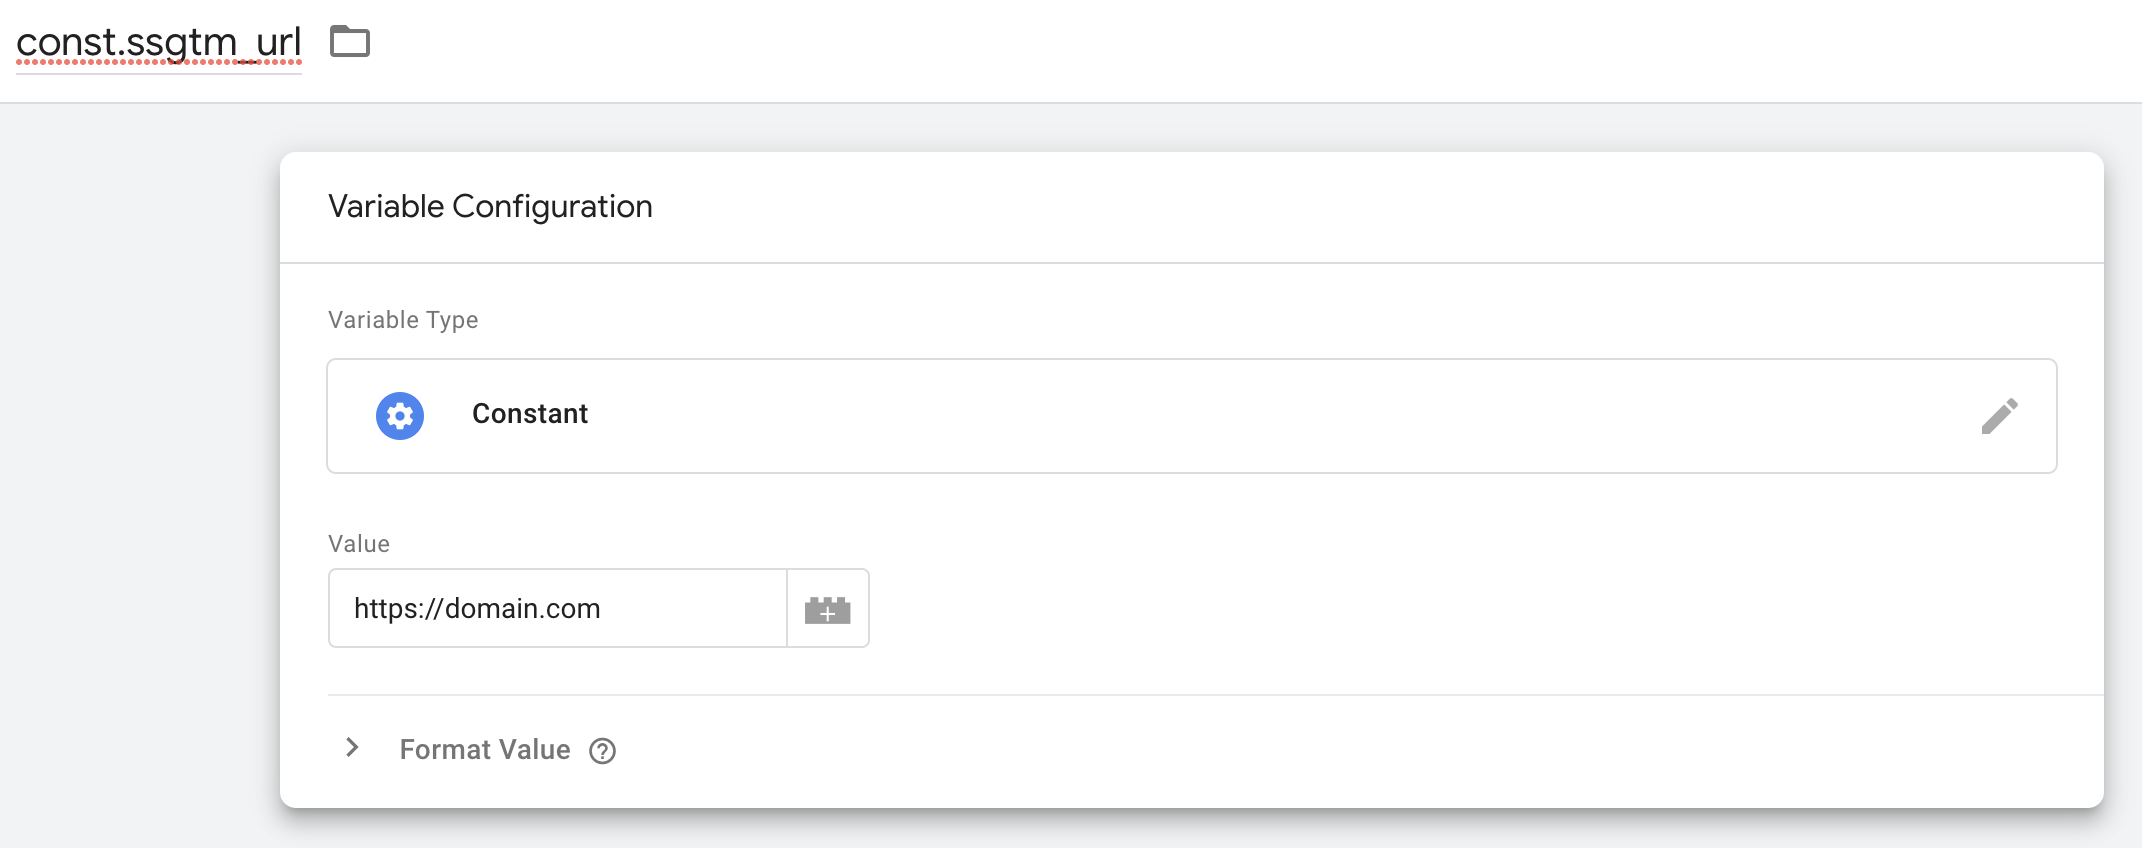
And a few more helpers variables. A constant with a URL to SS-GTM
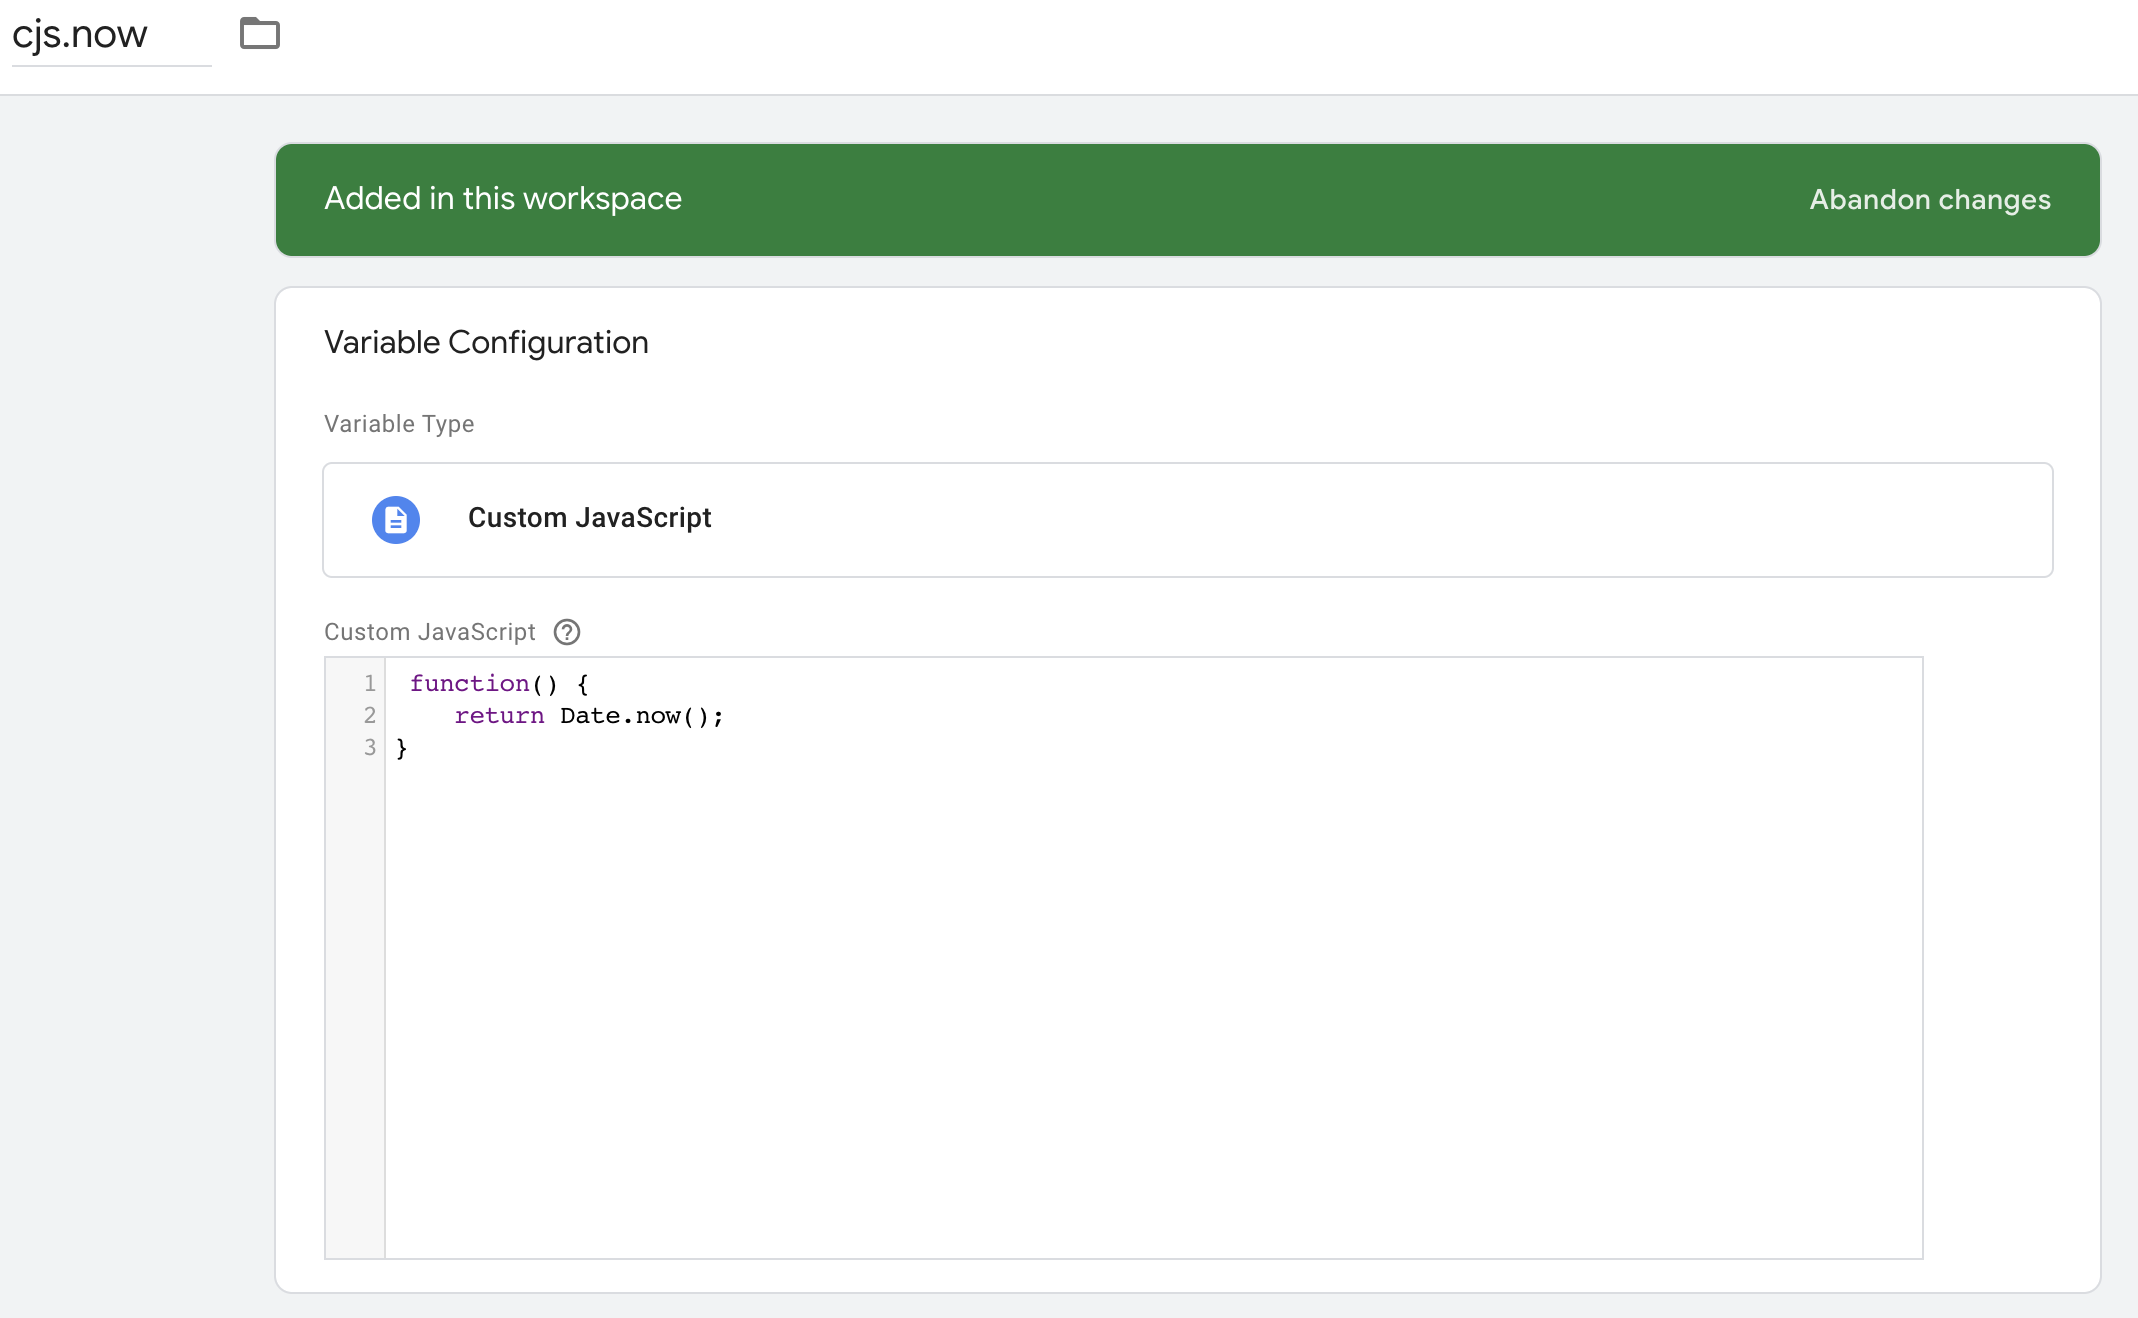
And Custom JavaScript to get current time. We will use it as the time of the purchase event:
Step 3 Firestore Tag
Go to the Tags page and click on the New button. Name your tag as you wish, I prefer dot notation, something like this - firestore.purchase. And click on Tag Configuration section, scroll a little bit and select Firestore Web Tag Template. Now let’s configure the tag:
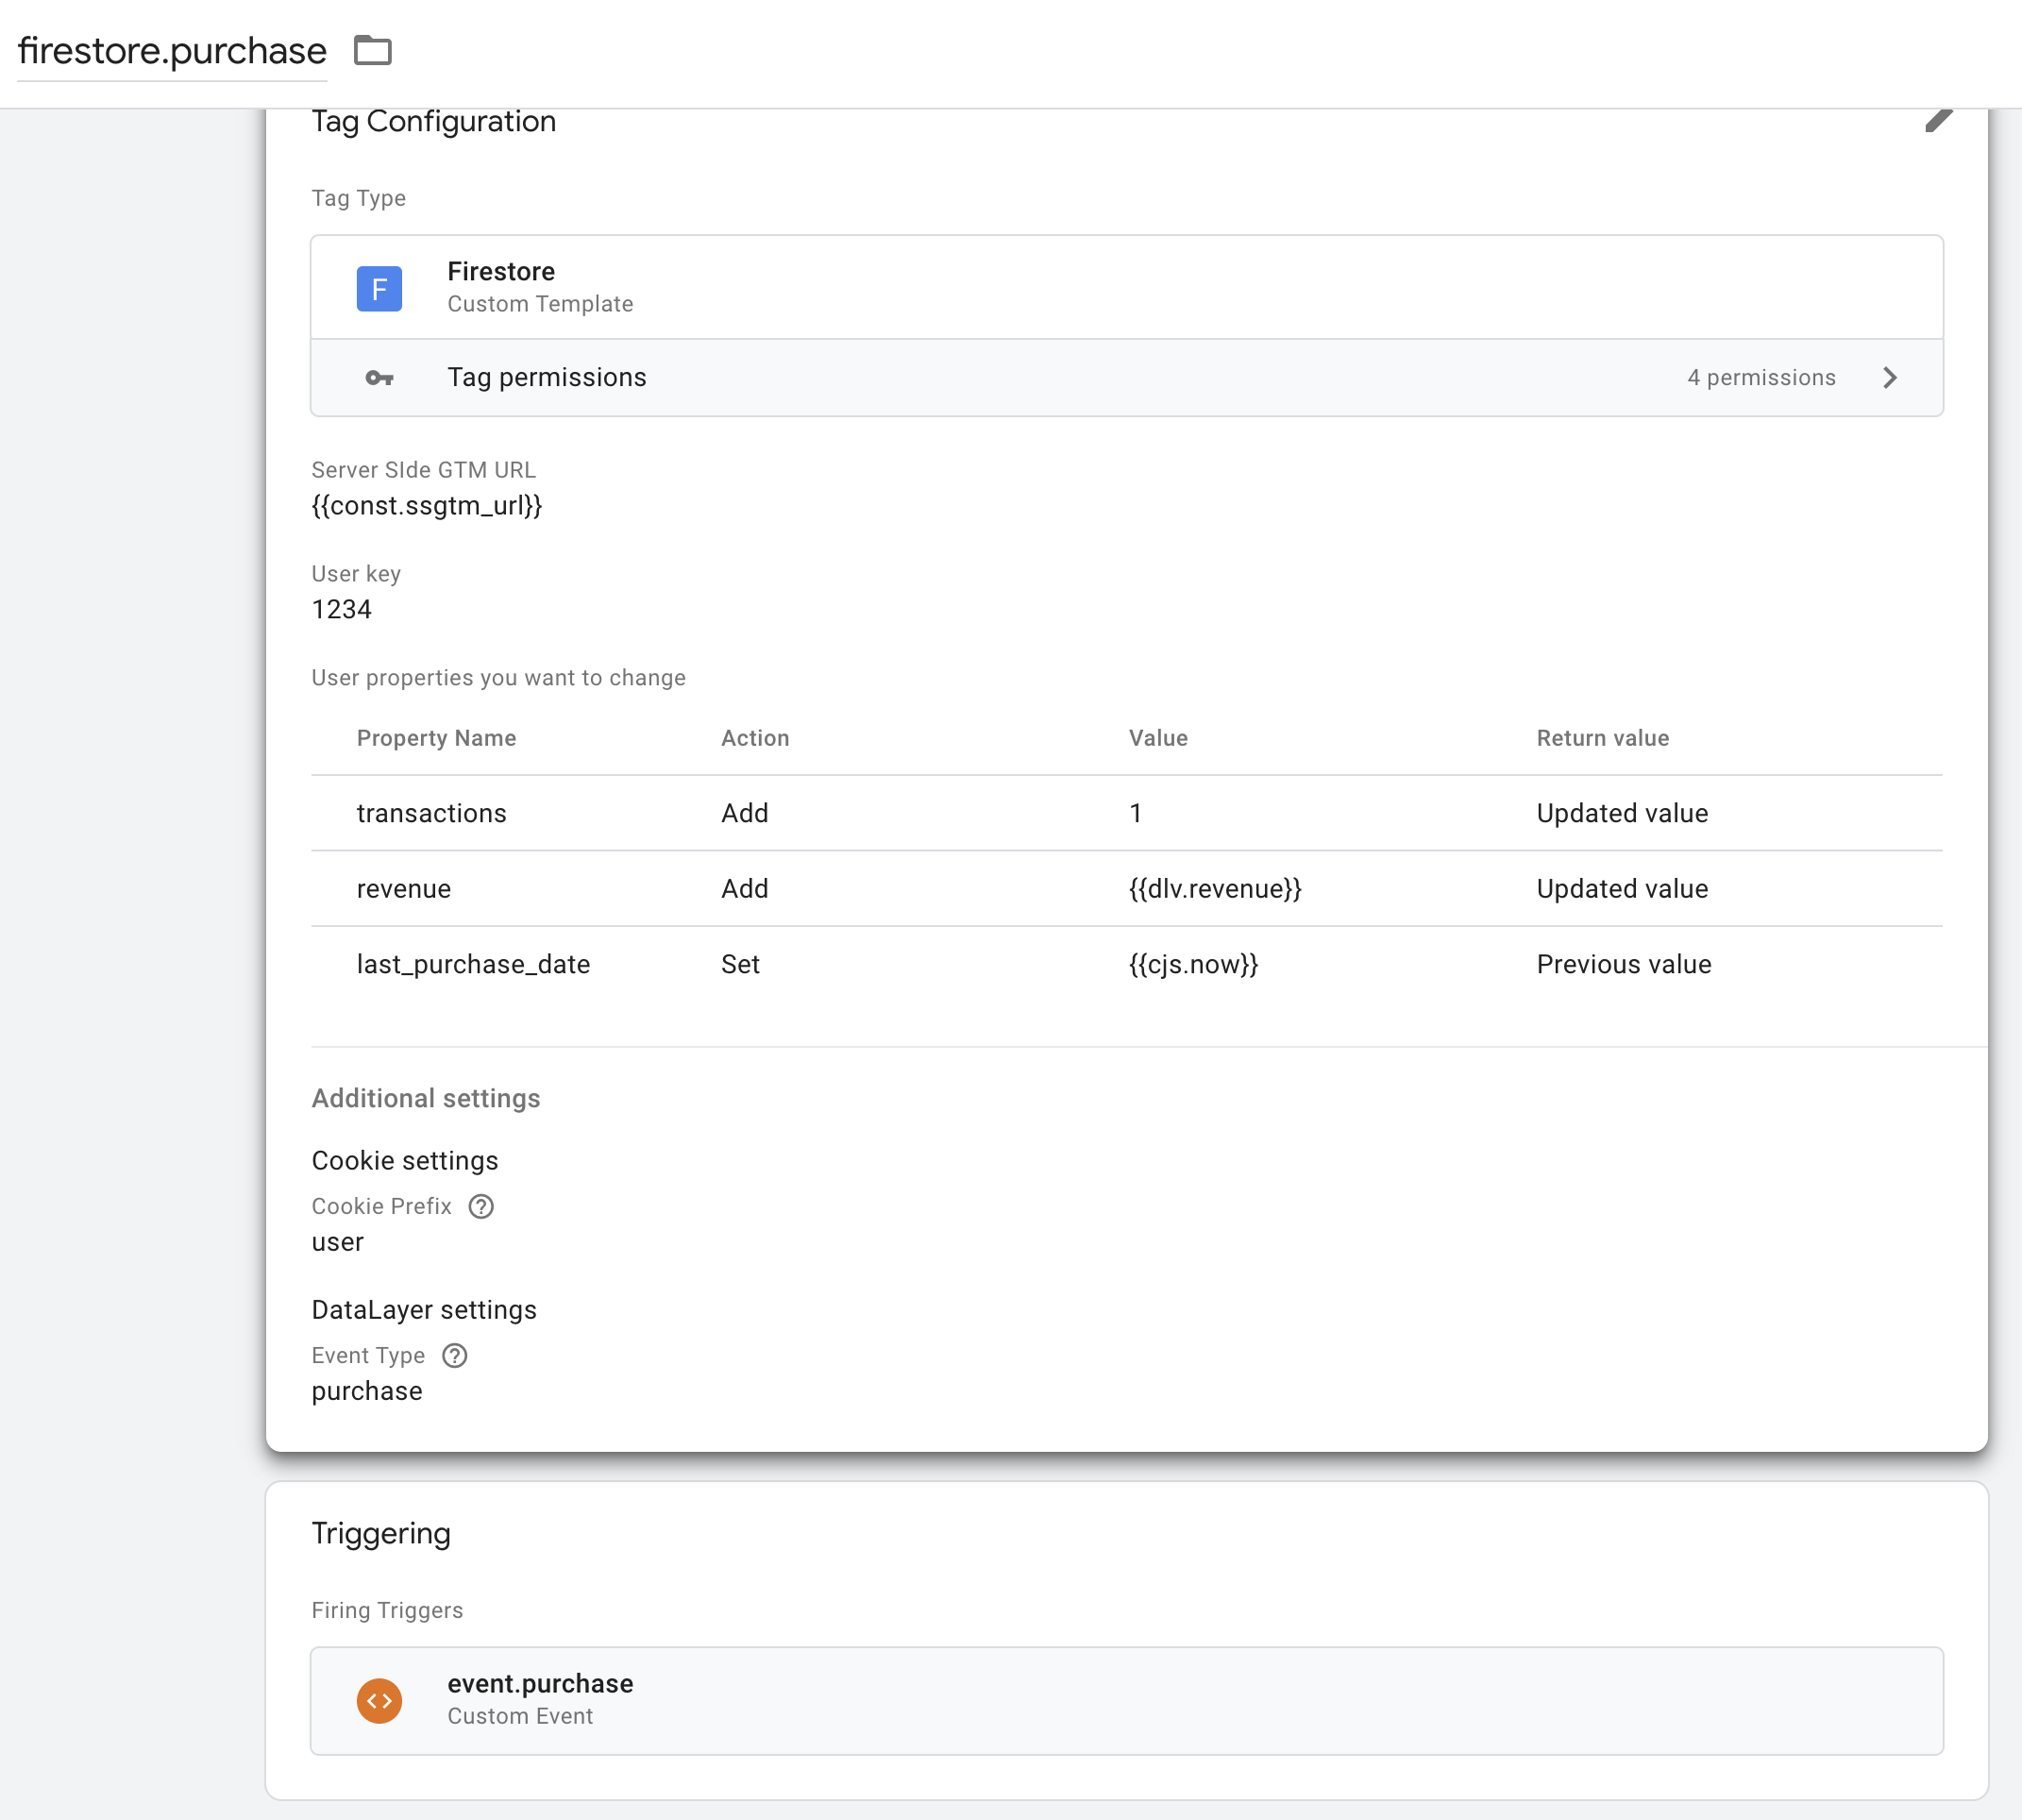
At first we fill the Server-Side GTM URL, with the variable we set in the previous step. The tag will send all data to this URL.
Then set the User Key field. It’s like user_id the key by which we will store all user properties. In production we will use a GTM variable with a unique value. For example {{user_token}}, later in the next post I’ll explain it in more depth. For testing purposes let’s set it to constant 1234.
Fun time. We have a table with user properties we want to change. What does it mean? Every time this tag is fired it will send a request to the server with the following rules:
- increase user property
transactionsby 1 and return increased value; - increase user property
revenueby transaction amount, again return updated value; - set
last_purchase_dateproperty to the current time but return previous value.
And that’s all for the user with a key 1234.
You can add any additional rules by clicking Add Row button under the table and input values in the panel
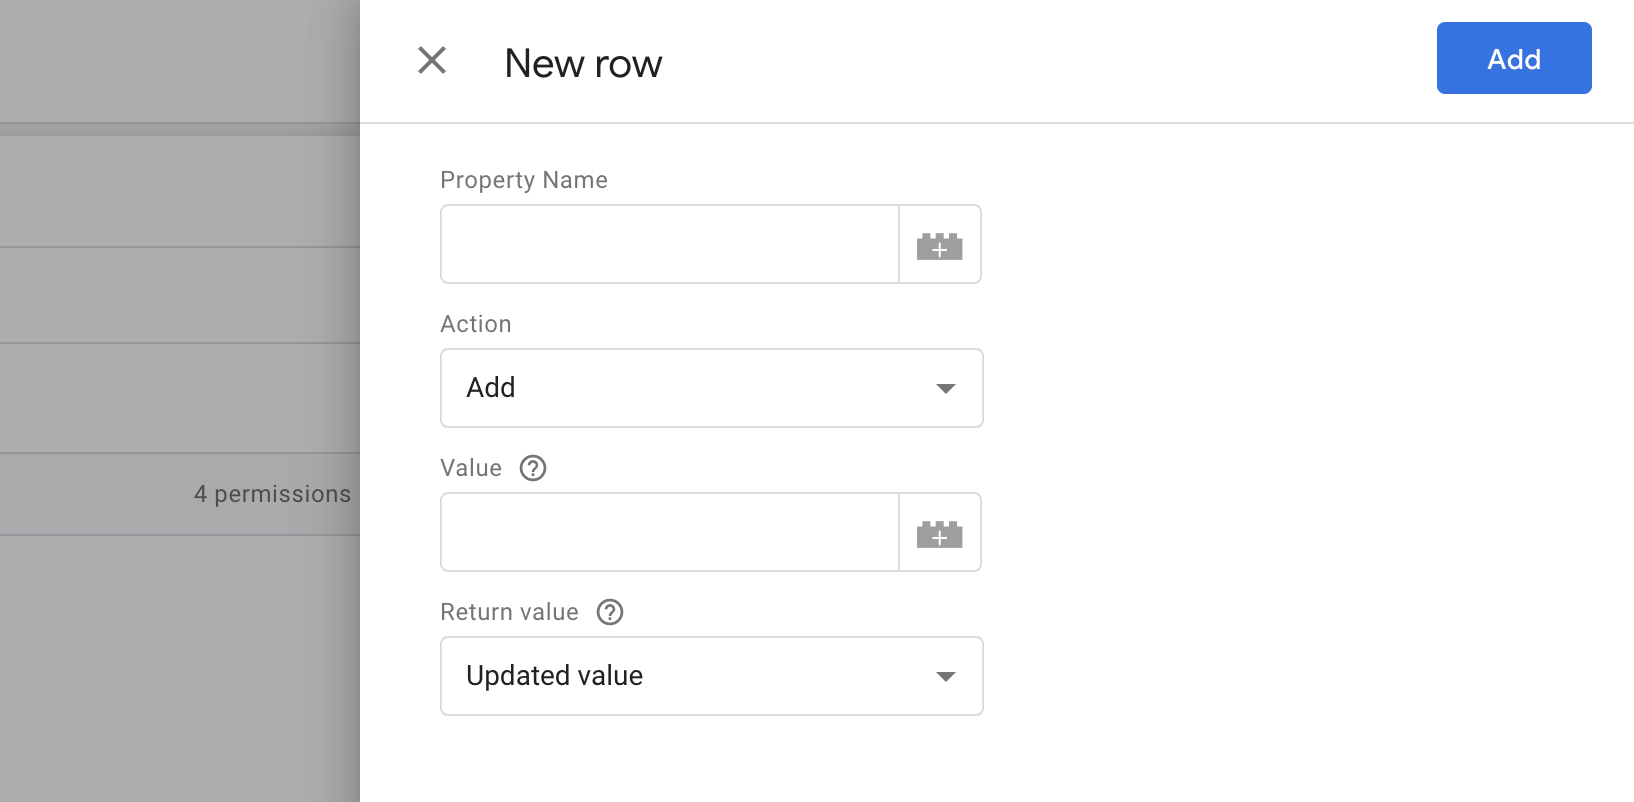
If the Action field equals Set, the user property will be set to the new value. The Value can be any constant or GTM Variable value. But please don’t pass to long values, all values from the table are passed by one GET request but browsers have limits ranging on the 2 KB - 8 KB per request. And yes, if the property hasn’t existed yet it will be created with a value equal Value.
If Action equals Add the property will be increased by value. It expects the value should be a Number type. On Server-Side it will be converted to number by makeNumber API. You can use floating point numbers too, but please don’t forget that in JavaScript for example 0.1 + 0.2 = 0.30000000000000004 (you can check it in console if it surprises you) so in your triggers it’s better to use greater than condition not equals. But if you really need equals conditions for floating point numbers please use toFixed. If the property hasn’t existed the value will be set to Value.
The return value field by default is set to Updated value, it means server will return increased value. But sometimes, for example in our test case, for last_purchase_date we need a previous value, to compare with a current moment and check if the last purchase was 30 days ago.
You also can leave this table empty. In this case you won’t change any property but only get the current user state back from the Server-Side. It may be helpful if you want more complicated logic than simple Set and Add. You can do it in 2 steps, first get all user properties, run Custom HTML or Template, change the user property and make dataLayer push with the new values. Fire the second Firestore Tag with a list of rules to set all the properties with the new values from the dataLayer.
But that’s not all. We also have Tag Additional Settings:
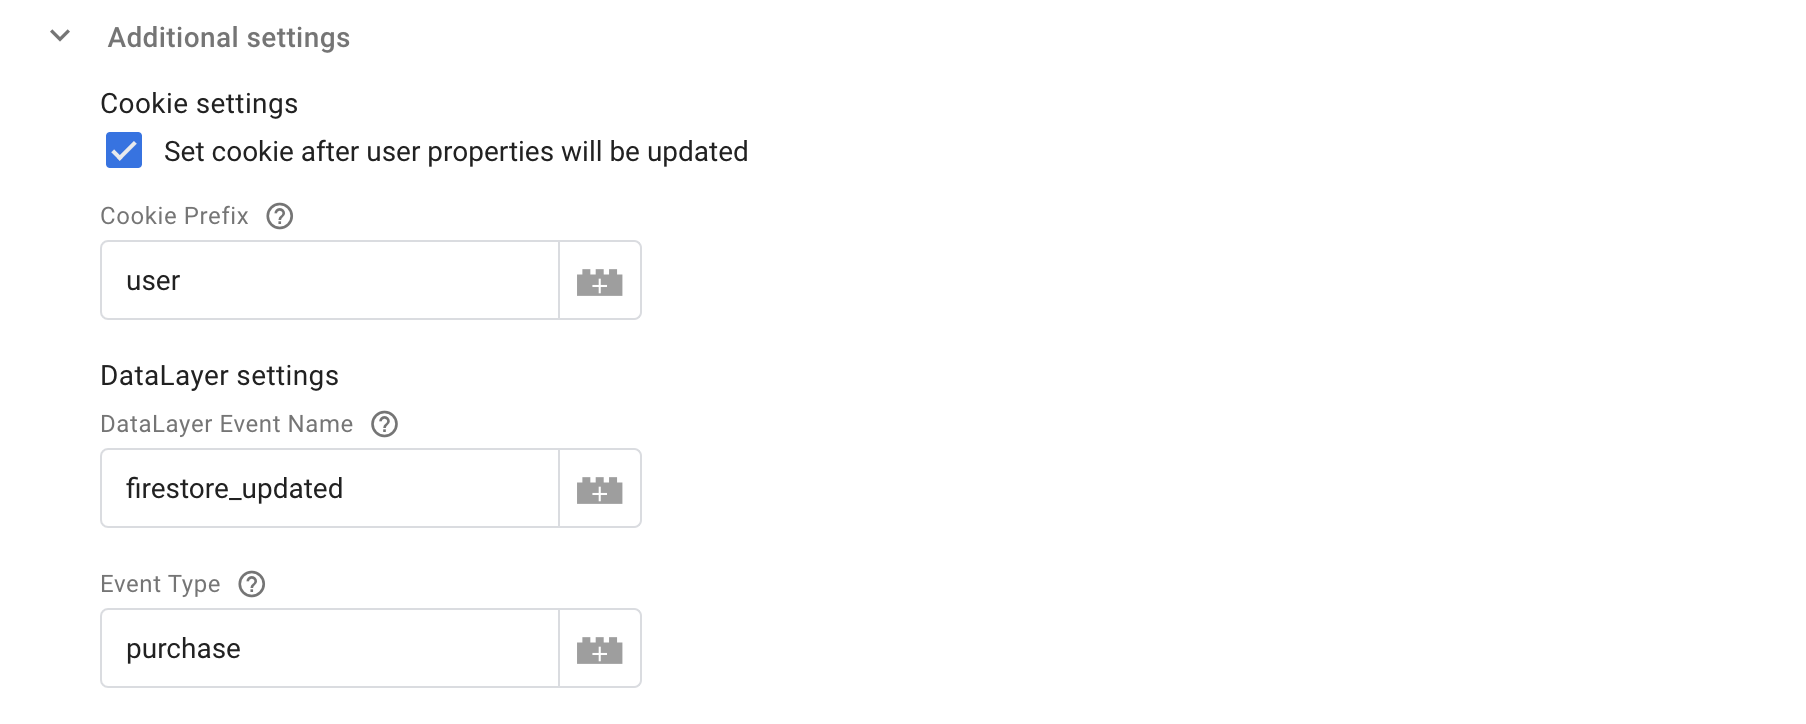
Here we have two sections Cookies and DataLayer settings.
Checkbox Set cookie after user properties will be updated is selected by default. But if you don’t need changed user property on the front-end, you can uncheck it.
The cookie prefix meaning is simpler shown by example. In our test case, the Cookie prefix equal to user the value of user property transactions will be set to user_transactions and so on:
| User property | Cookie name |
|---|---|
| transactions | user_transactions |
| revenue | user_revenue |
| last_purchase_date | user_last_purchase_date |
In DataLayer settings you can change DataLayer Event Name this is the name of a dataLayer event pushed after the user state will be updated. At the moment of this event you can get new user properties values from the cookies. We keep the default value firestore_updated.
Also we have Event Type. If you have a few Firestore Web Tags, for example one for registration, one for purchase, this value will help you to make triggers only for specific firestore_updated dataLayer events. This value will also be accessible in both Web and Server-Side GTM. In our test case the set Event Type to purchase
And don’t forget to set trigger for your Firestore Tag. In our case it is event.purchase, the sweet dream of all marketers – purchase events on each page load.
Step 4 Triggers on firestore_updated
Let’s create some Variables which help us make triggers and get values.
dlv.firestore_event_type variable to get firestore_updated type

Next three Cooke Variables. For user_transactions, user_revenue, user_last_purchase_date. They are identical but the names, so I put only one screenshot for cookies.user_revenue
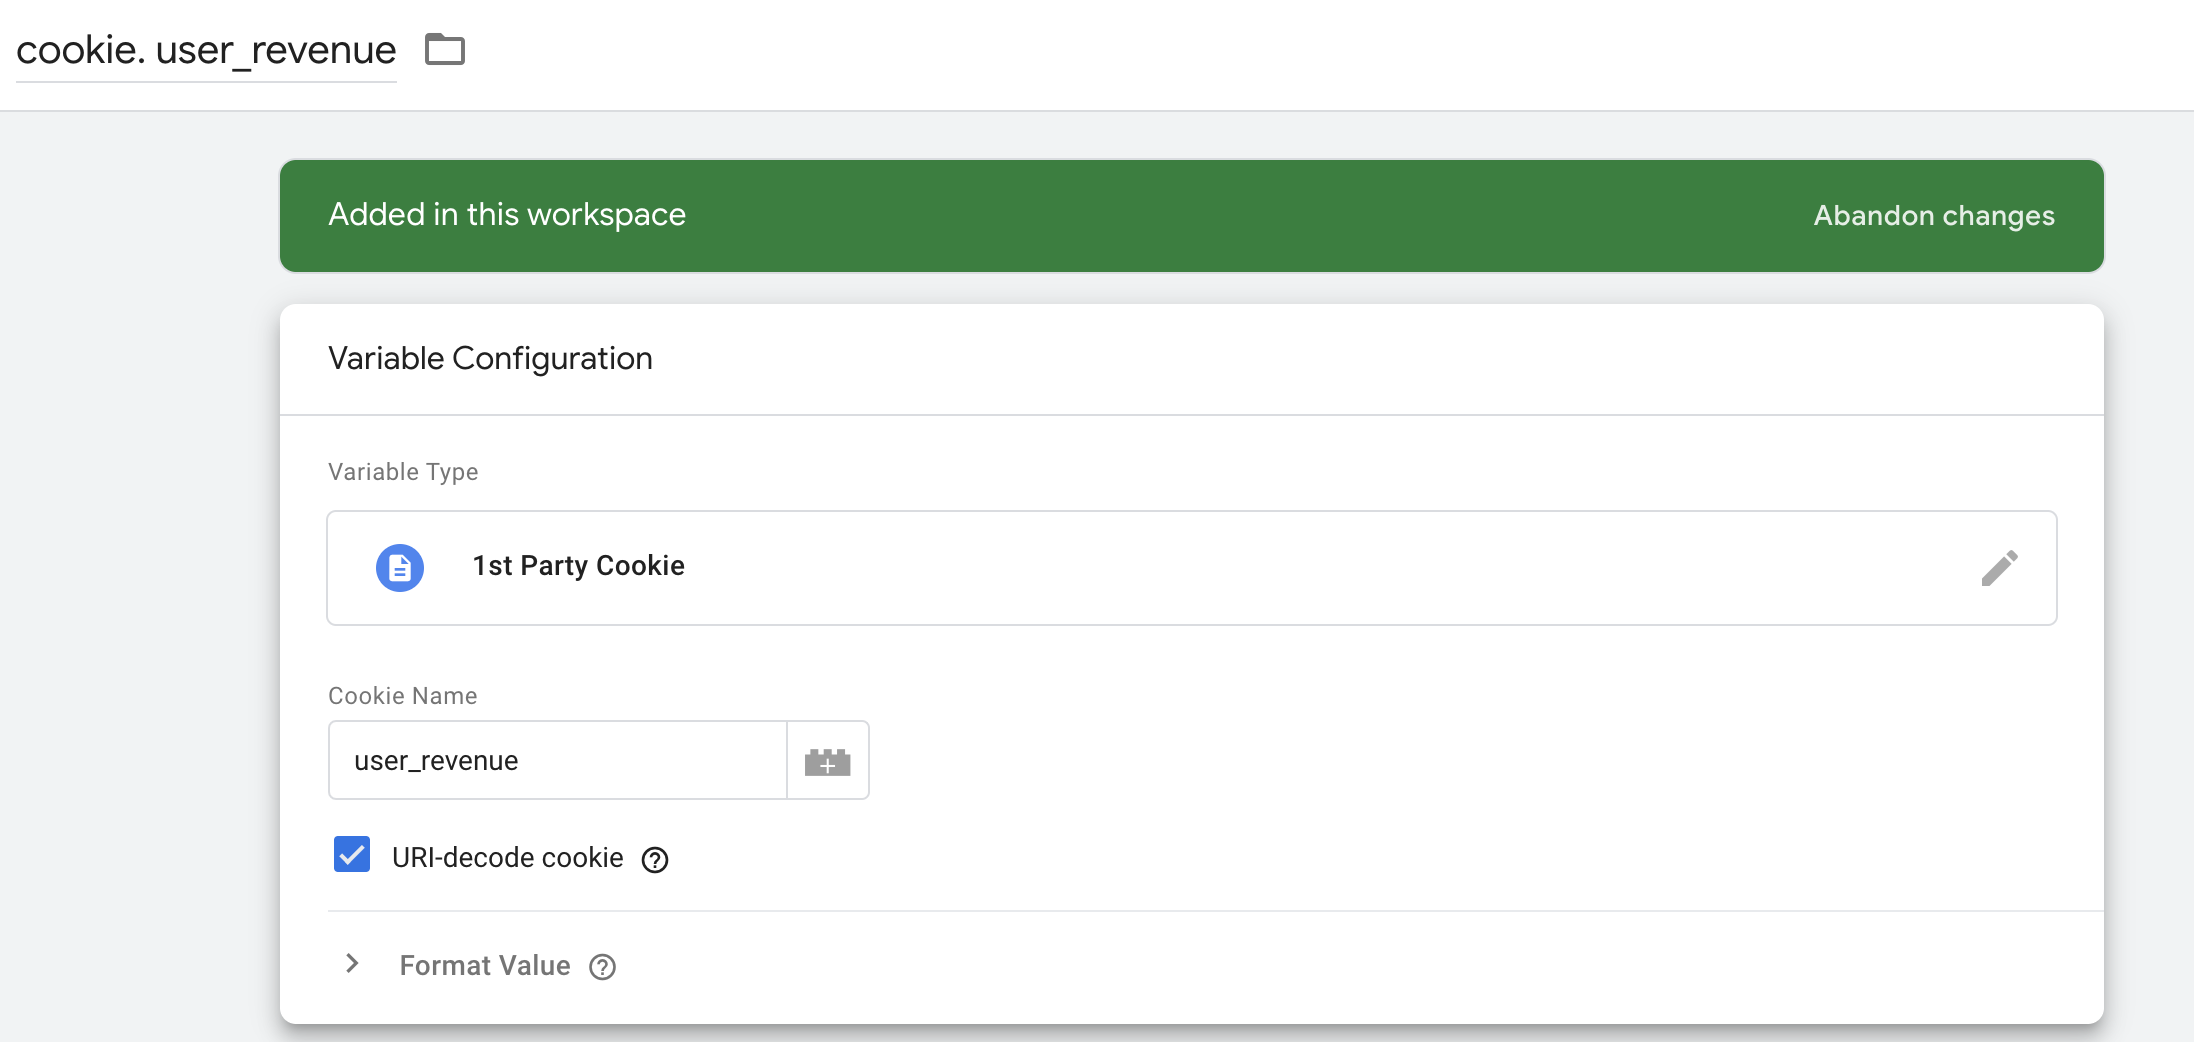
Don’t forget to tick the URI-decode check box, as on the Server-Side the value will be encoded.
Everything is settled, now we can create our profitable triggers. The first case is «users make more than 3 purchases or spend more than 100 dollars». For this case we will create two triggers. The first for «more than 3 purchases» part:
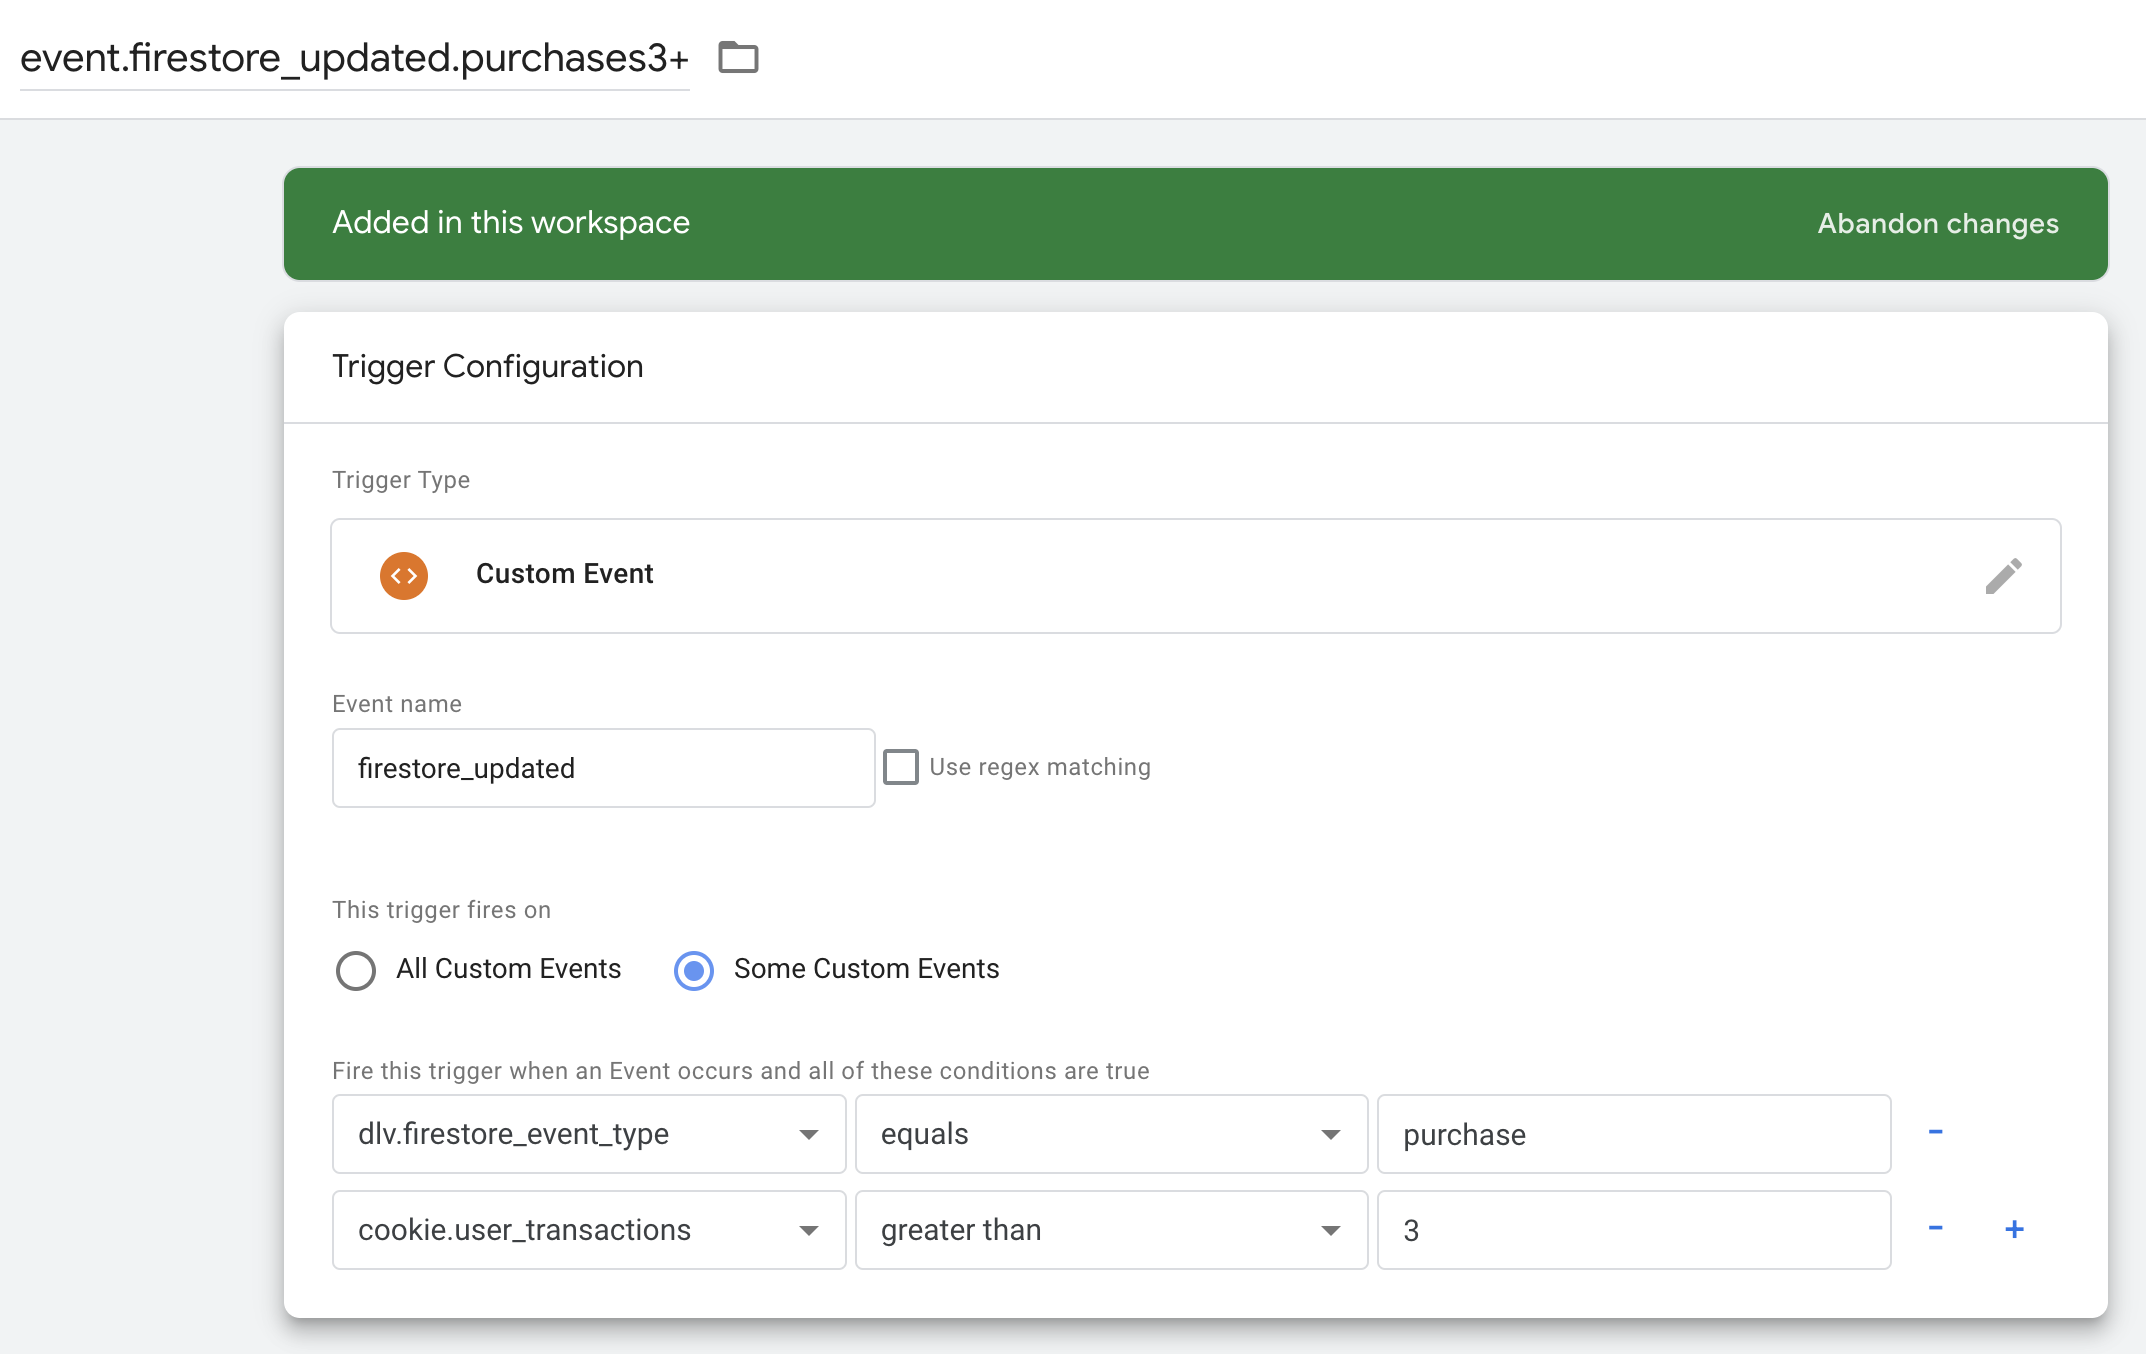
The idea is very simple: at firestore_updated (quick reminder this event is fired after user state is updated) we check event_type (in our case it’s purchase) and user property value from the cookie.
The second trigger:
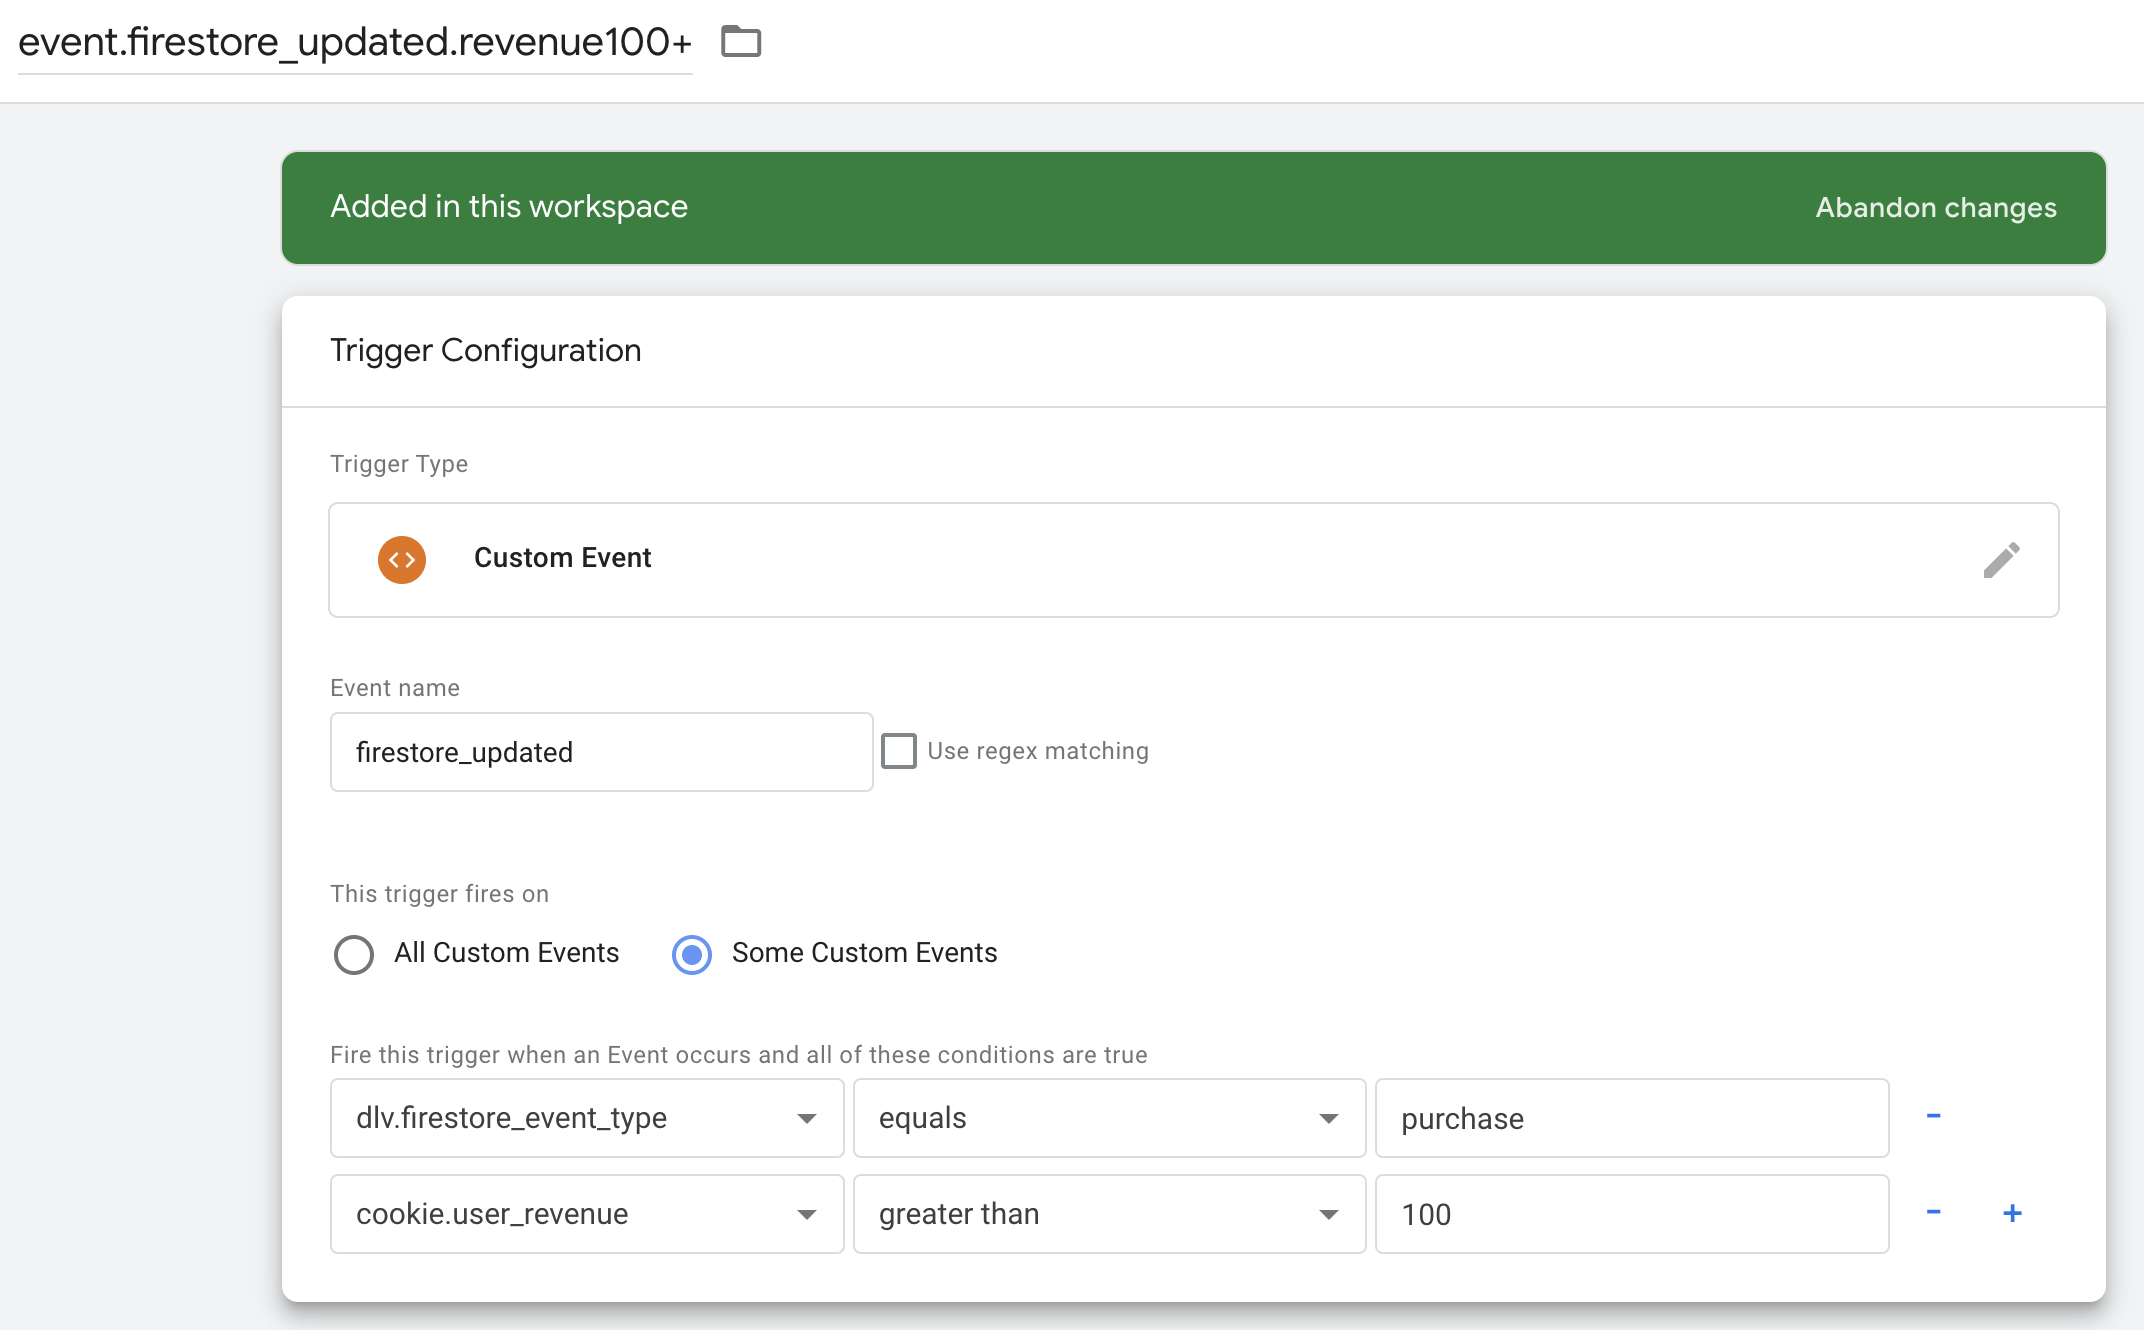
As you see the only difference is that we are checking the revenue from cookie.user_revenue variable.
The second case is «a user make a purchase but the previous purchase he made more than a month ago». We can create a Custom JavaScript Variable to compare current time with the cookie.user_last_purchase_date or we can use Days, Hours or Minutes Between Two Dates (or Now) Template Variable.
Let’s add the Template. Go to Template Page and in the Variable Templates sections click New button, and import the template from the GitHub repository as we did it for Firestore Web Tag earlier. After that go to the Variables Page and add new variable based on the template:

As you see, for the First Date field I set cookie.user_last_purchase_date, for the second Now and for the Time Unit I select Seconds, but in production you should set it to Days.
Our variable is ready, let’s add the final trigger:
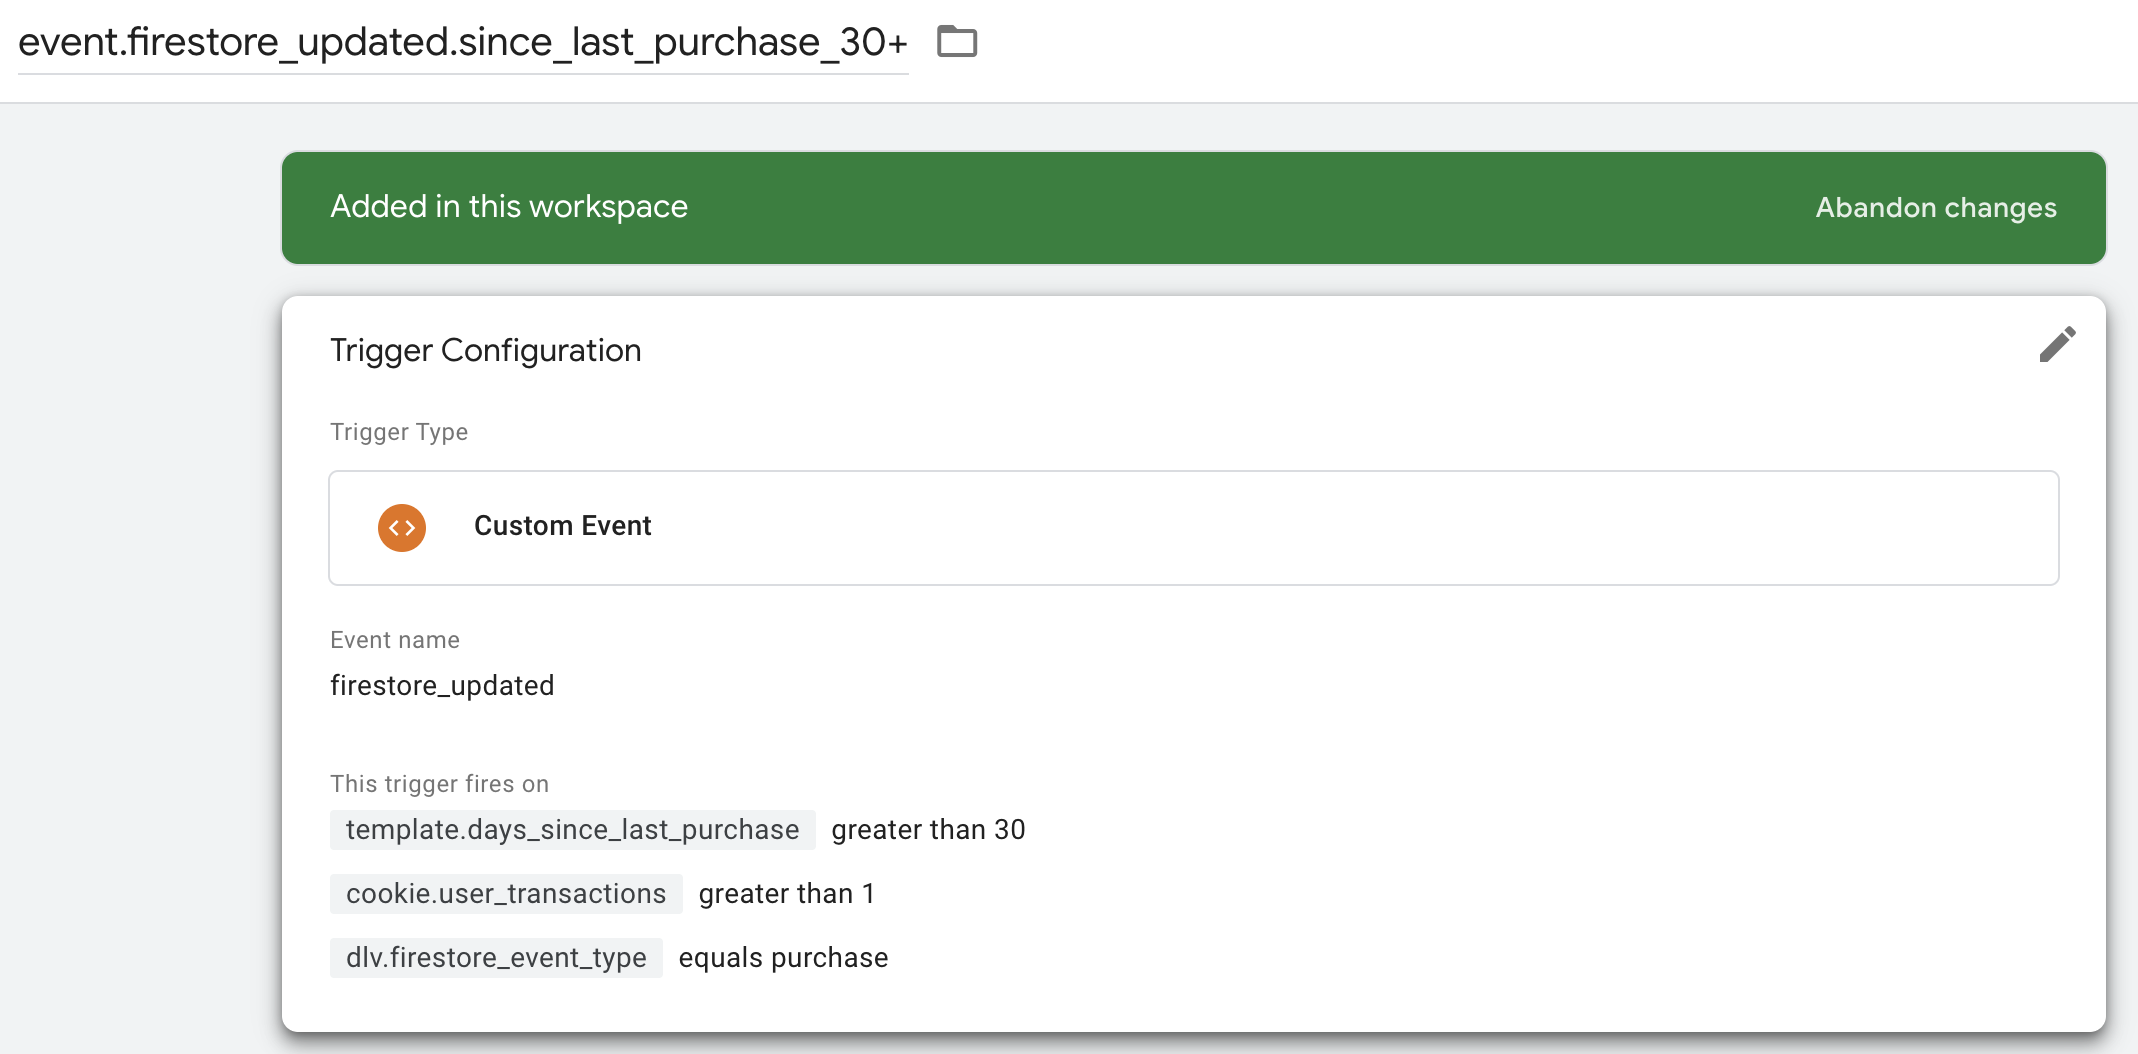
It looks like previous triggers but only we expected our new template variable template.days_since_last_purchase will return more than 30.
Step 5 Google Ads Conversion and Remarketing tag
The easiest step in the whole tutorial. Add the Google Ads Conversion Tag for the first case:
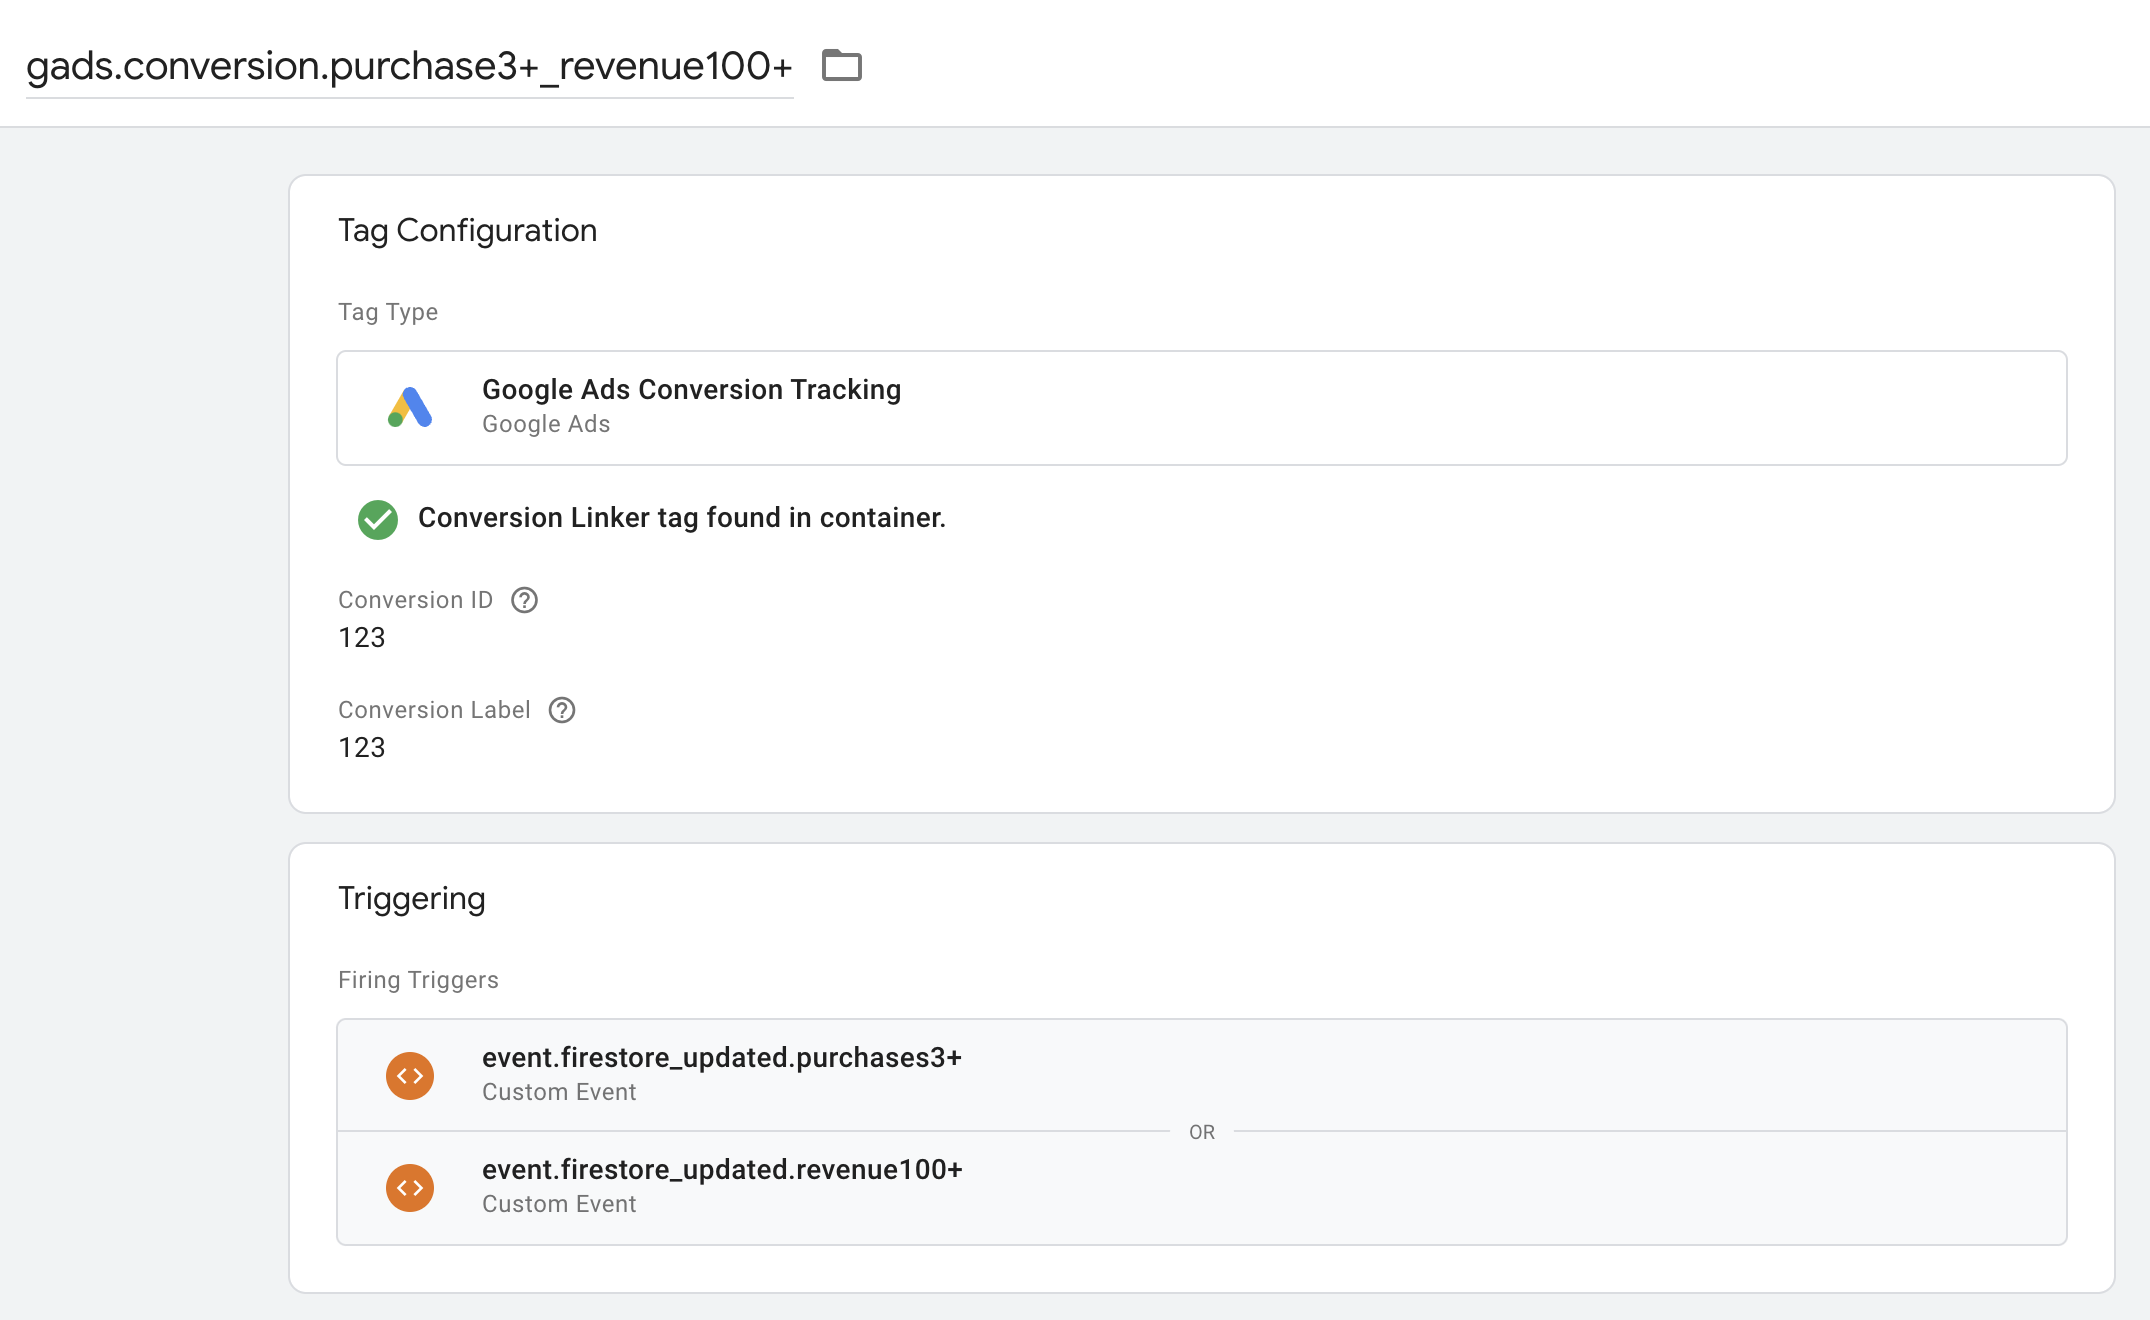
Nothing extraordinary, GoogleAds Conversion tag with two beautiful triggers.
Google Ads Remarketing Tag for the second case:
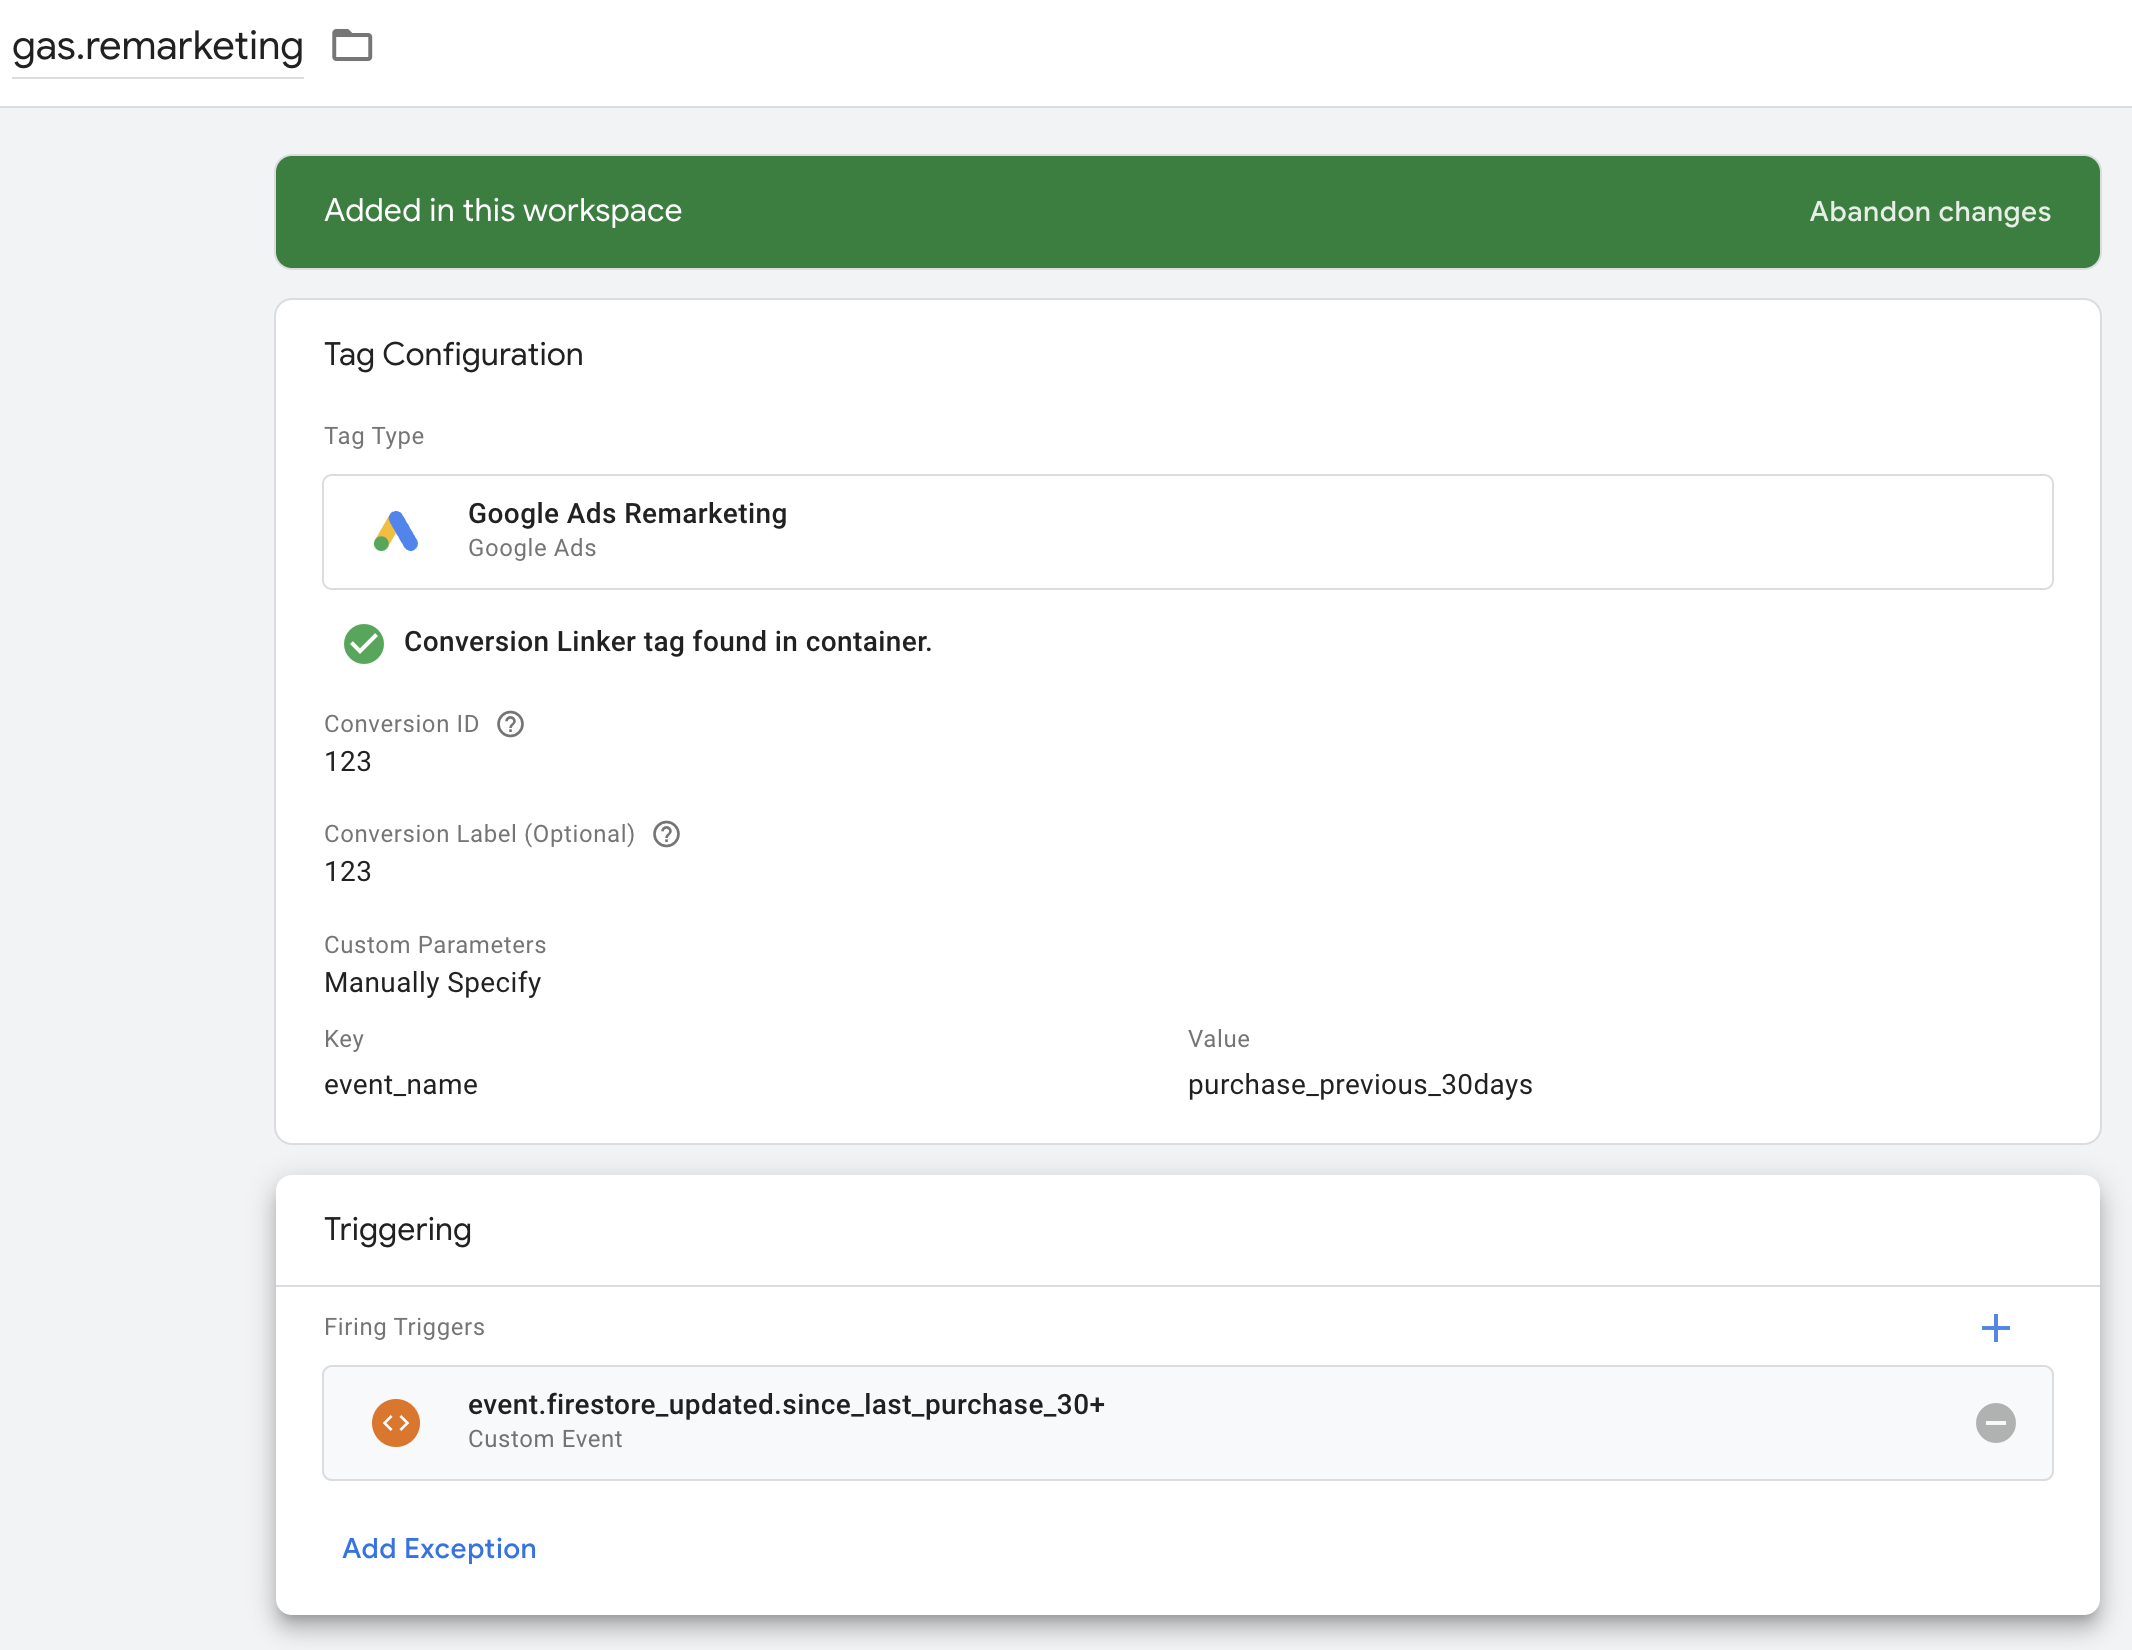
And here we get the same, standard Remarketing Tag with the trigger from the previous step. The only thing to notice is that we add one row in the «Custom Parameters / Manually Specify» section. The key is event_name, and the value is purchase_previous_30days. This way we can use one remarketing tag but pass different event types and guys from the PPC team can create different audiences based on the event_name param.
That’s all for the first part of the tutorial. It was long but easy. If you have any questions, please message me in LinkedIn. Now take a break, make a tea and let’s dive into the world of Server-Side GTM and Firestore.